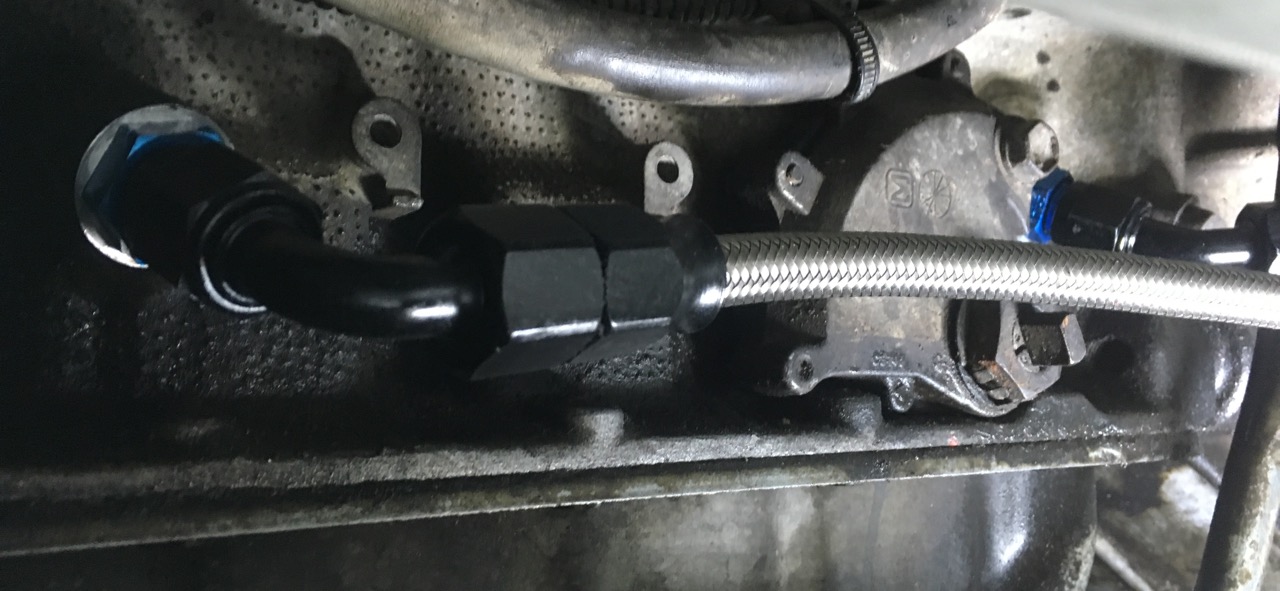
While installing my Boostwerks Engineering Comp Mount hidden winch, I found that the stock Jeep Cherokee transmission cooler hard lines interfered with my winch placement. In order to make room for my winch, I needed to replace my factory hard lines with flexible braided hose so that I could relocate them out of the way.
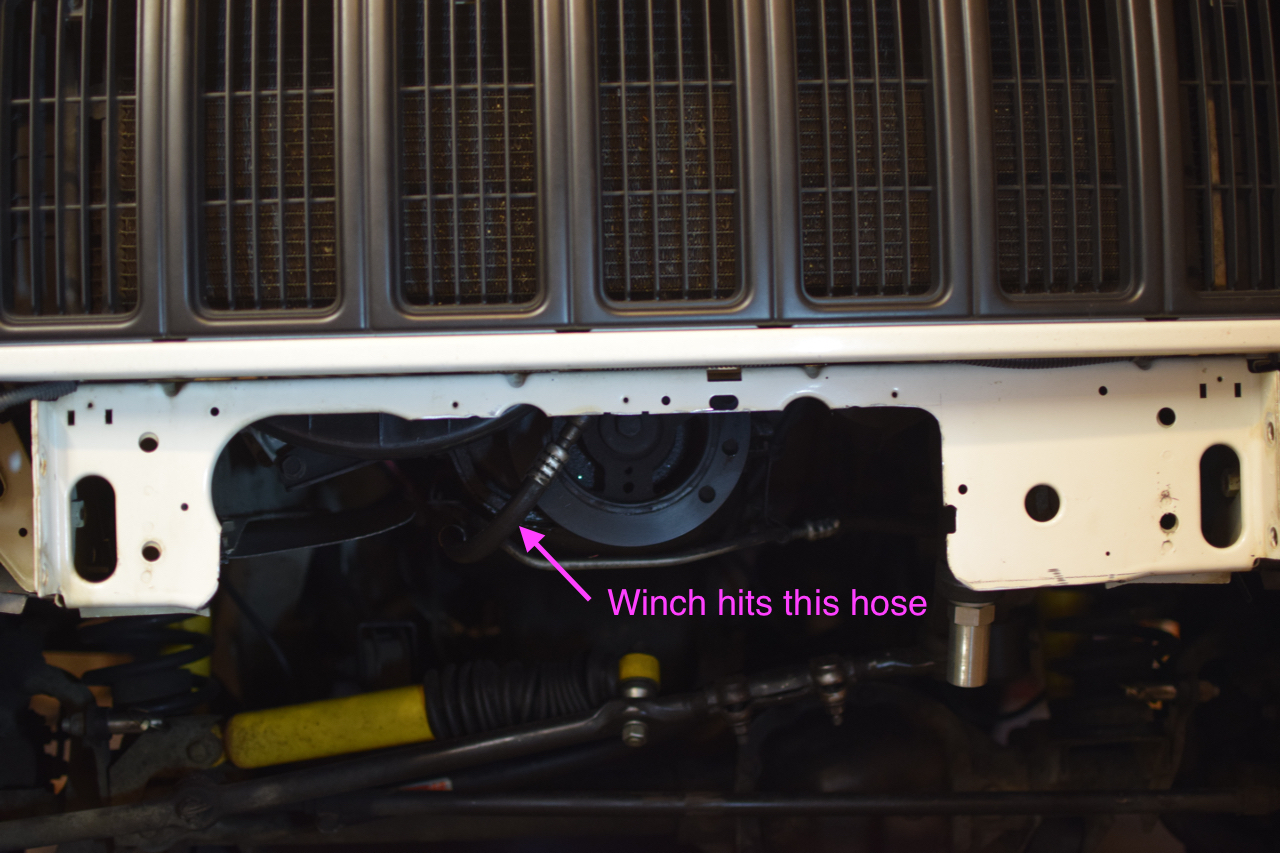
I probably could have cut the factory line that was in the way, flared the new ends, and then added a section of rubber hose with clamps. This would have let me relocate only a small part of the line. But this XJ is a hobby, and so I went all-in and replaced the lines from the transmission to the cooler. This post covers converting the hard lines to soft lines without making any additional modifications.
Parts list for conversion
All of the parts came from Summit Racing and I chose their own house brand of PTFE hose and fittings. While the AN standard makes various brands compatible at the fitting, I don’t think the same is true between the hose and the fitting when assembling hoses. It’s best to pick one manufacturer and stick with it.
| Quantity | Item | Description |
|---|---|---|
| 1 | SUM-220996 | -6AN PTFE HOSE 15 ft 15 feet of PTFE Hose for both sides of the cooler |
| 2 | EAR-9919DFHERL | -6AN TO 14MM-1.5 ADAPTER Convert the transmission to -6 AN fittings |
| 1 | EAR-176106ERL | -6AN VITON O-RING - PKG. OF 10 Seal the transmission side of the 14MM adapter |
| 1 | SUM-220667B | -6AN ⅝-18 INVERTED FLARE BLK Convert top of radiator cooler to -6 AN |
| 1 | SUM-221335B | -6AN ⅜ EFI FITTING BLK Convert bottom of radiator cooler push on to -6 AN |
| 2 | SUM-250686B | -6AN 45° PTFE FITTING BLK Front of transmission and bottom of cooler |
| 2 | SUM-250687B | -6AN 90° PTFE FITTING BLK Back of transmission and top of cooler |
| 1 | 2AZ503HF-AN4 | -4AN Hose Separator Clamps These clamps fit this hose’s 0.430-inch outside diameter |
| 1 | VPE-17192 | Vibrant Performance Cushioned P-Clamps Attaches hoses to factory brackets |
Specialty tools
| Item | Description |
|---|---|
| ACC-V304 | ALUMINUM VISE JAWS For holding -6 AN connectors during assembly |
| ICB-551454 | 6AN WRENCH Non-marring wrench for -6 AN connectors |
| FRA-900666 | Fragola Performance Systems Hose Test Kits 900666 Pressure testing kit to make sure your fittings are assembled correctly |
| 4000-6/50-FF | Dremel Toolkit with Cut-off Wheels The quick change tool arbor with metal cutting disks is crucial |
| TDT230 | Fiber Reinforced Strapping Tape For keeping the stainless braid from fraying while cutting it |
| B076Q7ZK19 | Hose clamp Used as a cutting guide |
Helpful installation videos
Before you begin, please watch this video of how to install PTFE fittings and then this one that includes a pressure testing demonstration. These videos are the basis for how I made these hoses.
Factory Service Manual
The 1997 Jeep Cherokee factory service manual covers the transmission cooler and associated lines on page 21-176.
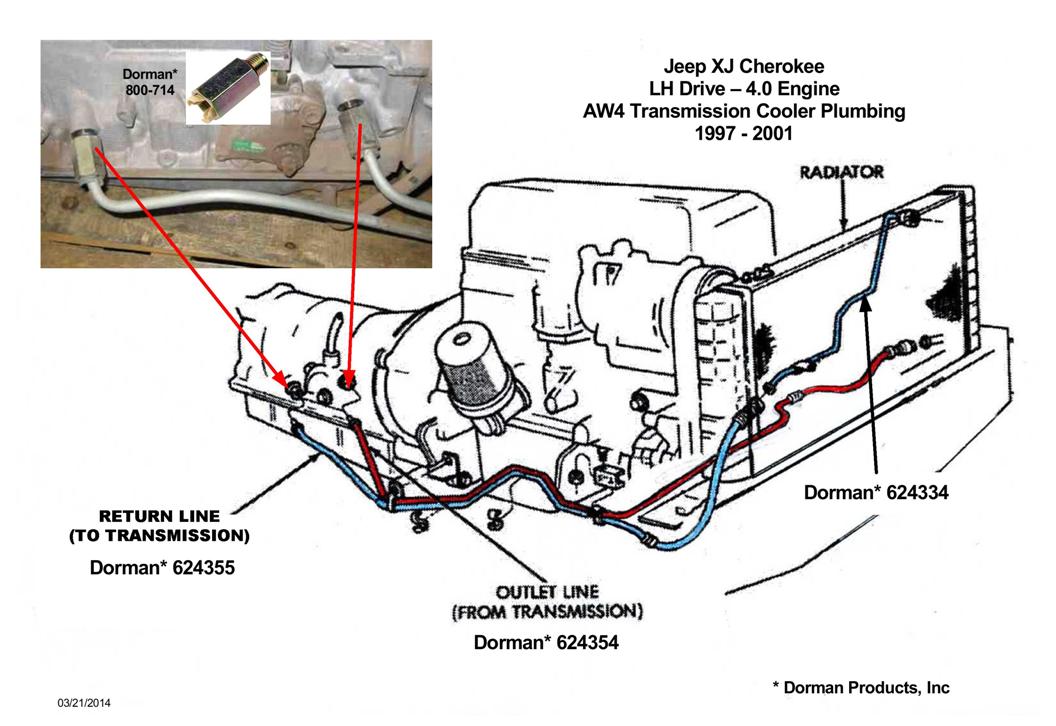
I collected the figure above from a forum post, and the inset photo makes it a little more clear why I chose a 90° fitting for the rear and a 45° fitting for the front.
It appears that Jeep changed the direction of flow through the cooler in the 1997 model year. Diagrams online show the transmission outlet going to the top of the cooler pre-1997 and to the bottom of the cooler in 1997 onwards. However, in the 1997 FSM, there is one diagram showing the old flow style. My 1997 had the rear transmission port routed to the top of the cooler and the front transmission port routed to the bottom of the cooler. If you make these hoses, carefully document your existing routing and flow direction, and make your hoses match.
There is also mention of an anti-drainback valve in the outlet side line. I didn’t identify one in my original lines, and these replacement lines do not include one. That doesn’t establish whether the original assemblies contained a valve. See the 15,000-mile update below for a delay I’ve noticed after extended parking.
Useful Links
- NAXJA: Switching to AN fitting for auto trans
- NAXJA: A quick link for a -6AN fitting to the AW4 cooler line.
- FourWheeler: Automatic Transmission Cooling Tips and Tricks
These links have a lot of useful information in them, and you should read them. The article from FourWheeler in particular has some great information about including an additional cooler.
Additional references: hose sizing
September 2026: Summit lists the SUM-220996 hose with a 0.320-inch inside diameter and a 0.430-inch outside diameter. The factory-style Cherokee transmission connector accepts 3/8-inch outside-diameter tubing. Those are different measurements: for comparison, 3/8-inch tubing with a 0.028-inch wall has a calculated inside diameter of 0.319 inches, very close to this hose. I haven’t confirmed the original Jeep tubing’s wall thickness, so this is a comparison rather than an exact factory bore specification.
Other AW4 owners have used -6 AN plumbing as well:
- NAXJA: Switching to AN fitting for auto trans, follow-up — RCP Phx reports steadier temperatures after a braided-line and cooler conversion on a 2000 XJ. The thread doesn’t establish the hose’s exact bore or liner material.
- NAXJA: 98 XJ Sport 4.0 AW4, Trans Line Convert PTFE-6AN — A discussion of adapting -6 AN PTFE lines to the radiator fittings, rather than a long-term test report.
- Eddie Abbondanz: AN Transmission Lines Upgrade with Aftermarket Trans Cooler — A completed AW4 installation using Vibrant 18976 -6 AN PTFE hose and matching ends.
These examples support the sizing choice, but they don’t verify flow through my particular assembly. Hose length, routing, and the passages through the fittings also matter. The bench pressure test below checks for leaks; it isn’t a cooler flow test.
Making the lines
This was my first time making PTFE hoses and with a little preparation it went well. These PTFE fittings require a brass ferrule that can be a little fiddly, and I didn’t have any problems assembling these hoses. If you are worried about making these, you can order extra ferrules in case you need to re-make a fitting.
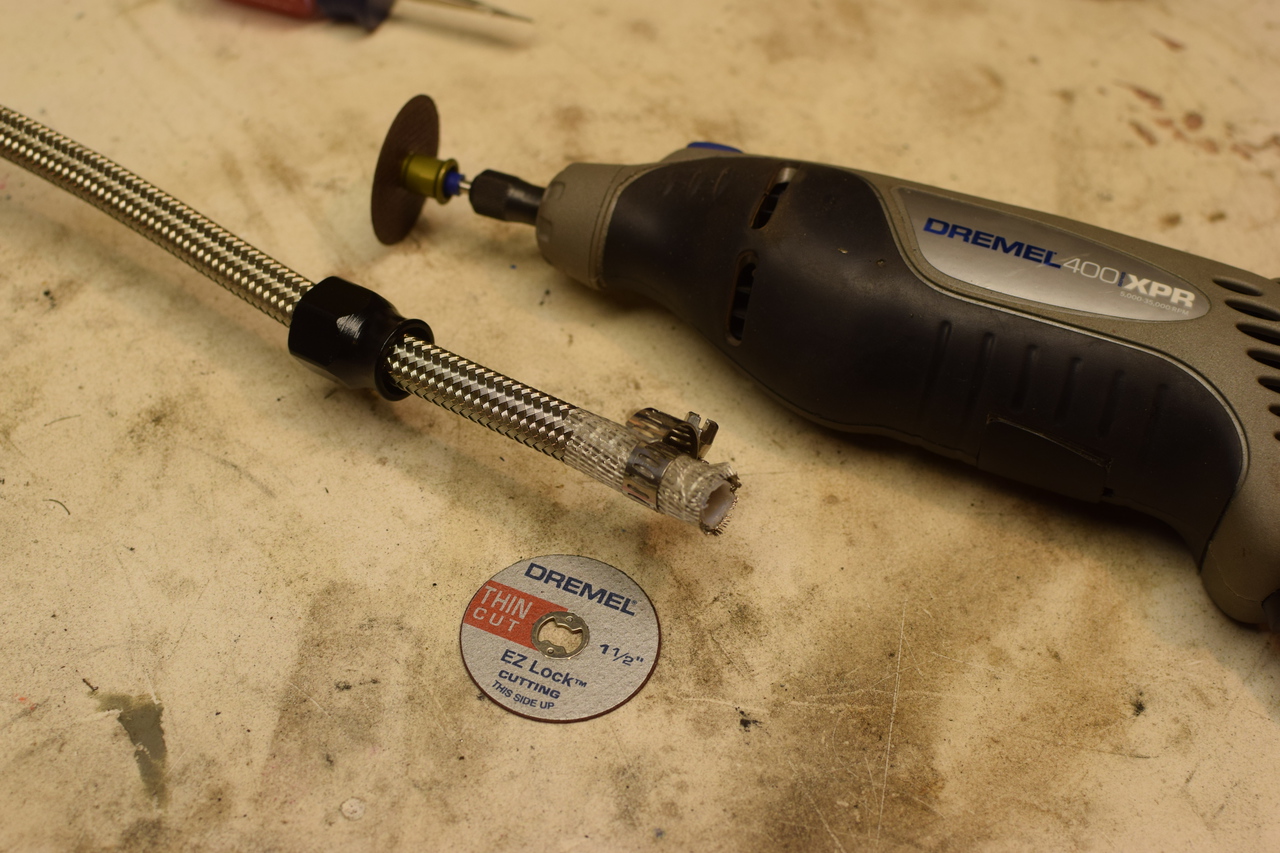 I used a Dremel with a cut-off wheel to make the cut. Slide the compression side of the fitting onto the hose, making sure that the orientation is correct. The flared bell end should be towards your cut. Wrap the location of the cut with tape. I found that strapping tape worked best and was thin enough to not cause problems. Put a hose clamp around the hose to prevent fraying and give you a straight reference line and prevent the tube from crushing. Cut with your Dremel.
I tried using a fine-tooth hacksaw, a tubing cutter, and a cut-off wheel on my grinder and nothing worked as well as the Dremel. I found it was best to cut through the outer stainless first, and slide it off a bit, and then cut the inner PTFE second. After you are finished, use the tip of a pen to make sure that your inner PTFE tube is round.
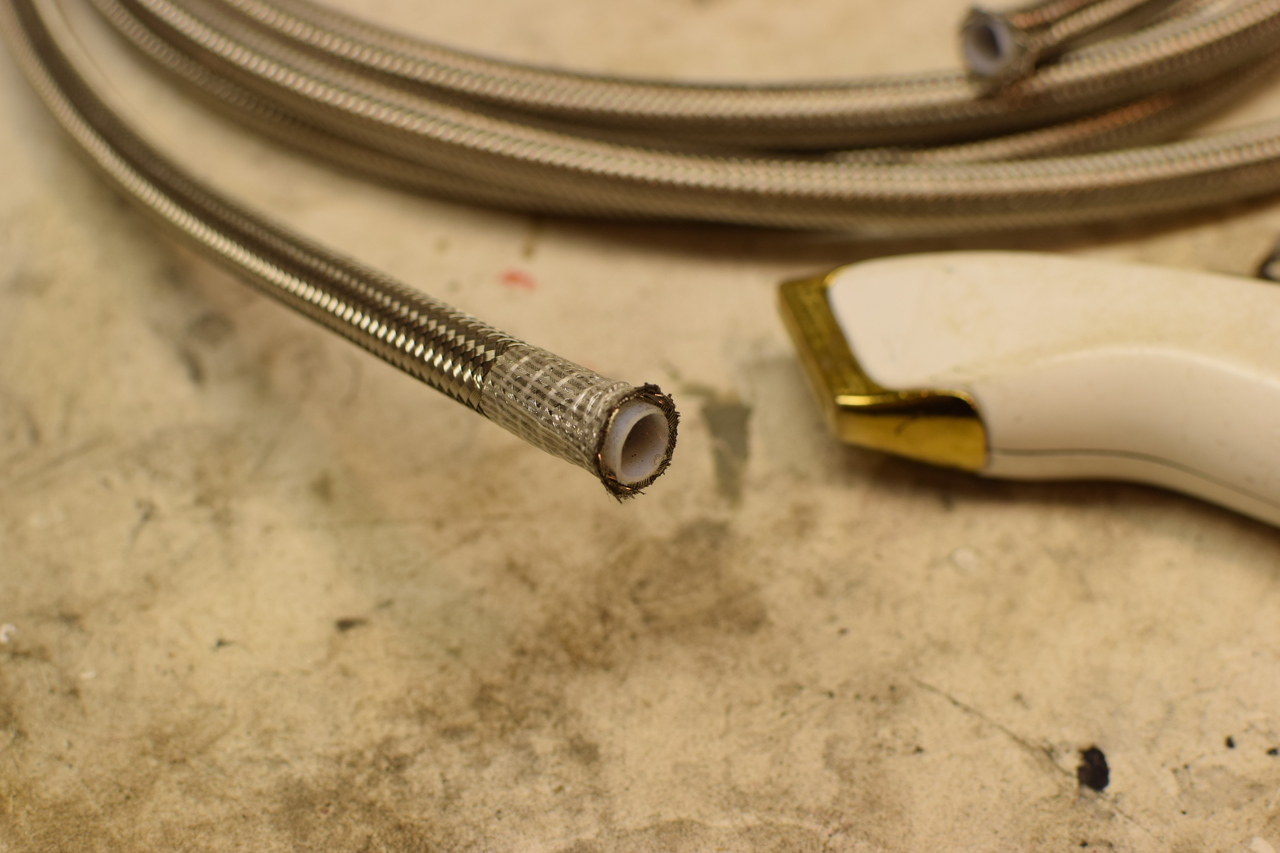
Once you’ve made the cut, you can remove the clamp and the tape. Add the ferrule and then assemble the fitting. I used a set of aluminum soft jaws on my vise to hold one side of the fitting. I found that I needed to use a 19 mm open-end wrench to assemble one side of the fitting. Follow the assembly instructions for your specific hose ends; aligned fitting faces alone do not establish that the fitting is properly assembled.
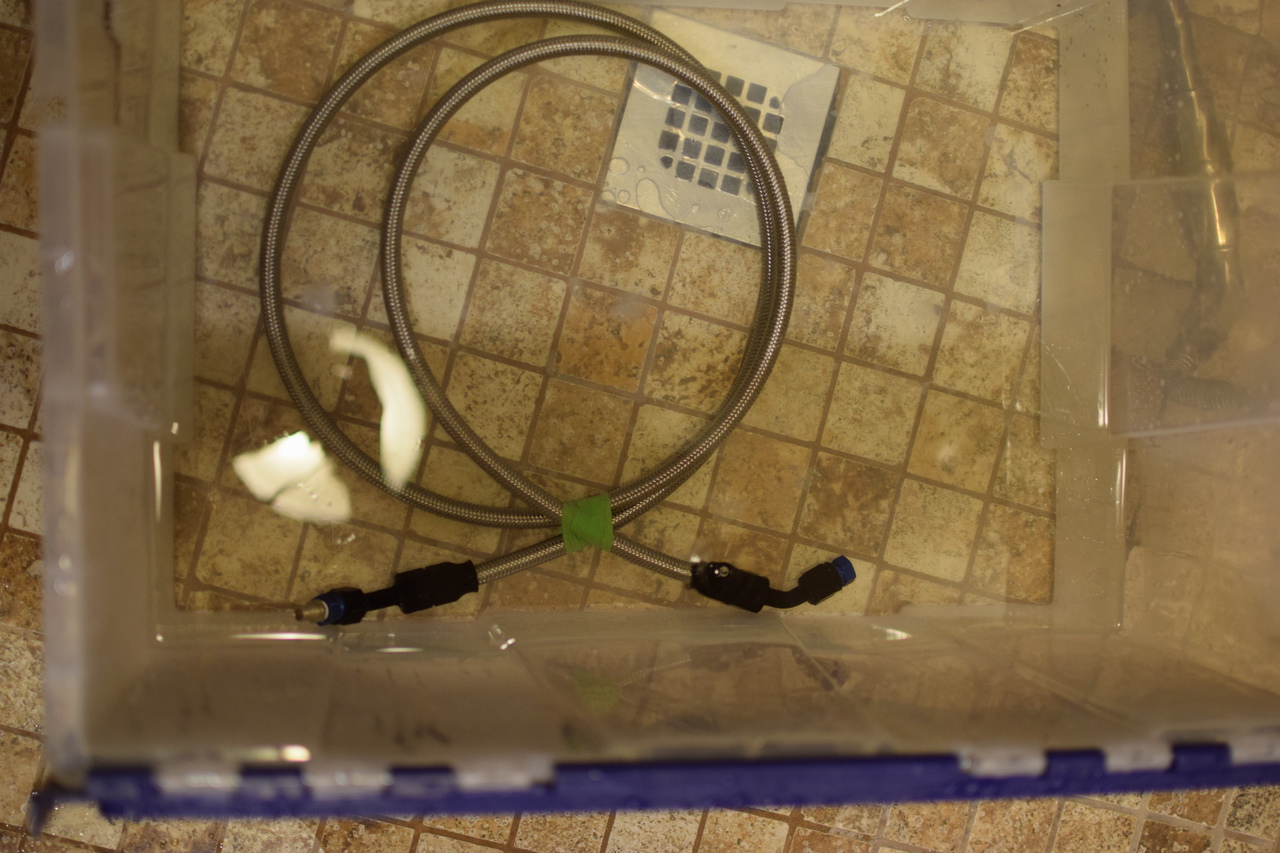
Once I assembled my lines, I pressure tested them in water with a tool from Fragola. It’s a sealed cap for one end of your hose, and a cap with a Schrader valve for the other. You can then add 60 psi to your hose with a regular bike pump and submerge it and watch for bubbles. I found that with my hoses it took some time for the weep holes in the fitting to quit emitting tiny bubbles. My hoses held pressure overnight on my bench as well without any problems.
Installing transmission adapters
The transmission needs adapters to convert it to use -6 AN fittings. I’ve got an AW4 automatic, and I needed two 14mm-1.5 adapters to convert to using -6AN. The transmission has some other adapters on it, and you can see them below after they were removed.
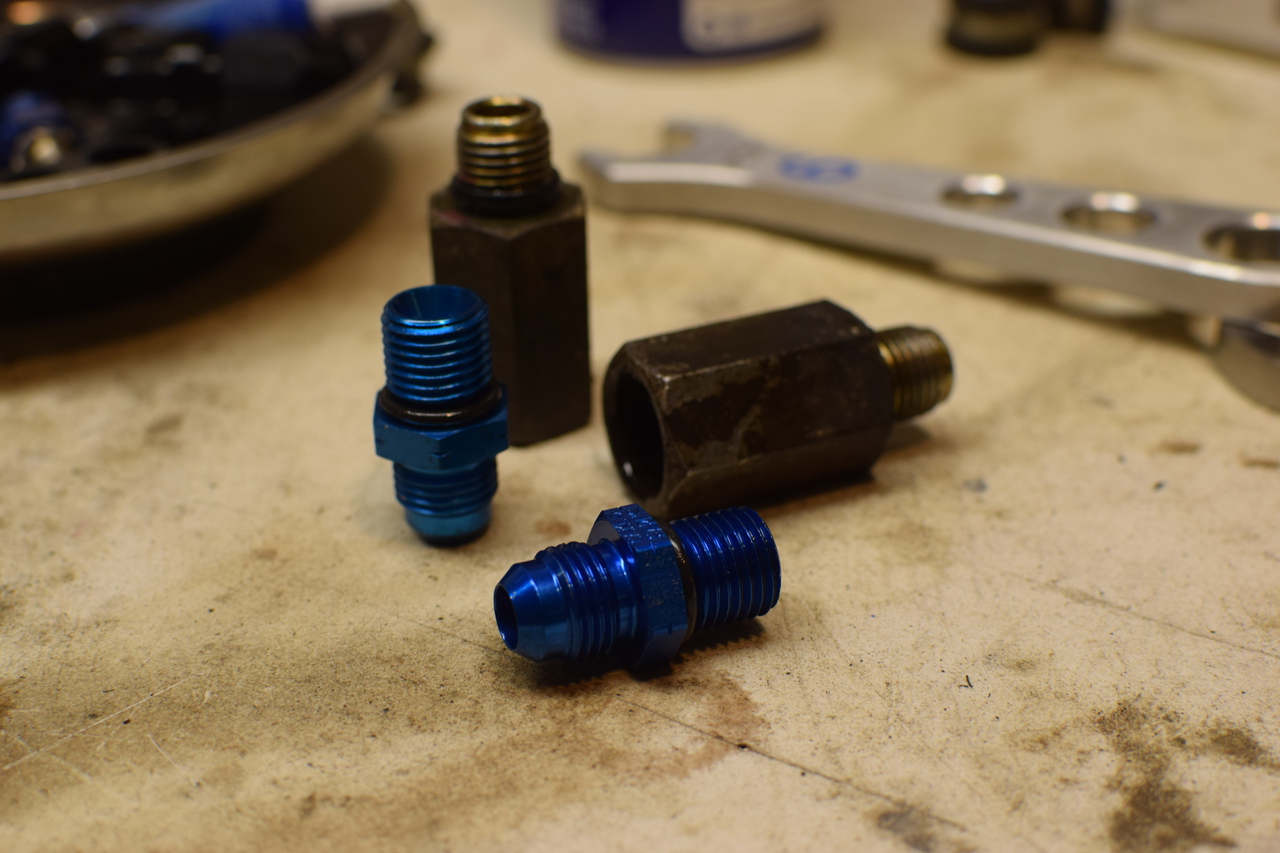
You can see in the photo above the new o-rings that I installed on the adapters. I put a little ATF on them before installing them, and I torqued these to 30 ft-lbs.

Once installed, they should look like the photo above.
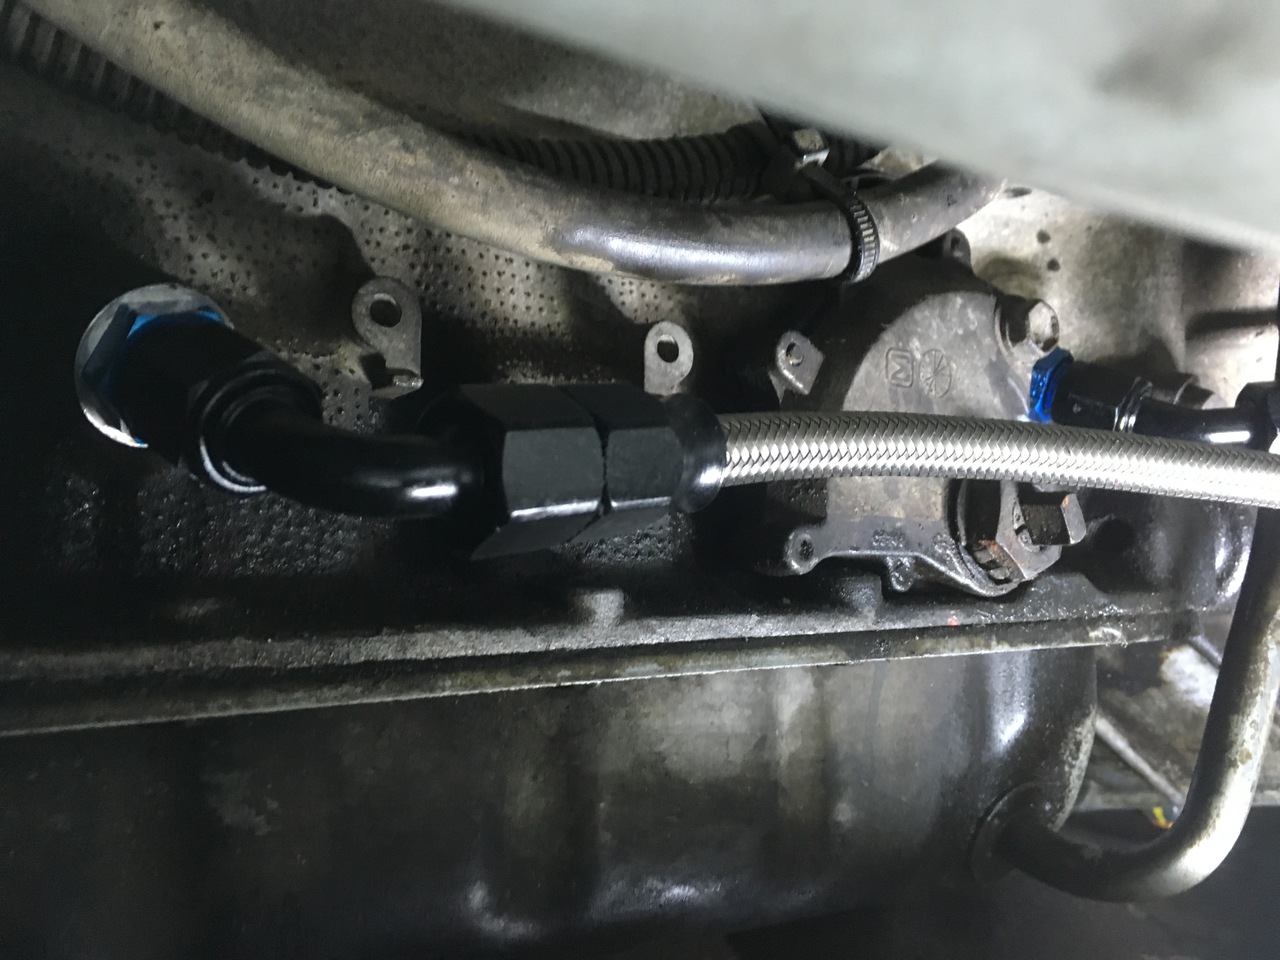
With the hoses installed, they’ll look like this. I’ve used a 90° fitting in the rear, and a 45° fitting for the front.
Top of the transmission cooler
The factory transmission cooler is built into the radiator and is on the driver’s side. We’ll need to convert both the inlet and outlet to use -6AN as well.
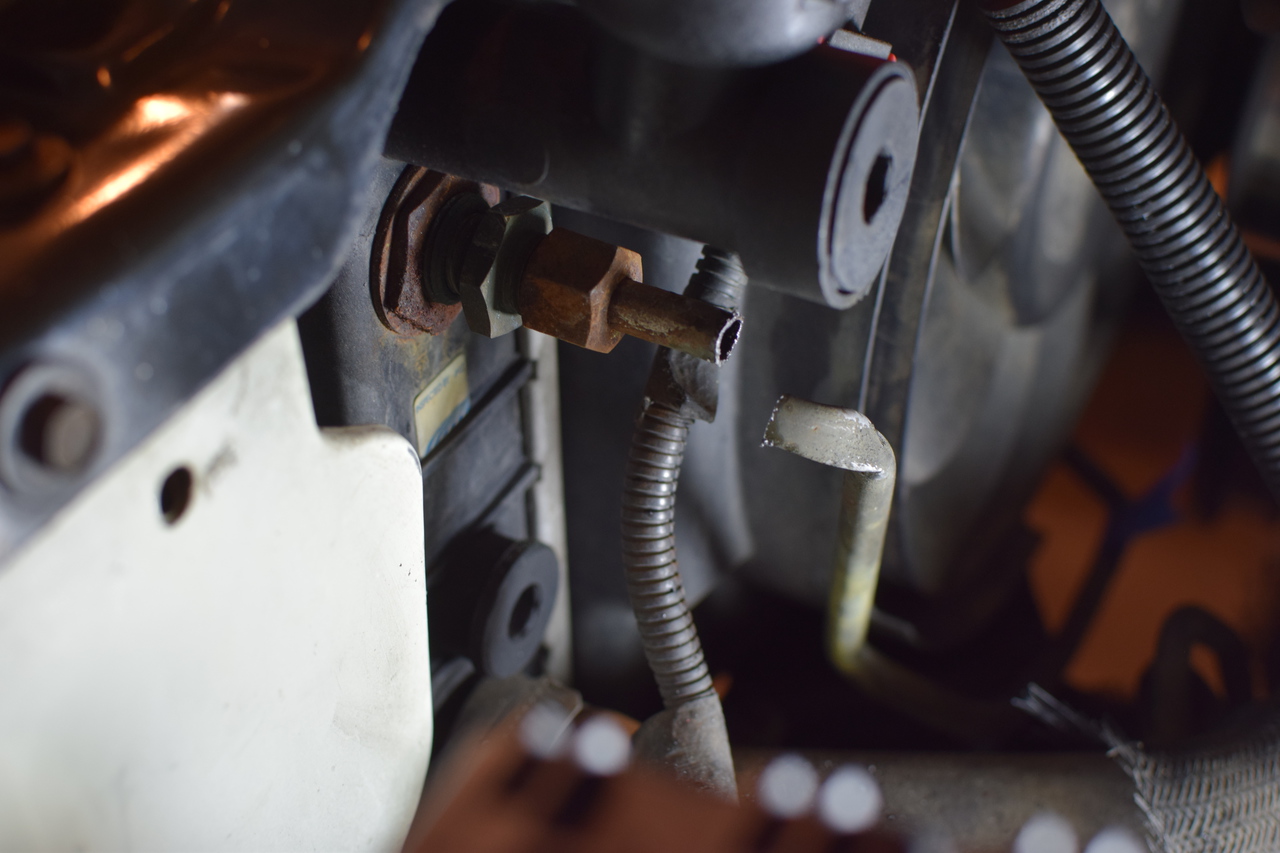
My factory cooler line was seized and the compression nut would not spin on the hard line. I cut the hard line and removed the whole thing with a 6-point socket. You want to remove the whole adapter and not just the flared fitting.
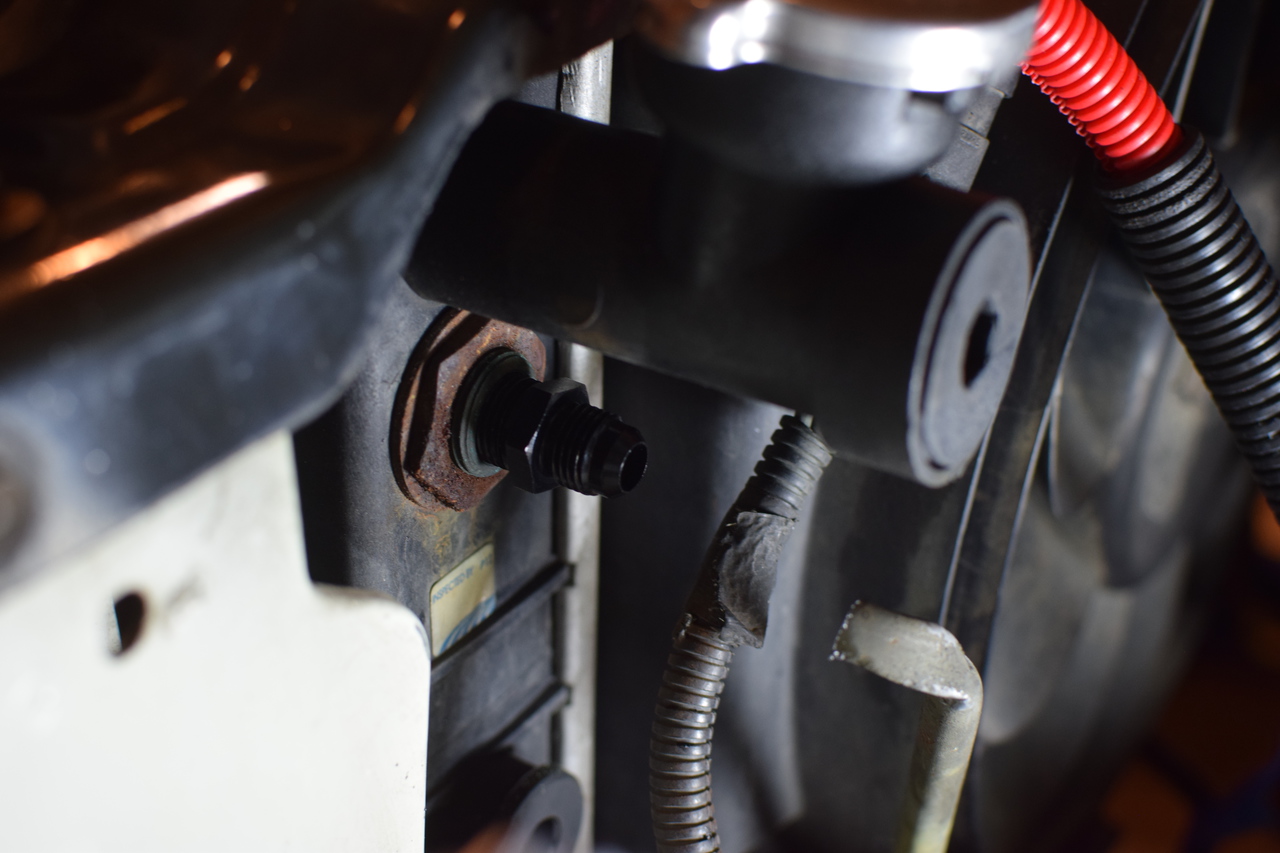
With the -6AN to ⅝-18 inverted flare installed we can see that we’ll need a 90° hose end fitting.
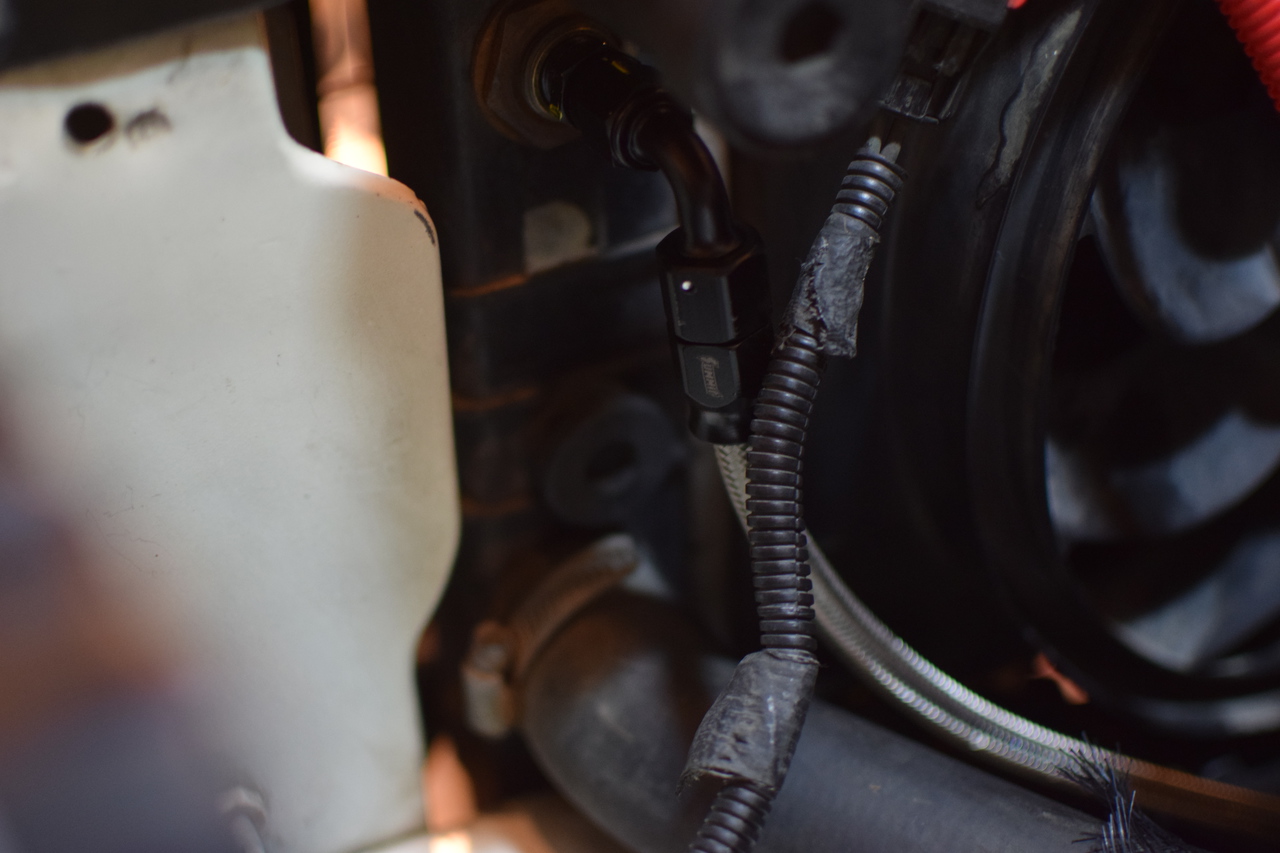
With the line installed, we still have lots of room and good routing options.
Bottom of the transmission cooler
My photos of the bottom aren’t great, but they show the fitting and hose routing.
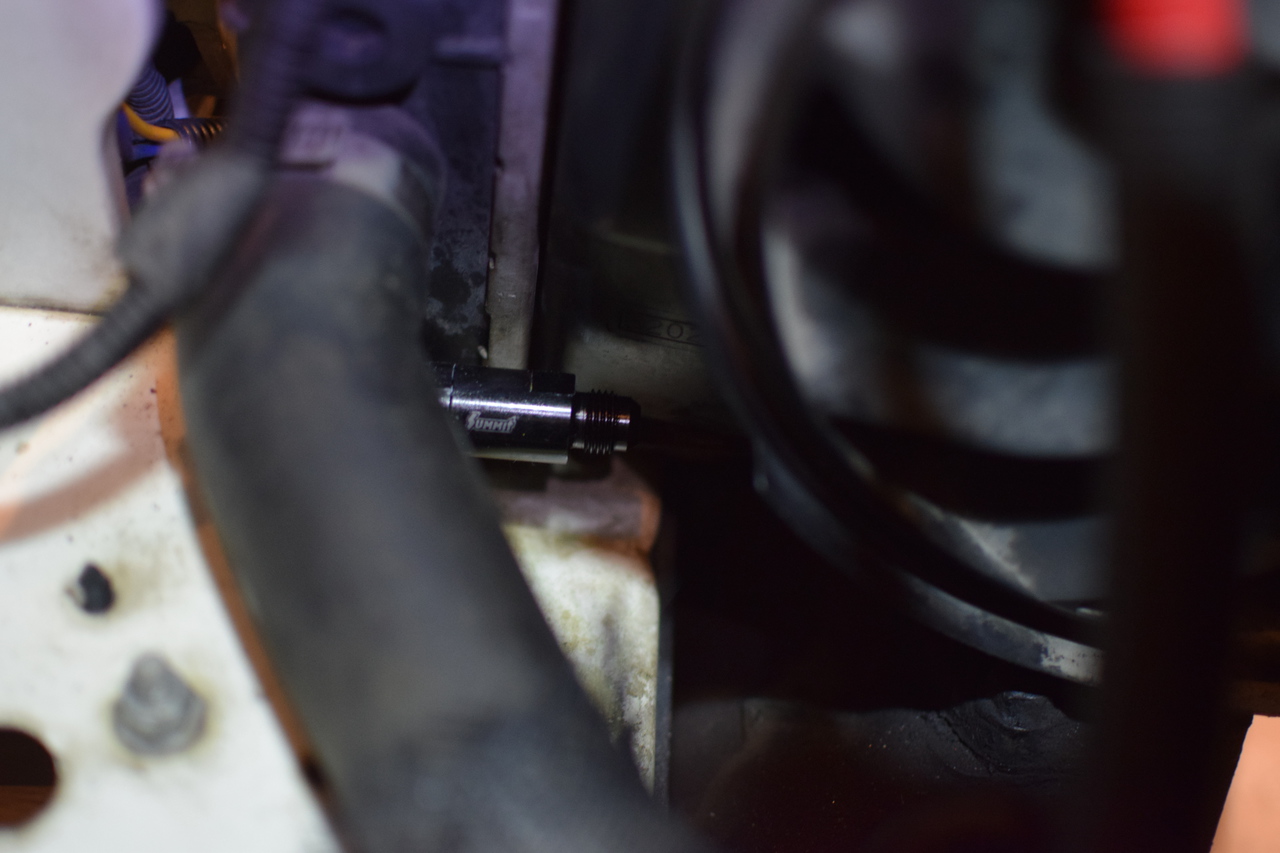
The bottom hole doesn’t have much room around it. It seems like the most common approach to this is to leave the push lock style fitting on the radiator and use an adaptor to this. It looks like in order to remove that fitting you’d need to pull the entire radiator out of the Jeep. In the photo above, you can see the ⅜ EFI fitting attached to the factory push lock fitting coming from the bottom of the cooler. I had to bend the hard line just a couple of degrees so that I could get a wrench on the EFI fitting to tighten it.
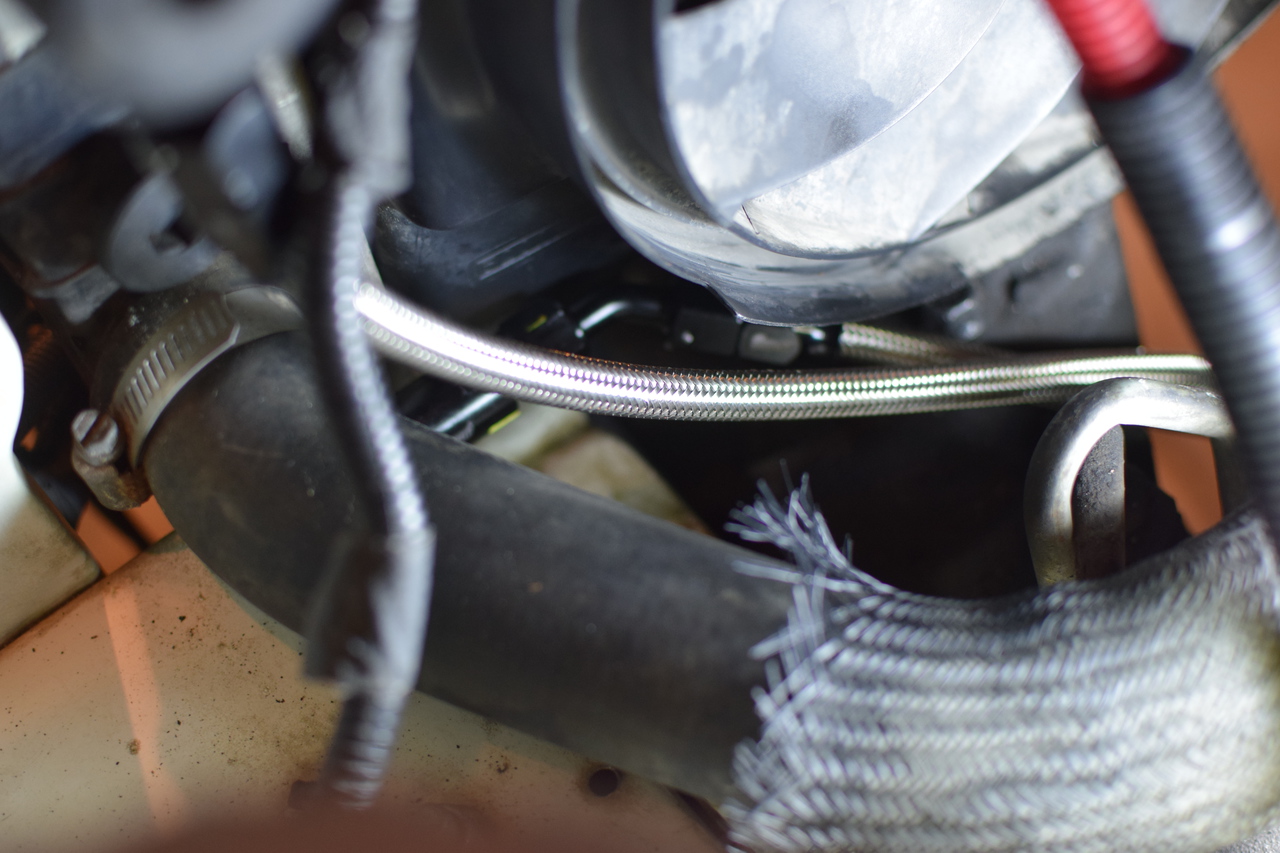
In the horrible photo above, you can see the cooler line in place on the bottom.
Finishing touches
Once you’ve routed the lines, you can add fuel line clips to tidy everything up. The Summit Racing PTFE hose is only 0.430 inches in outside diameter. I used -4 fuel line clips to attach the hoses to each other, and then I used the factory brackets and new p-clips to securely anchor the hoses.
Double-check your routing to make sure that at full compression your upper trailing arms aren’t going to interfere with your new hoses and that nothing is going to rub.
Original summary — 2019
I’ve been running these lines for a few months now without any problems. The installation was pretty straightforward once I had all the parts in place. My original parts order included 90° for both of the radiator fittings and a straight fitting for the front of the transmission. I didn’t like how the lines were situated and I swapped to 45° for that line and everything fits well now.
Update: September 2026 — 15,000 miles later
I still drive this Jeep, and 15,000 miles after the conversion the lines have been trouble-free, with one exception: occasionally, after it’s been parked for a couple of weeks or longer, the transmission takes 10–15 seconds before the Jeep will drive.
These replacement lines don’t include an anti-drainback valve. I suspect the delay is related to fluid draining back while the Jeep sits, but I haven’t confirmed the cause or whether the original line assemblies contained a valve. The AW4 service-manual section mentions removing a converter drainback valve before reverse-flushing on page 21-186. That’s worth following up on, but I don’t yet have a verified valve retrofit to recommend.
If you’ve got questions, please feel free to send me an email.