TLDR
The Boostwerks Comp Mount is a hidden winch mount for the Jeep Cherokee with an integrated steering brace. Mine is mounted behind a JCR Crusader Front Bumper and is further braced with Dirtbound Offroad Frame Tie-Ins Brackets.
The mount is well built and installed with only minor modifications to the mount itself. The powdercoat is great, and the overall fit and finish is fantastic with great attention to detail. The integrated steering brace has really improved the highway manners of the Jeep. The winch is working great, and I would absolutely use this solution again for mounting a winch in a Jeep Cherokee.
The Great Parts
The BWE Comp Mount is a well thought out product, and I really like this option for mounting a winch. I think this is a great option for carrying a winch in a Jeep Cherokee. The fit of the comp mount was spot on. The low center of gravity and theft protection is great.
The Bad Parts
There were a few things that were a hassle and made the final installation take longer than I’d originally planned. I had to relocate my transmission cooler lines, and I needed to replace my worn out motor mounts. Relocating the winch contactor box under the hood is also a larger project than I originally expected.
2020 Update on JCR
JCR is no longer offering their Crusader bumper without the front hitch option. This makes it a fair bit harder to do this same installation. In addition, they no longer offer it as an option as a special order. Unfortunately to use that bumper you’d need to cut out the hitch mount and the gussets for it and weld in a covering plate to do this same build. If anyone else has a bumper that would work well with the comp mount, send me an email and let me know so I can add it here.
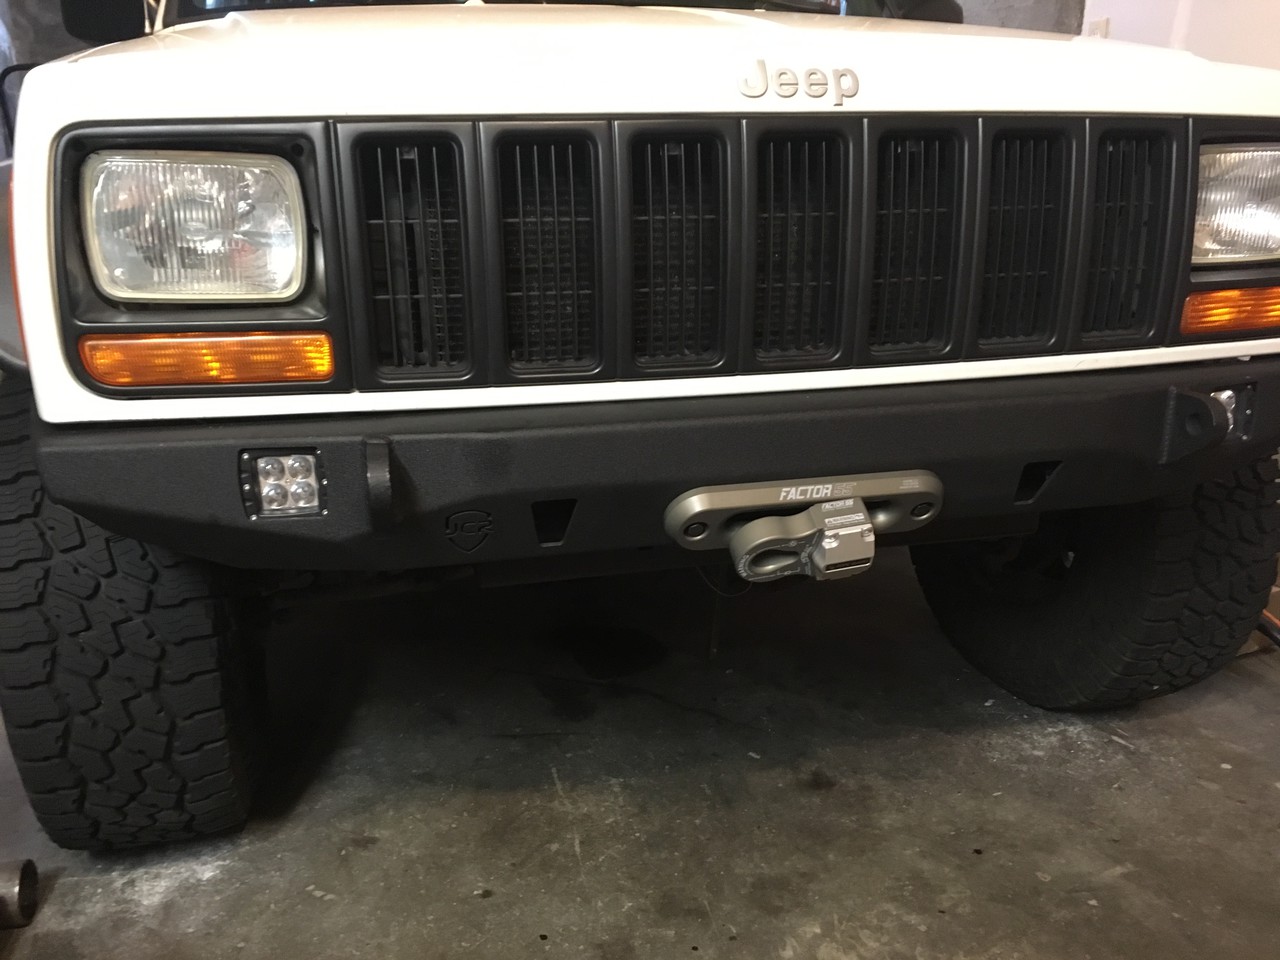
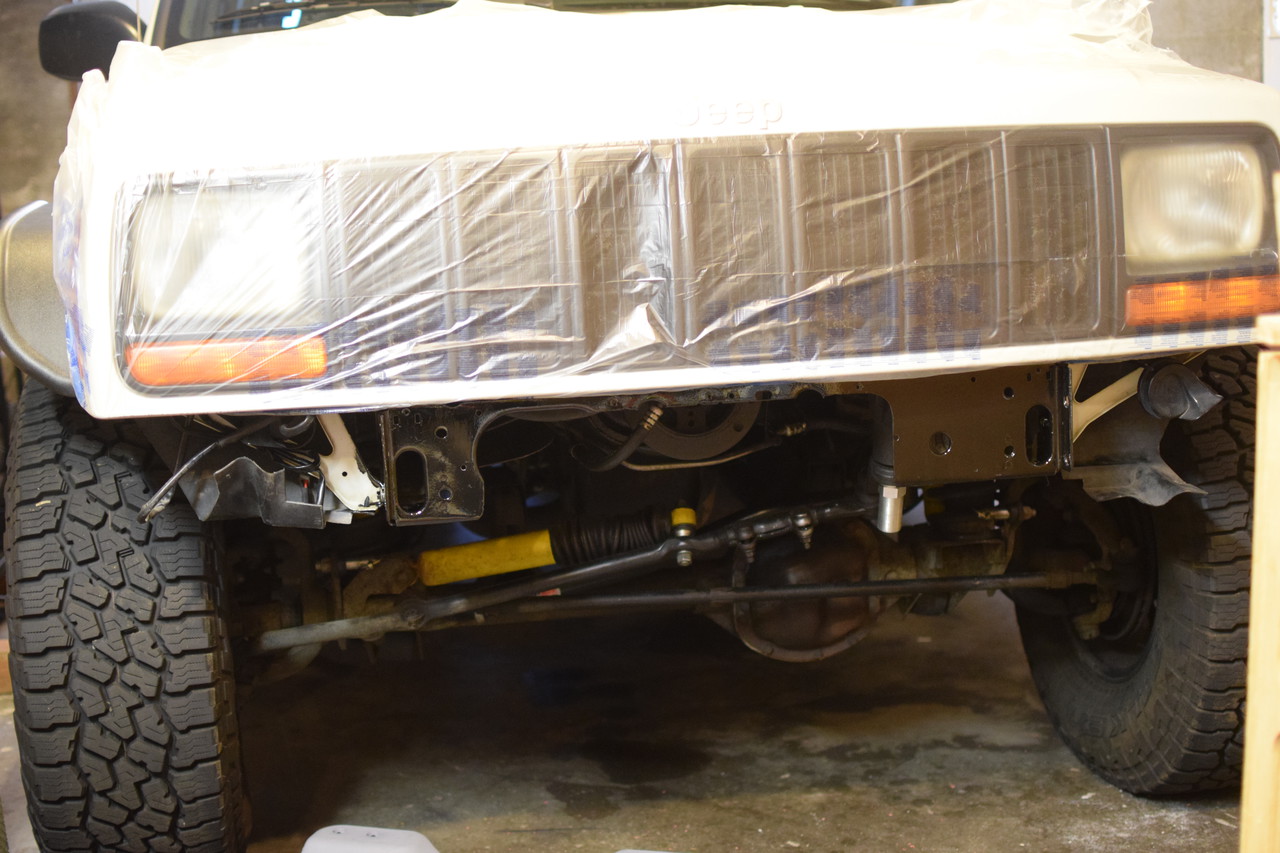
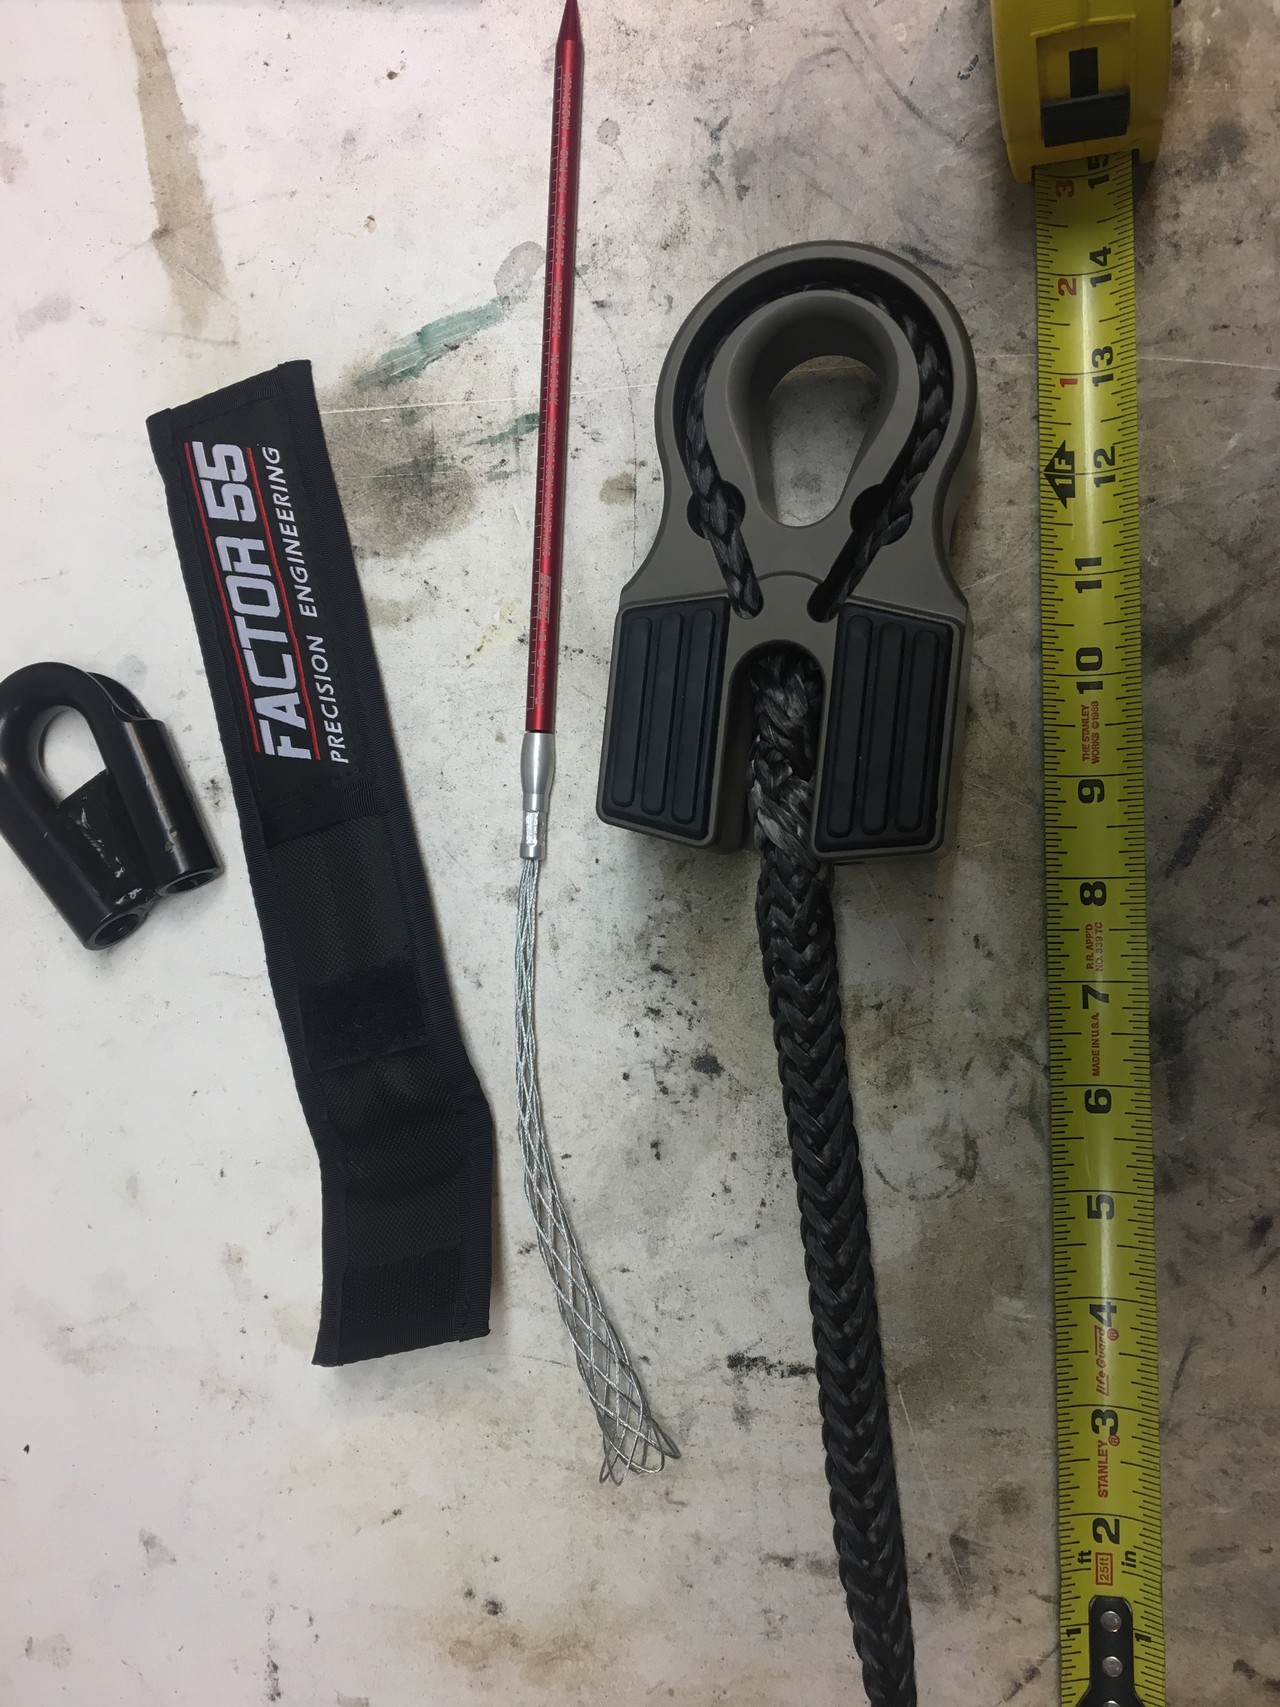
The Finished Installation
Here’s a view of my XJ in my garage with my freshly installed Factory 55 spliced flat link and fairlead.
After unpacking everything, I immediately removed the contactor box from my Warn M8s Winch and test fit it in the Comp Mount. In this photo you can see that the freespool switch is pointing backwards towards the engine. You can also see the black nylon plastic fairlead that ships with the Comp Mount. You can see the spool adapter that I later installed to replace the handle. It’s a beautifully built part from Boostwerks.

I’ve included a photo of this because I think it’s worth doing - I chase nearly everything that I can with a tap as I’m tearing down parts. In this case, the sway bar bushing mounting holes have taken a lot of vibration and abuse over the years and I think it’s worth chasing them out to make sure that the installation of the new parts goes smoothly. In this photo you can also see that I’ve added some POR-15 rust inhibitor paint.
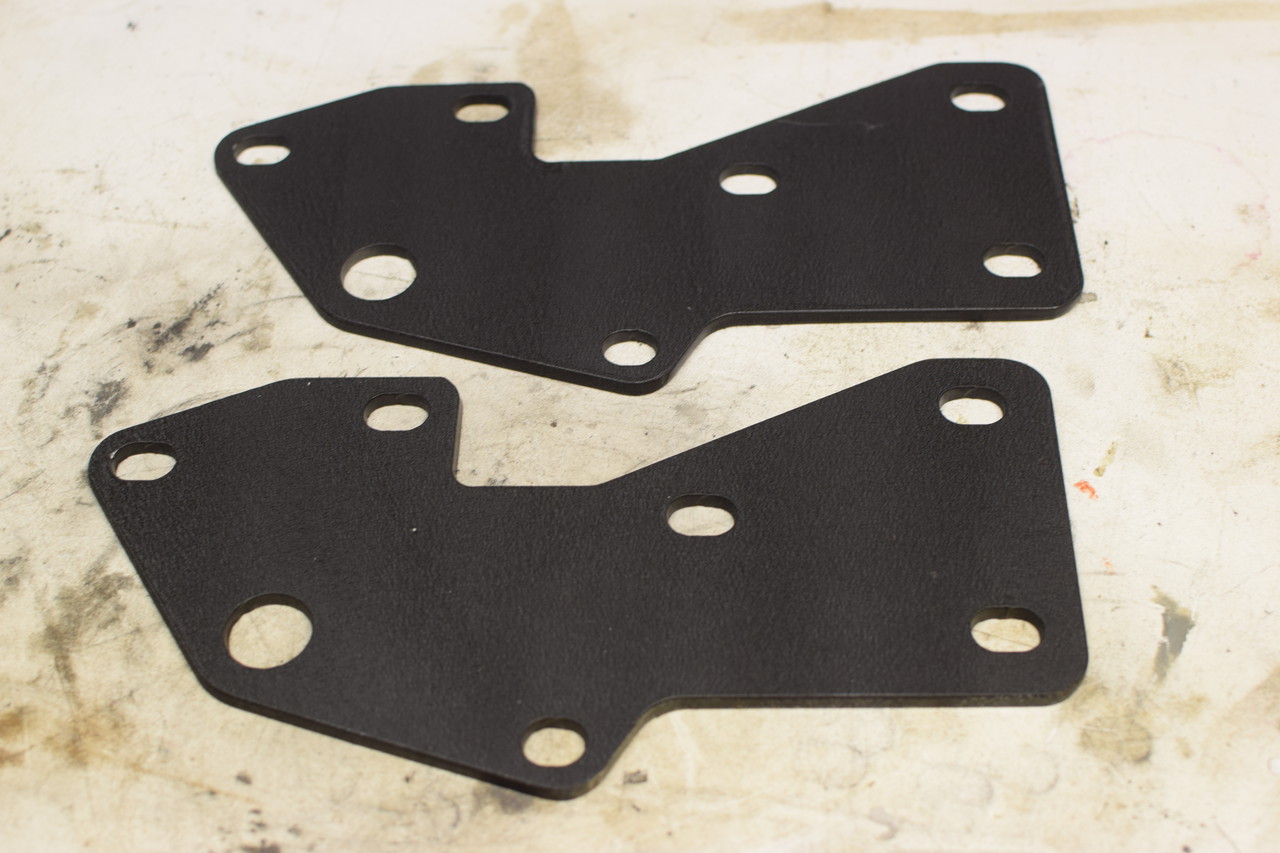
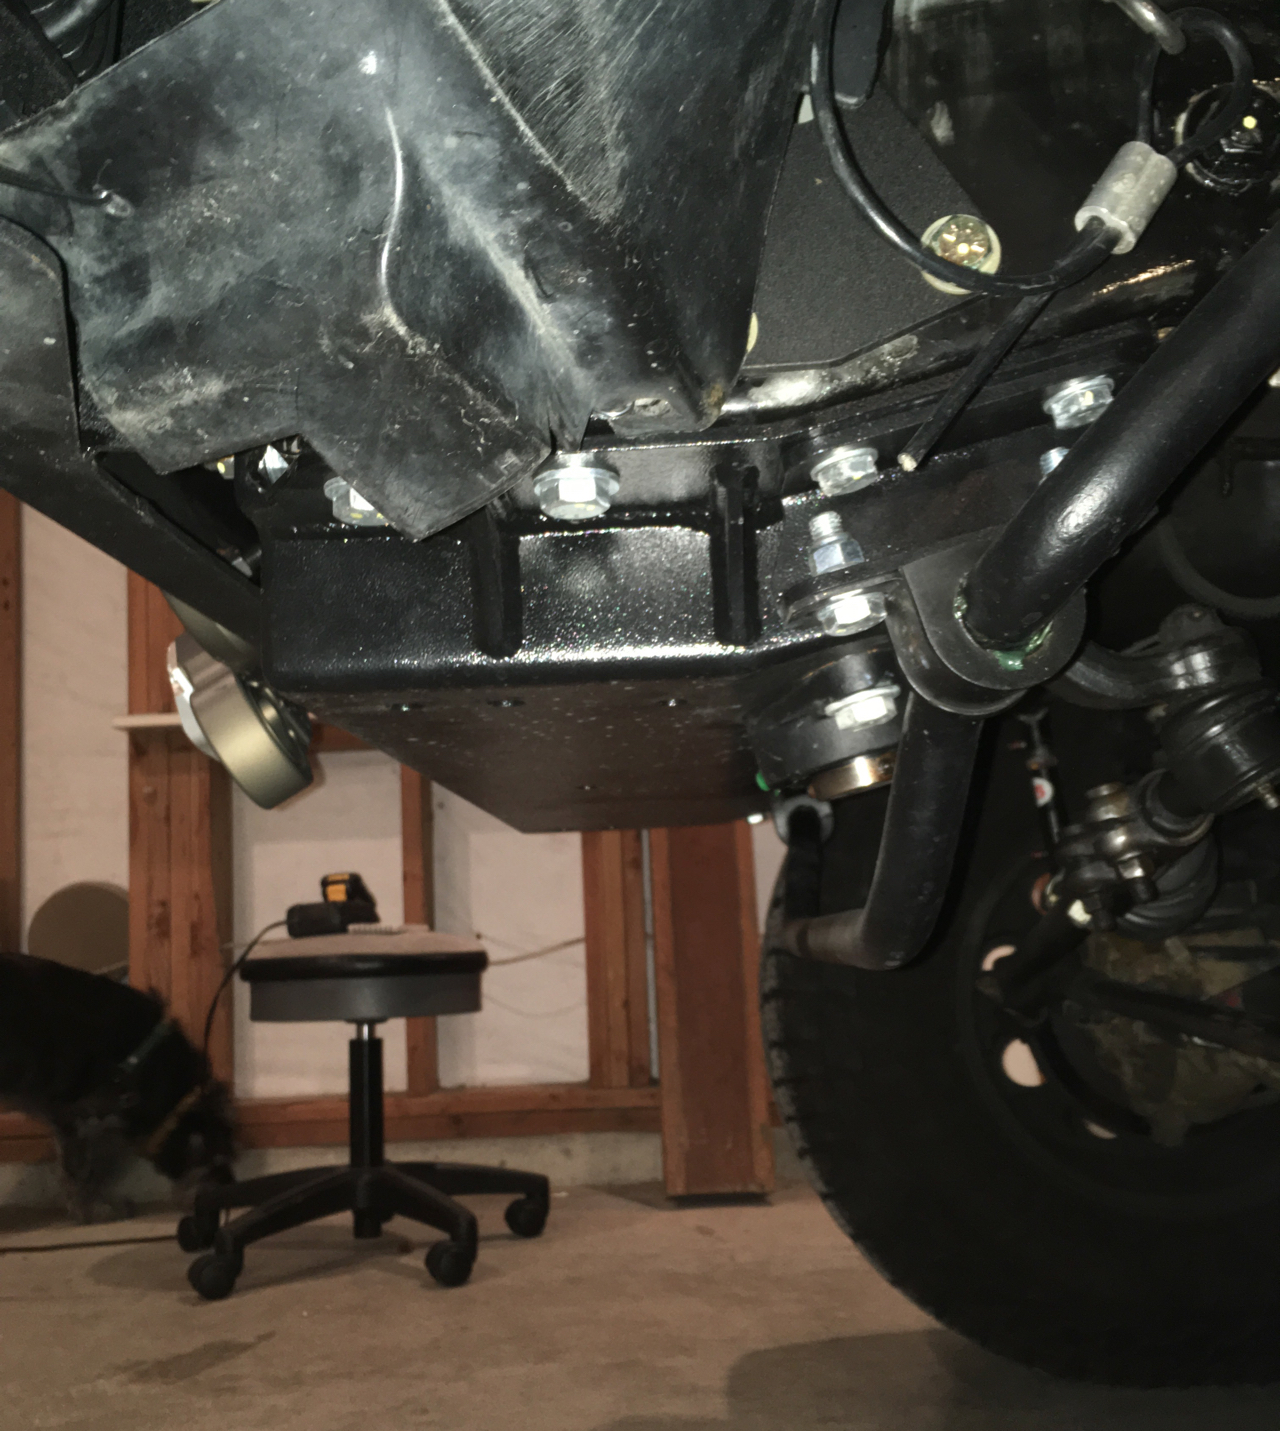
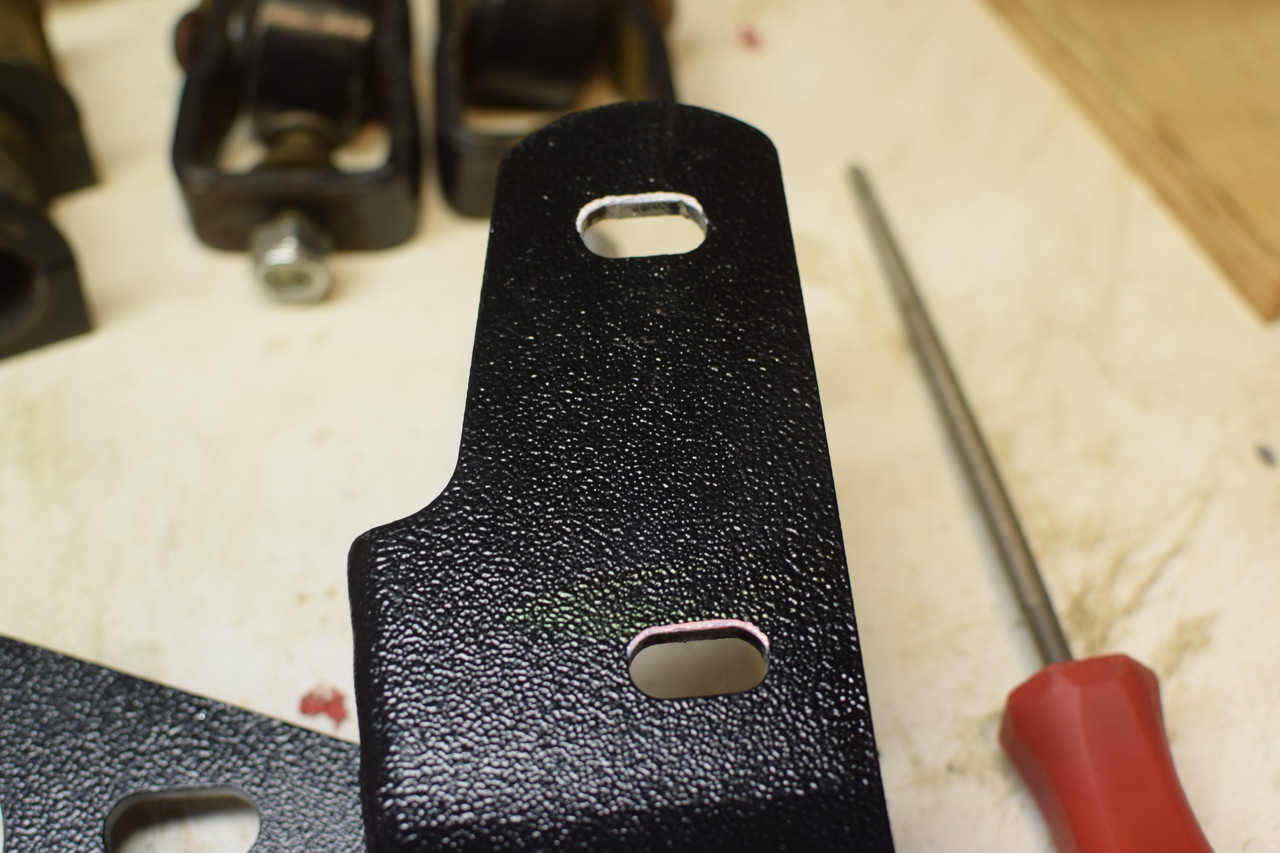
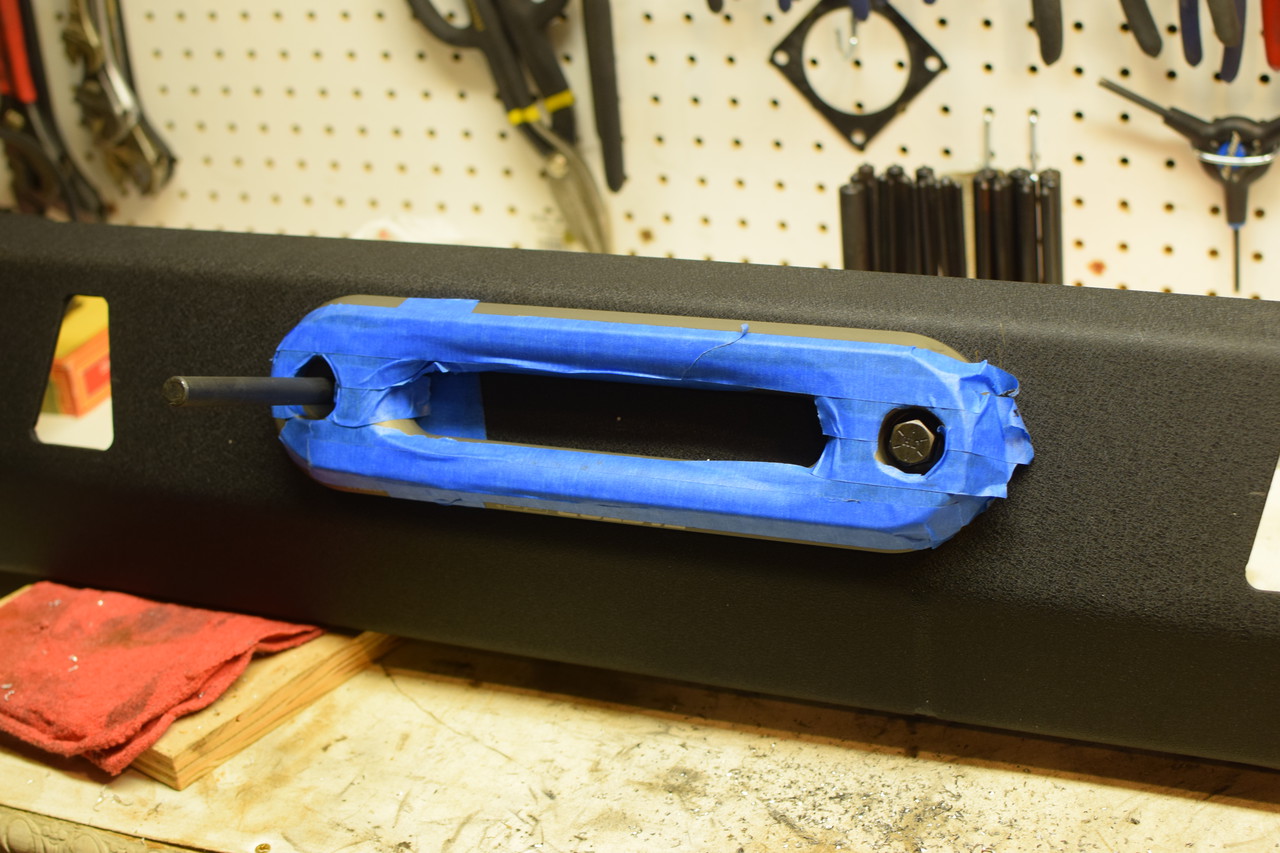
The comp mount adds a fair bit of bracing to the bumper brackets. It ties them into the front frame rails through the sway bar mounting holes and several other locations. However, I think for cross pulling it makes sense to add additional bracing. I’ve used the bumper tie in brackets from Dirtbound Offroad. I like that their brackets allow you to keep the diagonal bracing that supports the corners of the front header panel. The brackets from JCR don’t allow that. I sanded these and gave them a coat of wrinkle paint.
You can see the frame tie-ins to the outside of the uni-frame rail in the following photo, along with some other details of the final installation.
Cutting My Crossmember
This was a part of the job that I was the least excited about - cutting the front crossmember. I made the cuts with a grinder and cut-off wheel. I’ve started to really like the Metal Max cut off wheel from Lenox. It’s proven durable and still cuts quickly.
I was far too fiddly with marking this out. The Comp Mount covers this entire area, and so the cuts really only need to open space for the rope to pass through. It’s worth nothing that in some markets, the Jeep XJ had a factory hidden winch option. If you look closely at the crossmember before you cut it, you’ll see that the crossmember has holes punched for the standard winch attachment pattern.
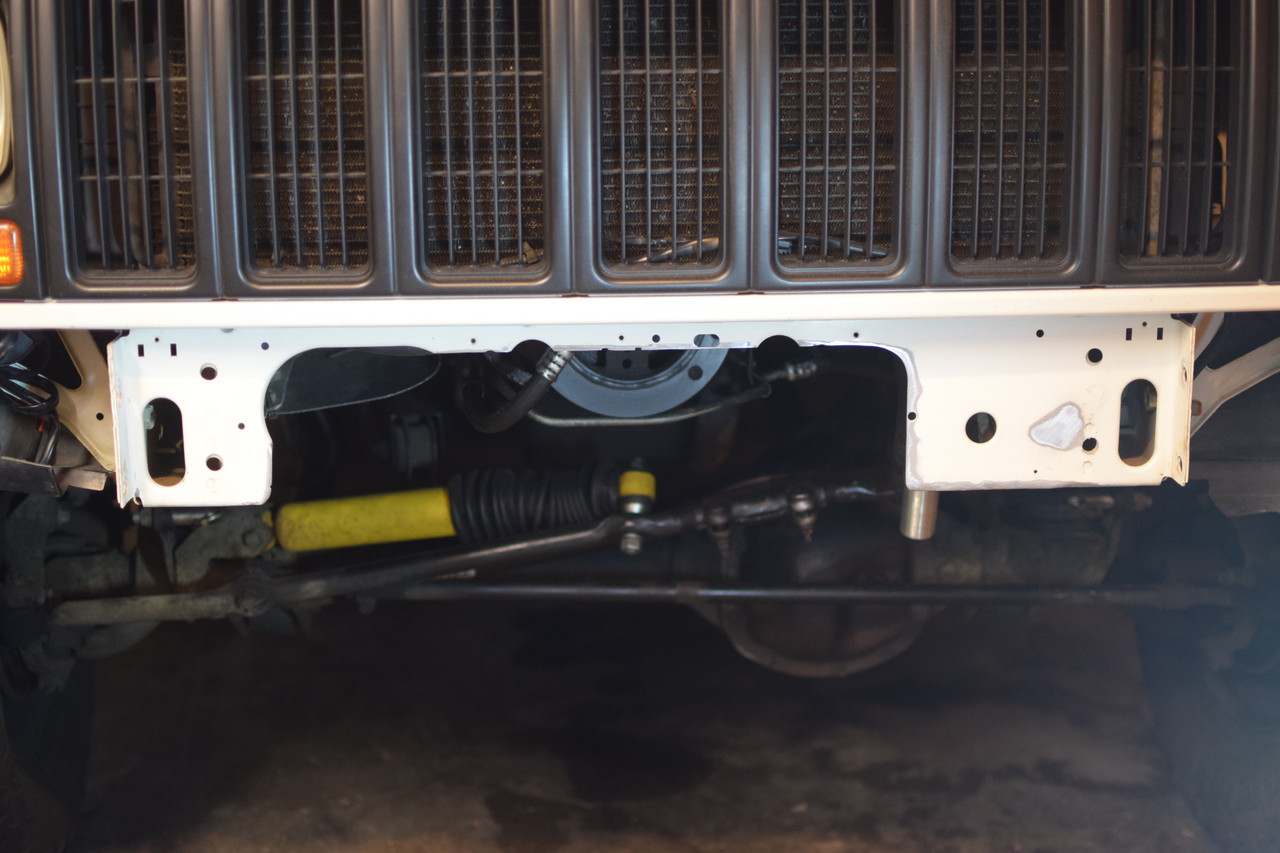
In the photo above, you can see the two hose lines in front of the balancer. These are transmission cooler lines, and later in this project I found that they fouled on the winch. I could have relocated them with some simple cutting and flaring and re-routing only a section of one of them. But, I chose to completely replace them with flexible hoses.
After making the cuts, I removed all of the rough edges, sanded the entire area, and then applied a coat of POR-15.
With the cuts done and the paint cured it was time to test fit the Comp Mount. This mount went in and out a lot while I was getting lines moved, wiring installed, and parts moved around. I cannot imagine doing this without a good floor jack. During this time, I didn’t have the winch in its cradle. Keep it light!

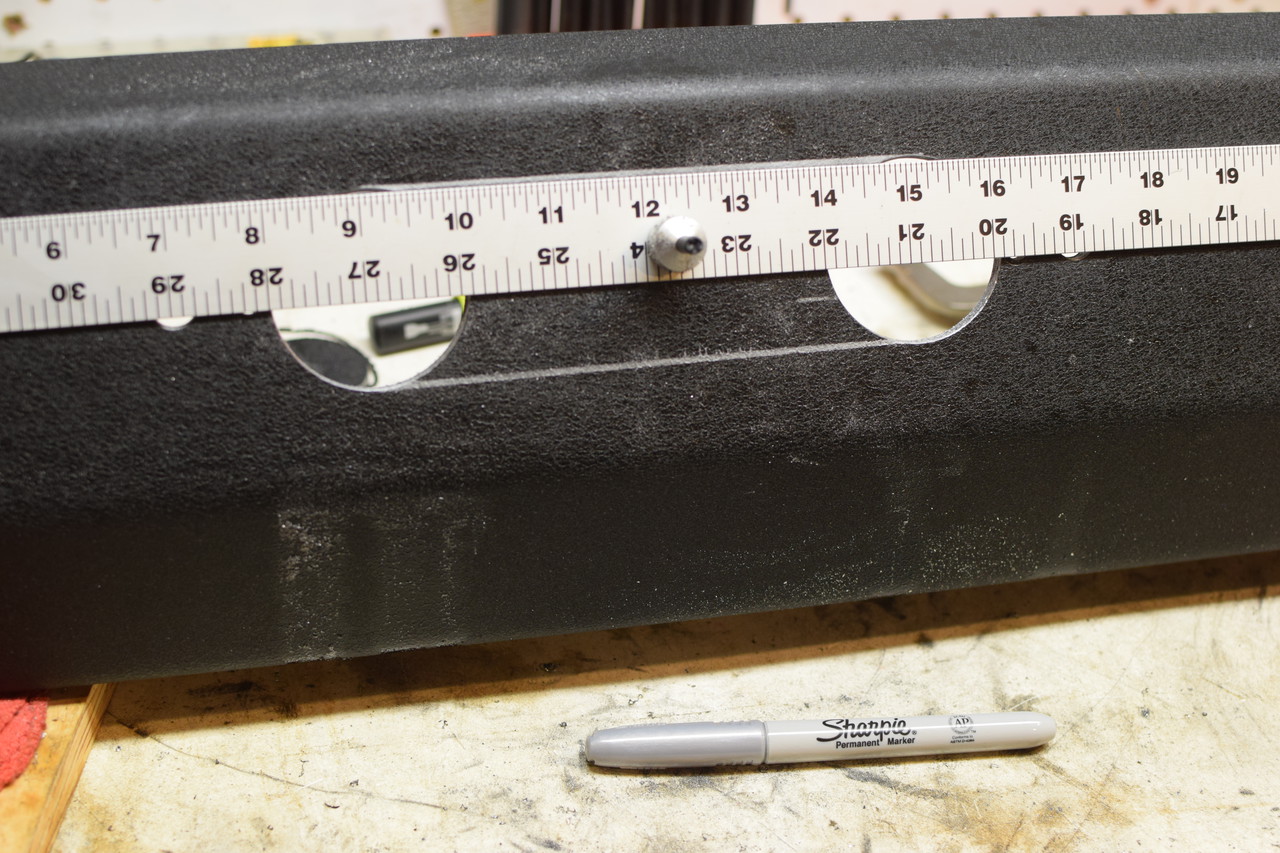
During this time, I found that the holes that aligned with the sway bar bushing mounts were a little out of place compared to my Jeep. I’m certain that every Jeep is going to be a little different, and so this wasn’t surprising. I marked with a silver Sharpie Pen and then filed by hand to make some room.
With all of the bolts lining up and test fit, it was finally time to install the comp mount one more time for final fit. I still have no idea where this chunk of wood came from, but I can’t imagine working on my Jeep without it.

Cutting My Bumper
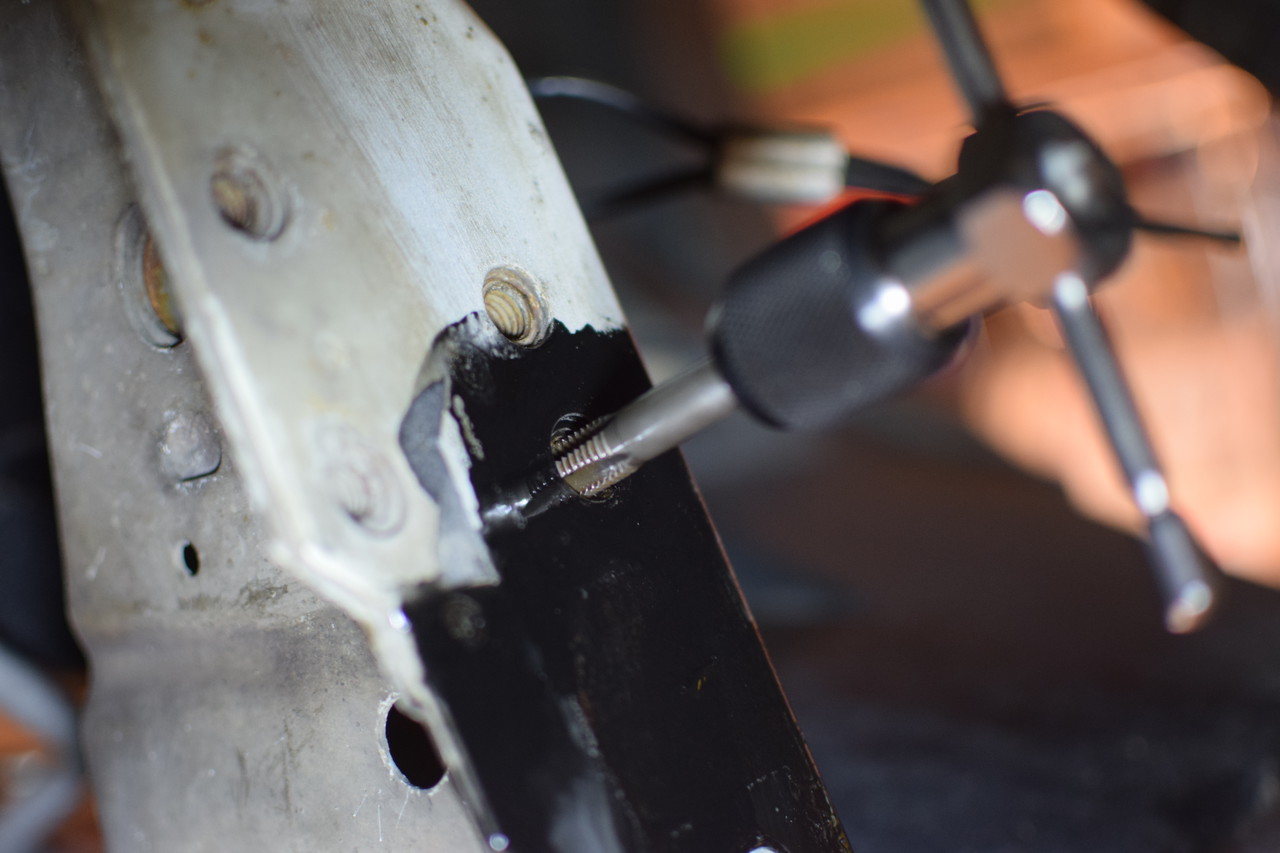
With my comp mount installed into it’s final location, I was able to measure for my fairlead. I established a horizontal center line between the top and bottom of the jack cut outs on the front of my bumper, and then established a vertical center line between those. I checked this center line by measuring between my shackle tabs. An aluminum yardstick with a magnet is great for this - it’ll stay put while you move around to mark things.

With careful measurements made, it was time to do some drilling. I first punched the location for one side of the Factory 55 fairlead. After punching it and checking the measurements one last time, I drilled a hole for the mounting bolt. I then put the fairlead in place and tightened the bolt. I carefully measured and made the fairlead square to the bumper, and then used a transfer punch to mark the location of the other hole. You can see the transfer punch in this following photo. This ensures that the two holes are absolutely spot on without having to measure. I think in this photo I’ve also got either magnet or double stick tape holding the fairlead up on the free side - I wanted to be able to look at it from a distance to make sure that the spacing looked right.
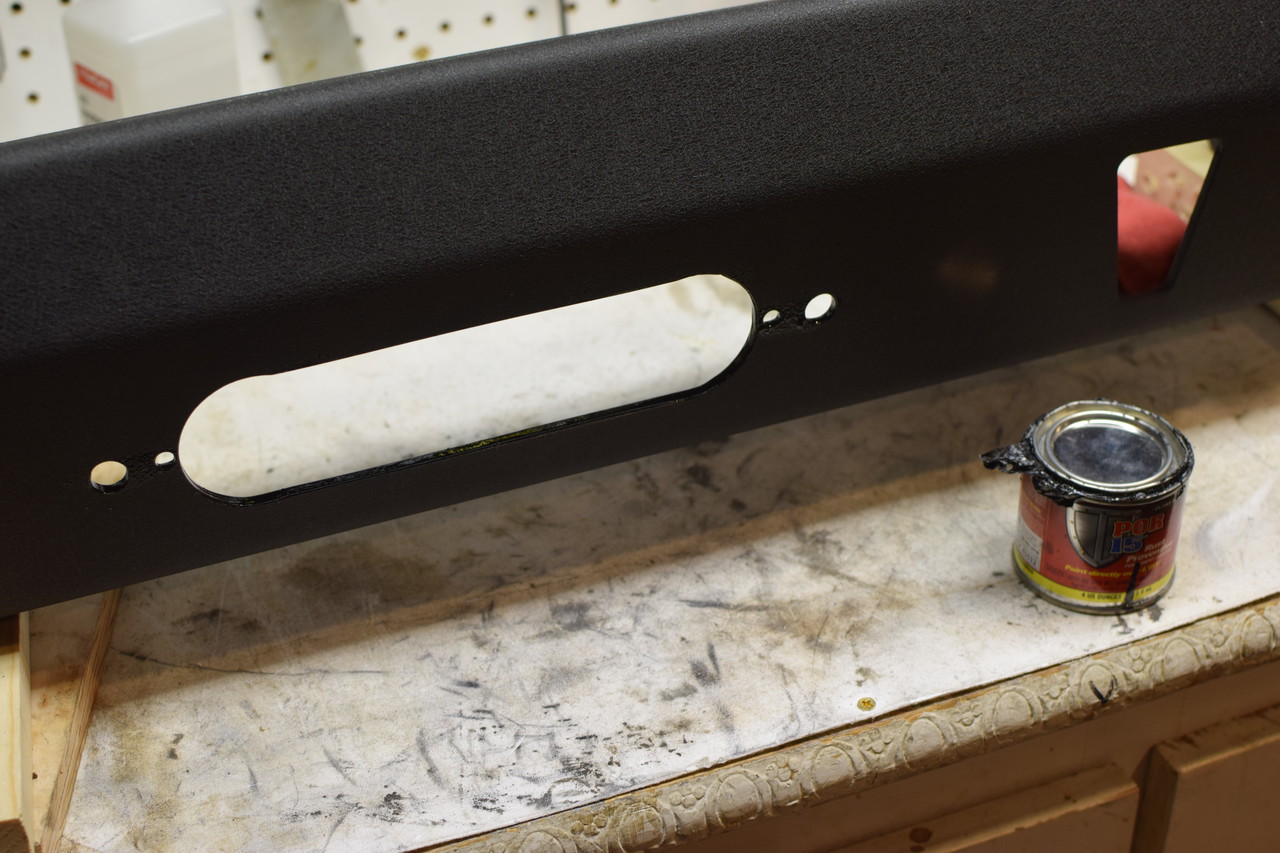
With the fairlead in place, I could now address two things - drilling for what I think are anti-theft bolts that insert from the rear, and then cutting the opening for the rope. The anti-theft bolts are inset inside the main bolt holes, and are inline with the center line. They can be carefully measured and then drilled. If they are off a tiny bit it doesn’t really matter if you’ve drilled them a little oversized.
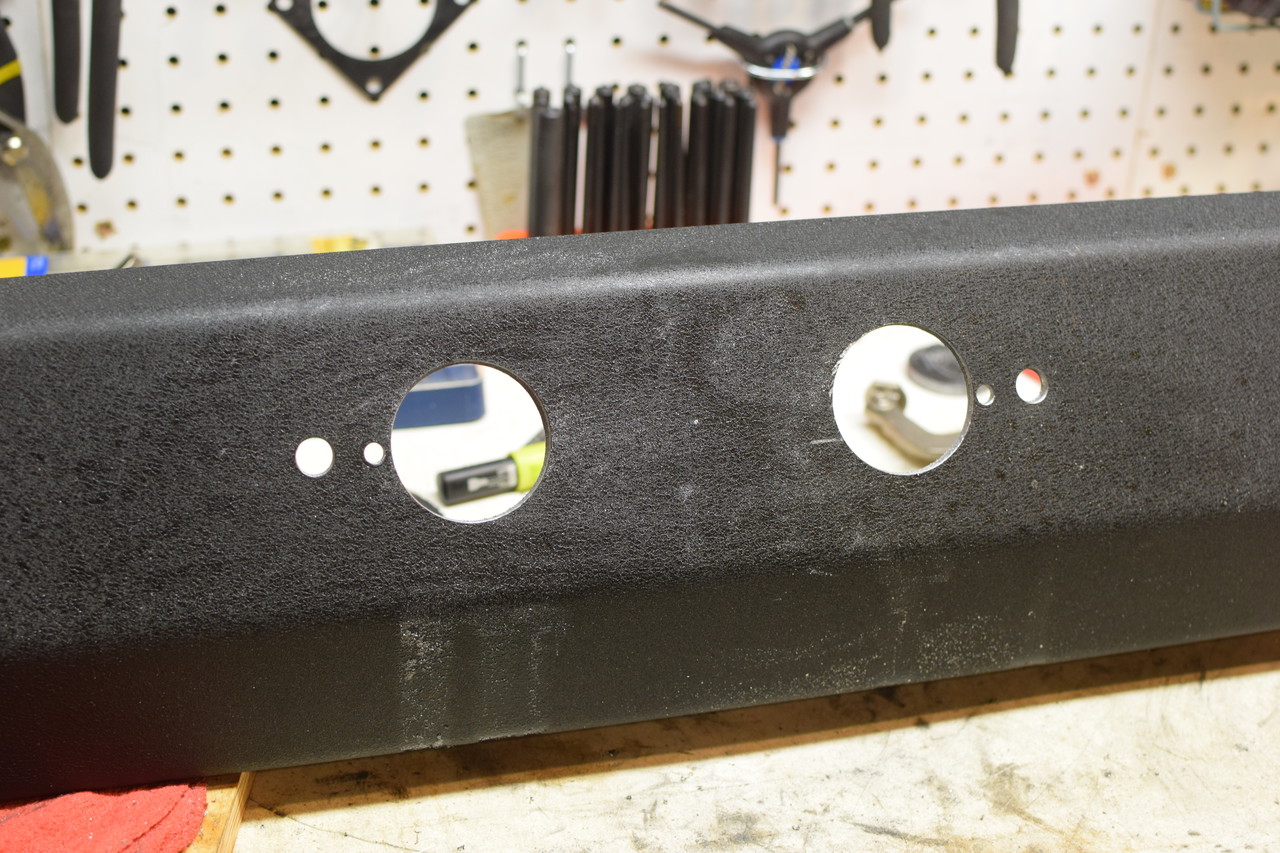
The hole for the fairlead was first cut with a 2-¼ hole saw. I then drew lines between the edges with my trusty silver Sharpie and then cut the bumper with the same cut off wheel.
With the cuts made, it was time to clean up the edges with a file and deburring tool and then painting. These areas are completely hidden, and so I used POR15.
During final fitting of the bumper, I did find that I had to shave down the plastic inner fairlead to make some clearance for the bumper. I took about ⅛inch off of the back of it. The plastic material works well with woodworking tools and a simple block plane made it thinner and sandpaper set flat on my workbench made it flat.
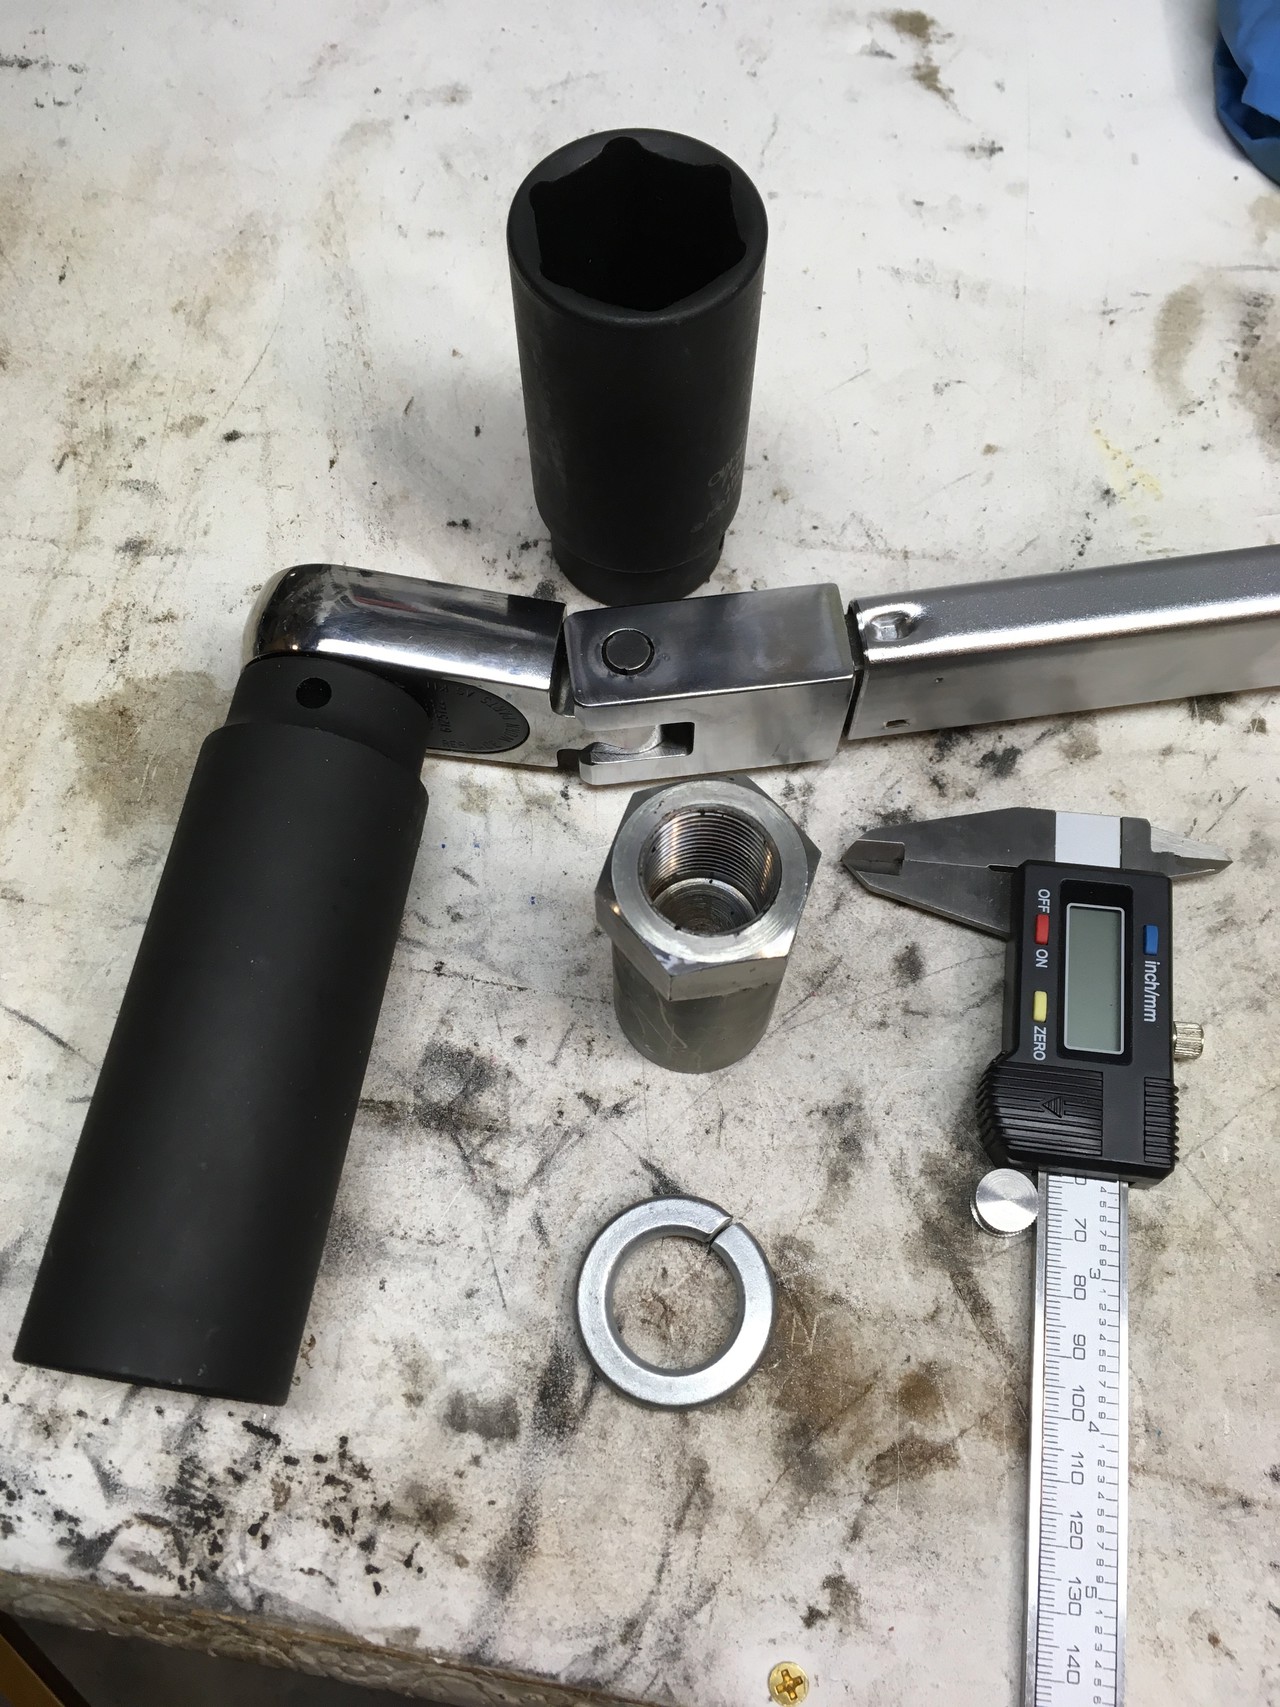
Sector Shaft Nut Installation
Update: Boostwerks is now making their own tool to handle the problem described below. The kit now includes a tool made out of ¼” plate that allows for a ½” torque wrench to tighten down the sector nuts. You won’t have the hassle I had of altering a socket!
With that buttoned up, it was time to move on to one last task. The Boostwerks Comp Mount incorporates a steering brace. It’s a stout design and it puts a burly pillow bearing onto the end of the Pitman Arm to prevent the arm from being able to wag around in open space. The design replaces the sector shaft nut with a longer sleeve that engages the new bearing. In the photo below you can see this new sleeve installed.

In order to torque the sector shaft nut to spec, I needed an extra deep throat
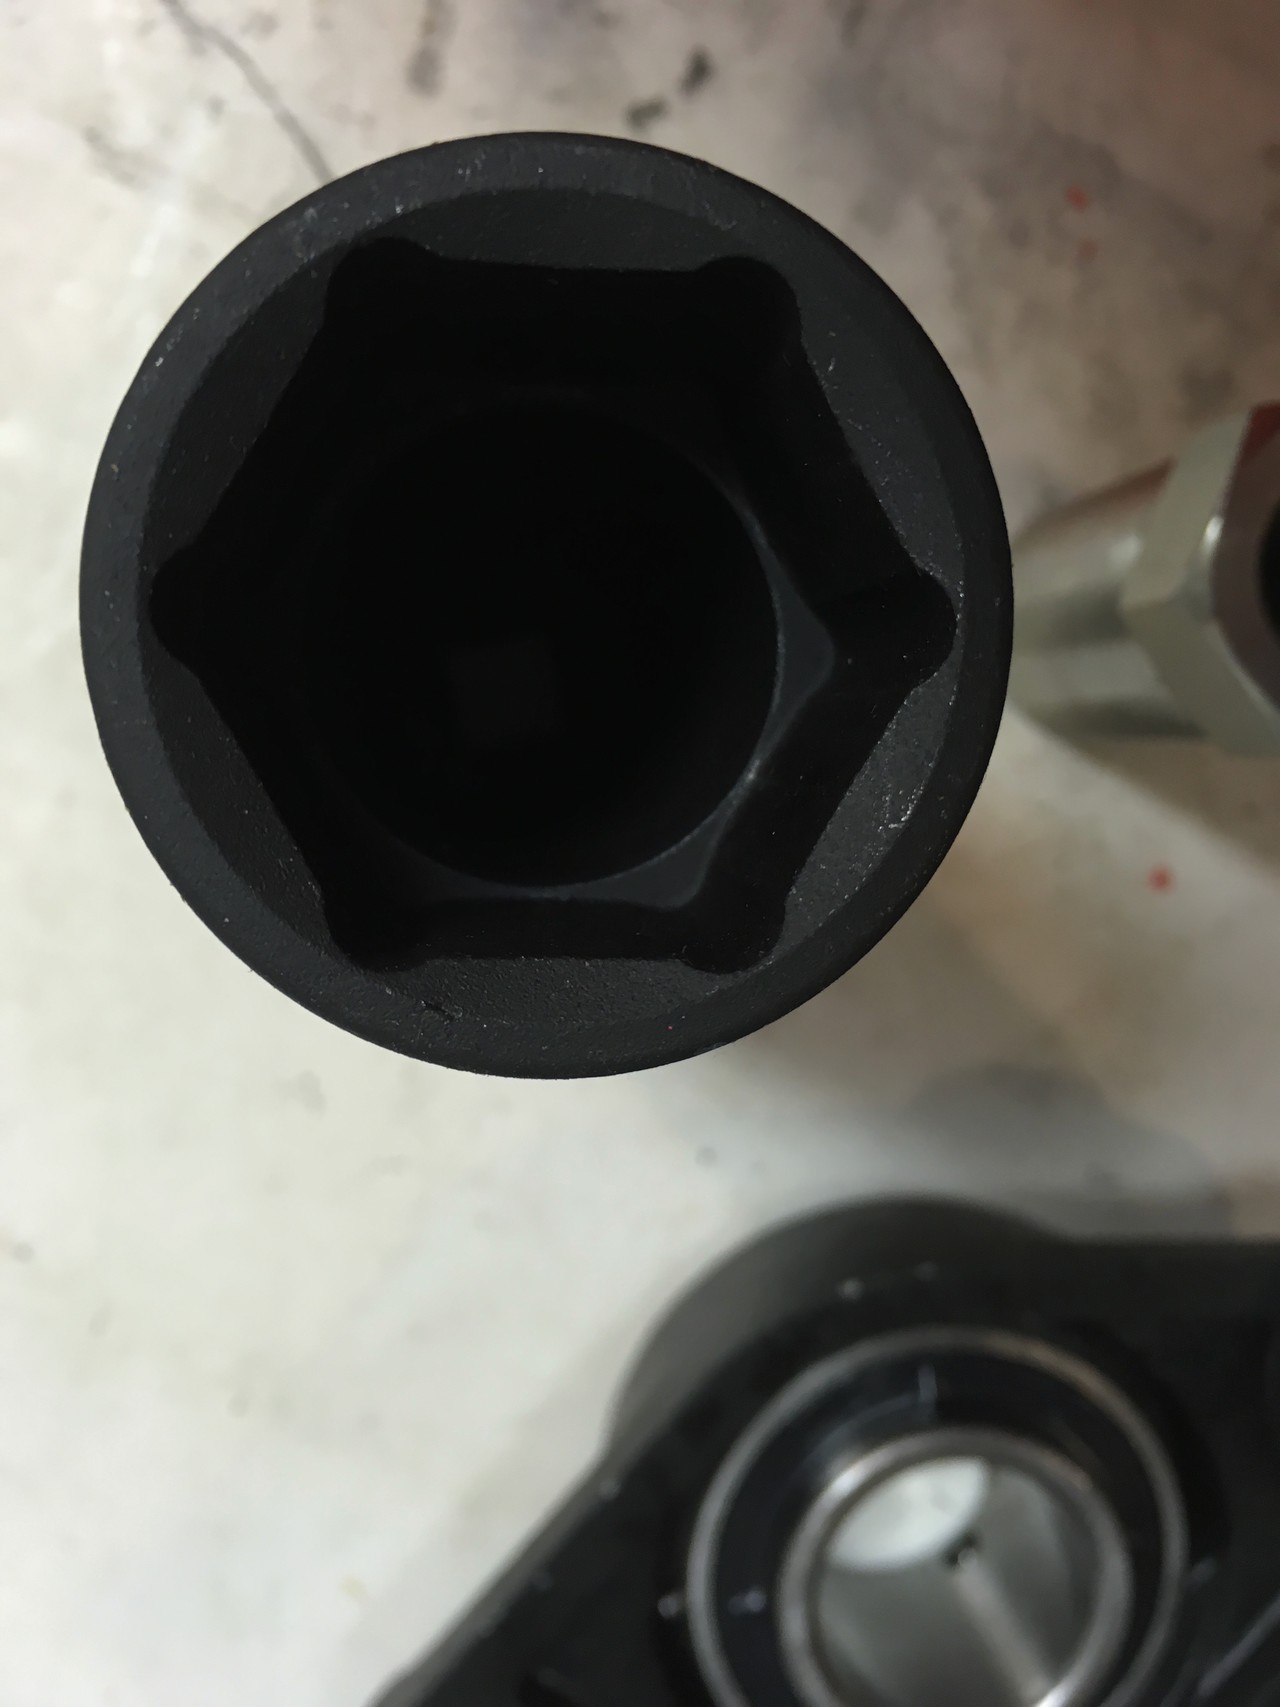
With my newly machined socket, I was able to torque the nut to the correct 180ft/lbs.
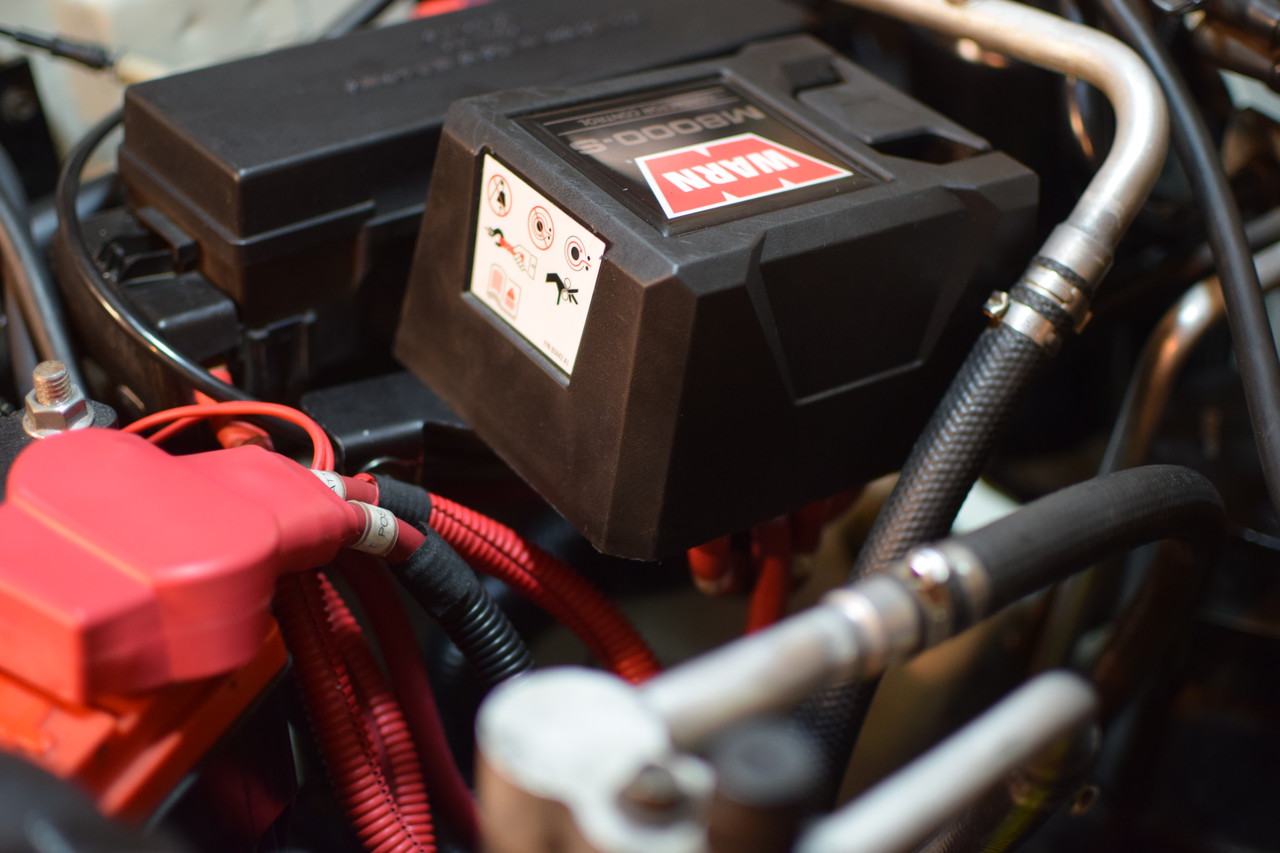
Winch Power Cables
Jeep Cables made a beautiful set of custom cables for me. He even labeled each one with custom made labels. With the winch mounted below and the contactor box mounted under the hood, you’ll need a custom set of cables.

After mounting my winch in the cradle and the contactor under the hood on the Boostwerks Solenoid Mount, I was able to measure for my new cables. I ordered a full set of cables. They all had 5/8 lug with 5/16 hole.
| Cable | Length |
|---|---|
| F1 | 42 inches |
| F2 | 42 inches |
| A | 42 inches |
| Ground | 52 inches |
| Winch Positive | 18 inches |
With the wires in place, it was almost time to try this thing out!
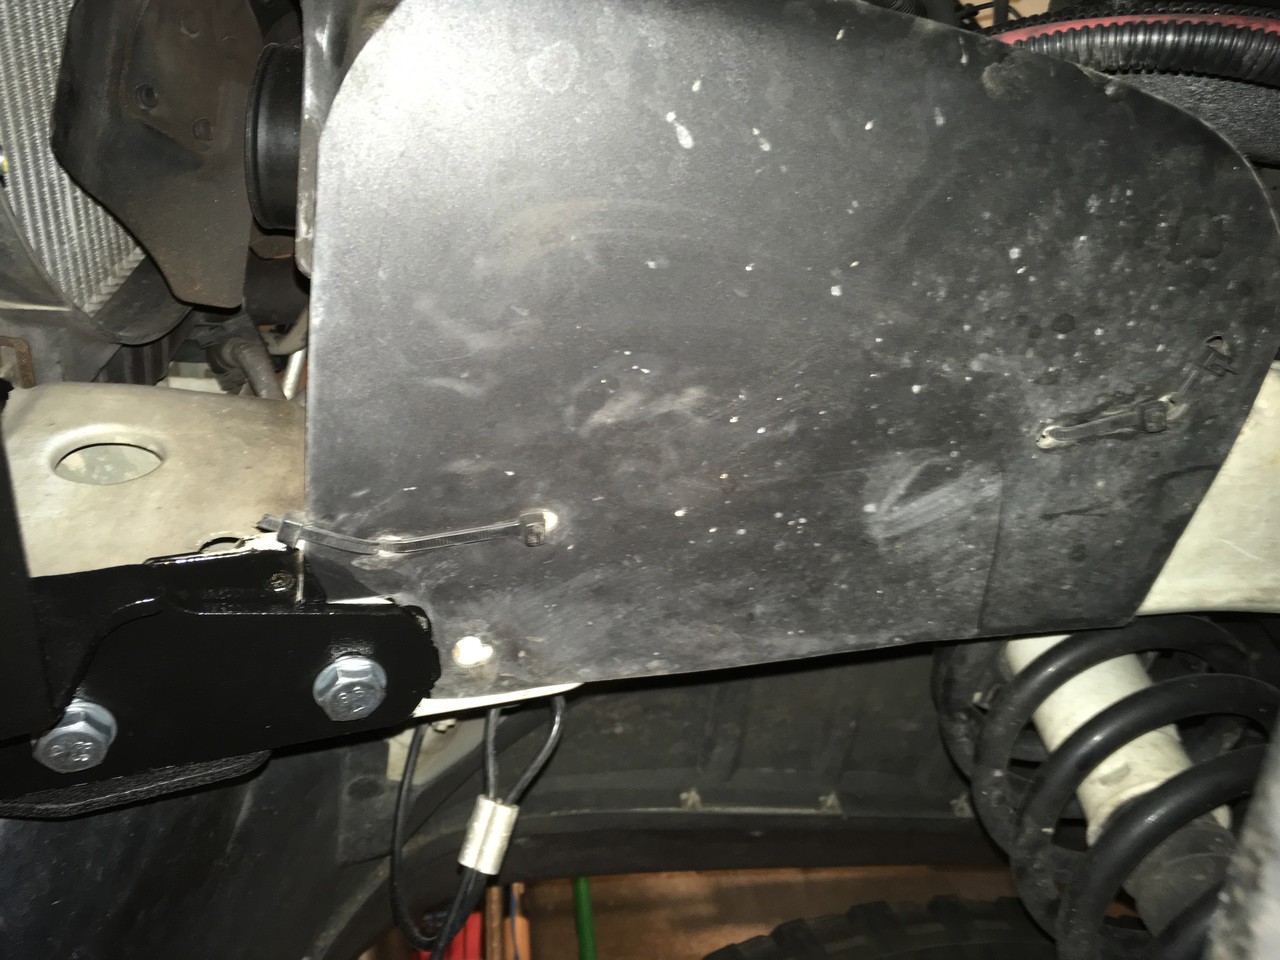
Alternator Shield
For what it’s worth, I used plastic from a cheap black plastic garbage can to make a splash shield for my alternator.
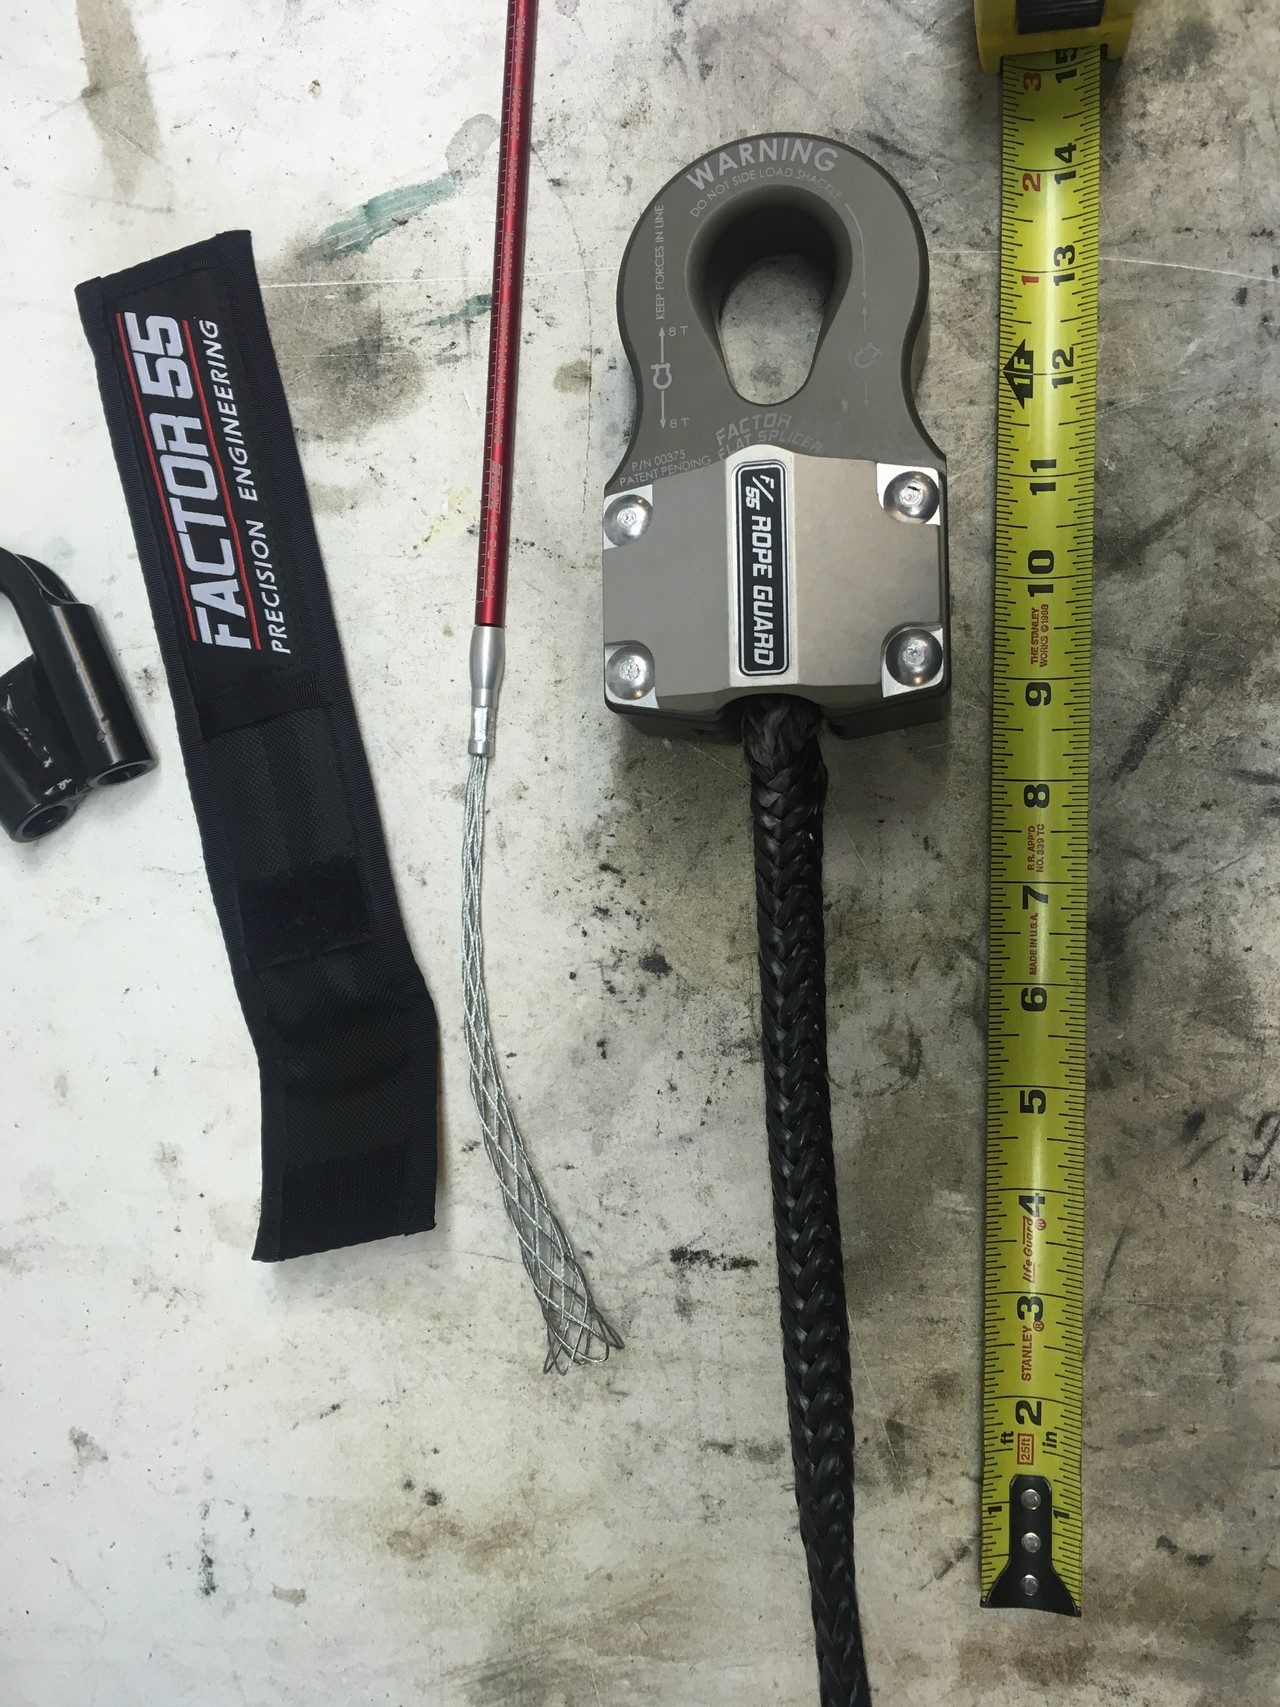
Winch Rope Guard
After the winch was installed one last time, I was finally able to splice the thimble onto my rope. I used the Fast Fid, and it couldn’t have been any easier. They’ve got a great video on both repairs and splicing.
With the splice done, it was time to wind the winch and go wheeling.
Winch Clocking for Freespool
I currently have my freespool selector pointed upwards at an angle. I had the intention of cutting a hole in my front bumper to allow easy access to it. After getting everything installed, I decided I didn’t want that. For the moment, I just power-out the rope. The next time the Jeep is up on stands, I’m going to clock the selector downwards so that I can get to it from below if I want to. It’ll mean a small hole in the bottom of the mount, and I’m ok with that.
Overflow Bottle Relocation
I’m still sorting out where to locate my coolant overflow bottle. The winch contactor took the location of the stock tank, and so at the moment I’m using a Dorman universal tank located in the space in front of my brake booster. I built a custom bracket for it, and while it’s worked well, I’m not sure it’s the best solution. I’ll write a follow up post once I’ve decided on this.
If you’ve got questions about any of this, please feel free to send me an email.