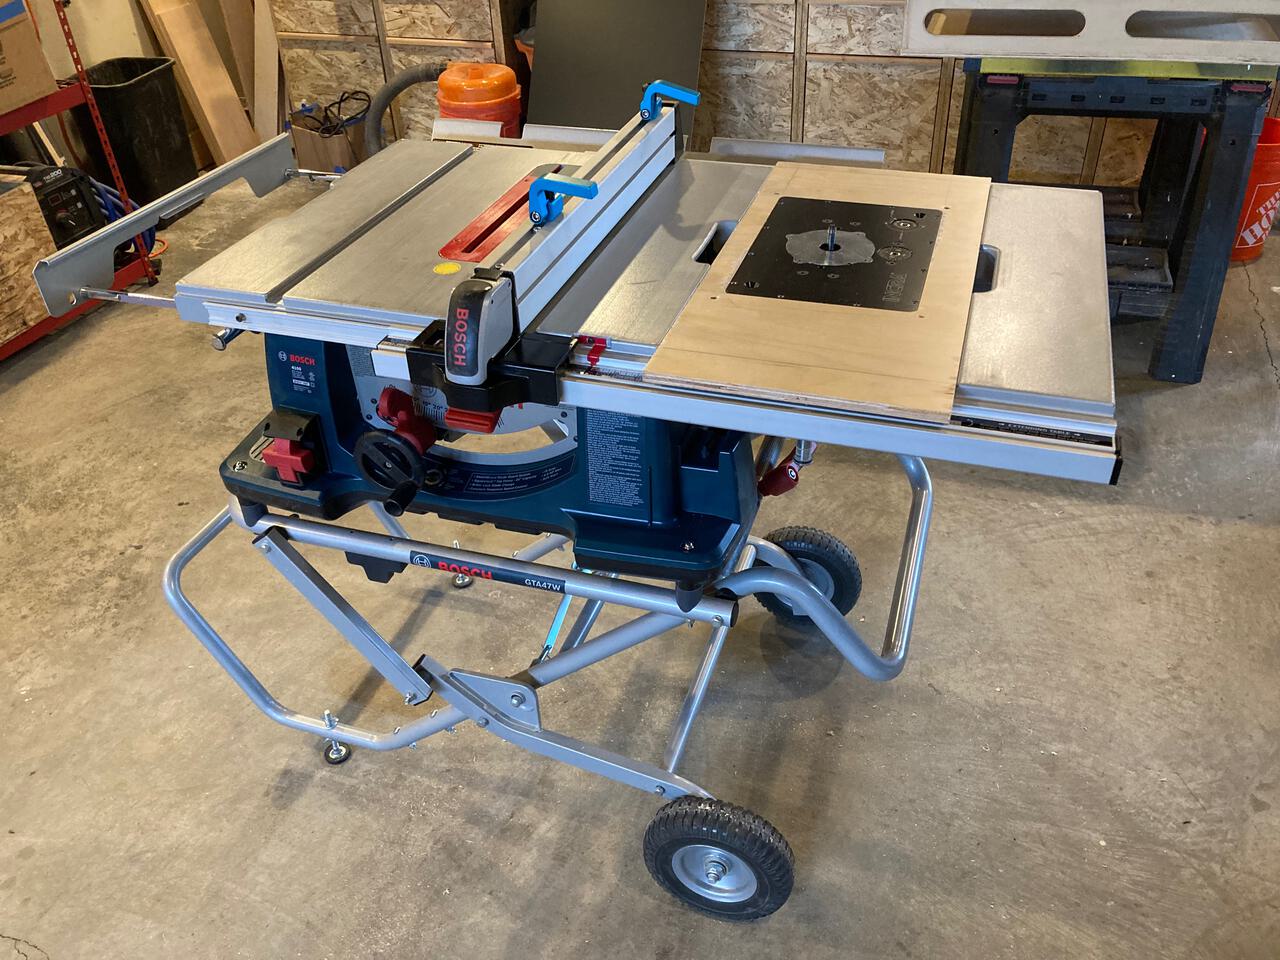
I built a router table insert for my Bosch contractor table saw. When this table saw is in its wide configuration, there’s room for a small router lift. Built properly, you retain full use of the table saw fence.
TLDR;
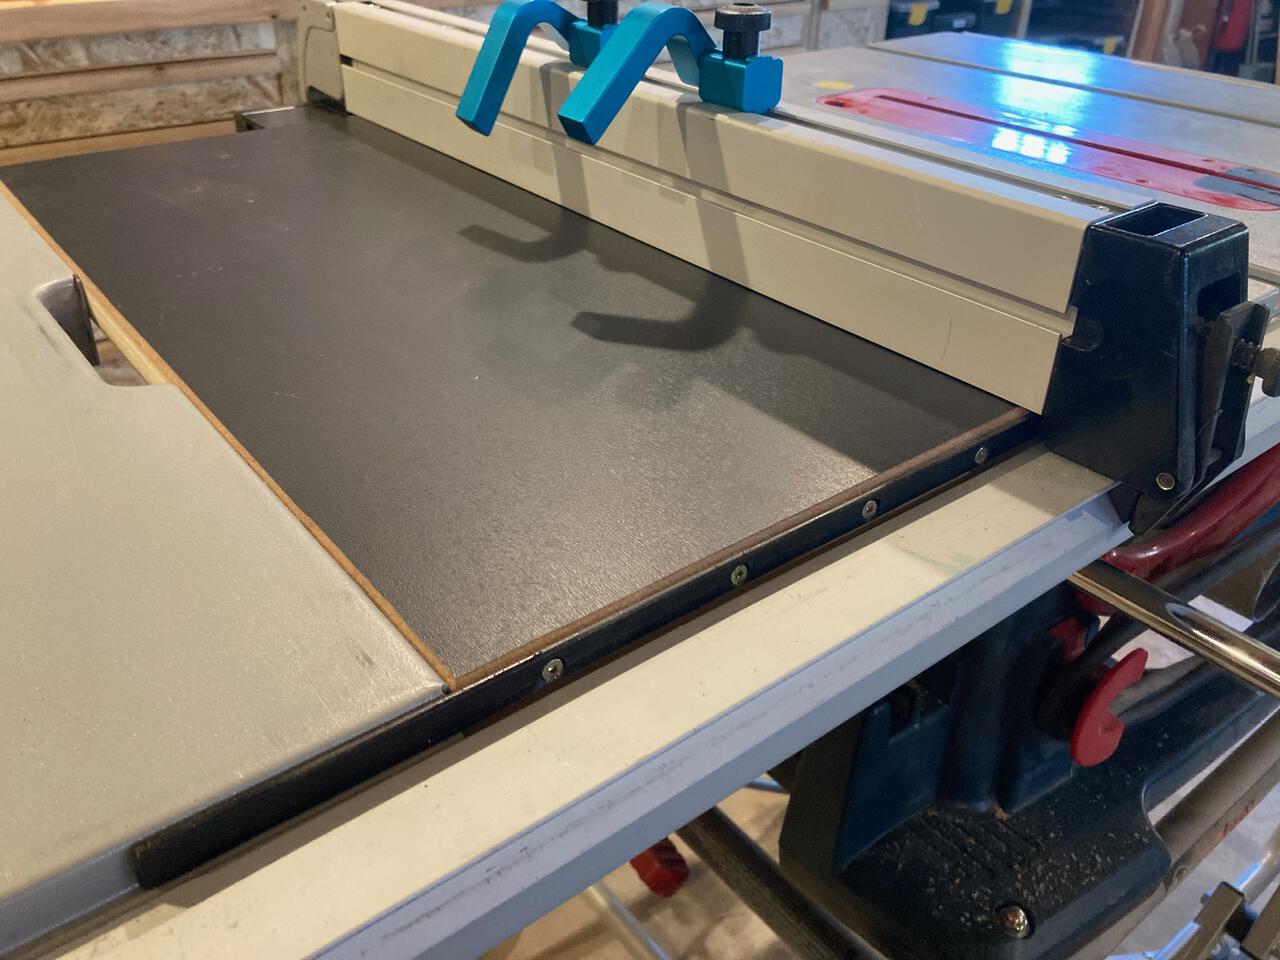
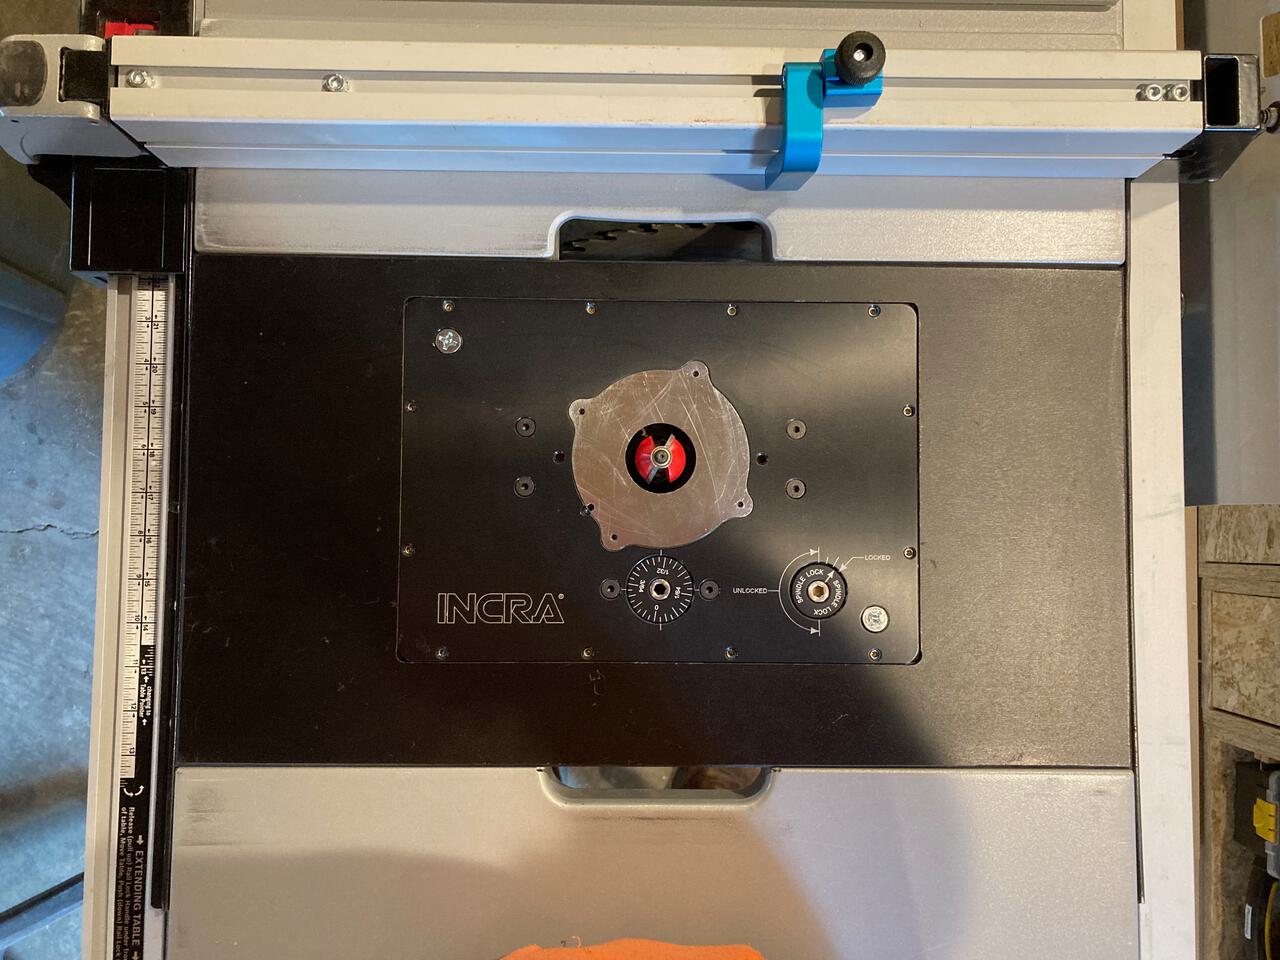
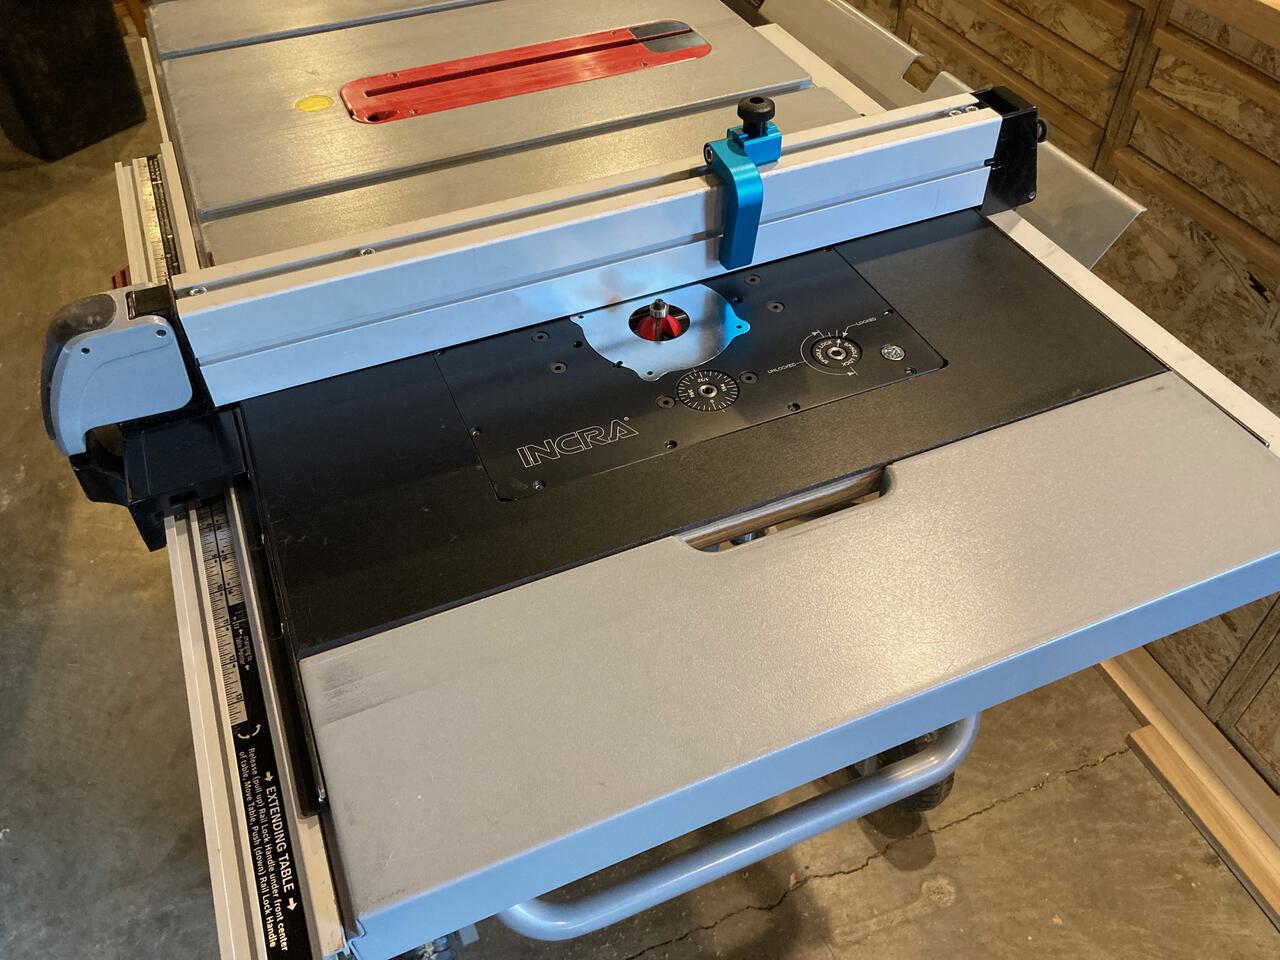 Here’s the finished router table insert.
Background
I’d been thinking about this for a while, and I searched the internet. This isn’t a new idea.
- Julian Tracy built router table with a fence extension.
- This Lumberjocks forum post has more discussion.
- Commercially available unit for the European version of this saw.
- Andreas Kalt builds a nice version of this on YouTube, it’s worth watching!
My first version
My first version of this router table was ¾” plywood that rested across the fence rails. This worked great, but it didn’t allow me to use the fence with the router lift. The plywood also wasn’t very slick.
The plan
Disclaimer: I am not a professional. This is for informational purposes only. Please be careful with power tools. If you store the saw with the router in place, it’s a little tippy and could fall out if you don’t put the fence over it. Use your own judgement if you choose to build something similar.
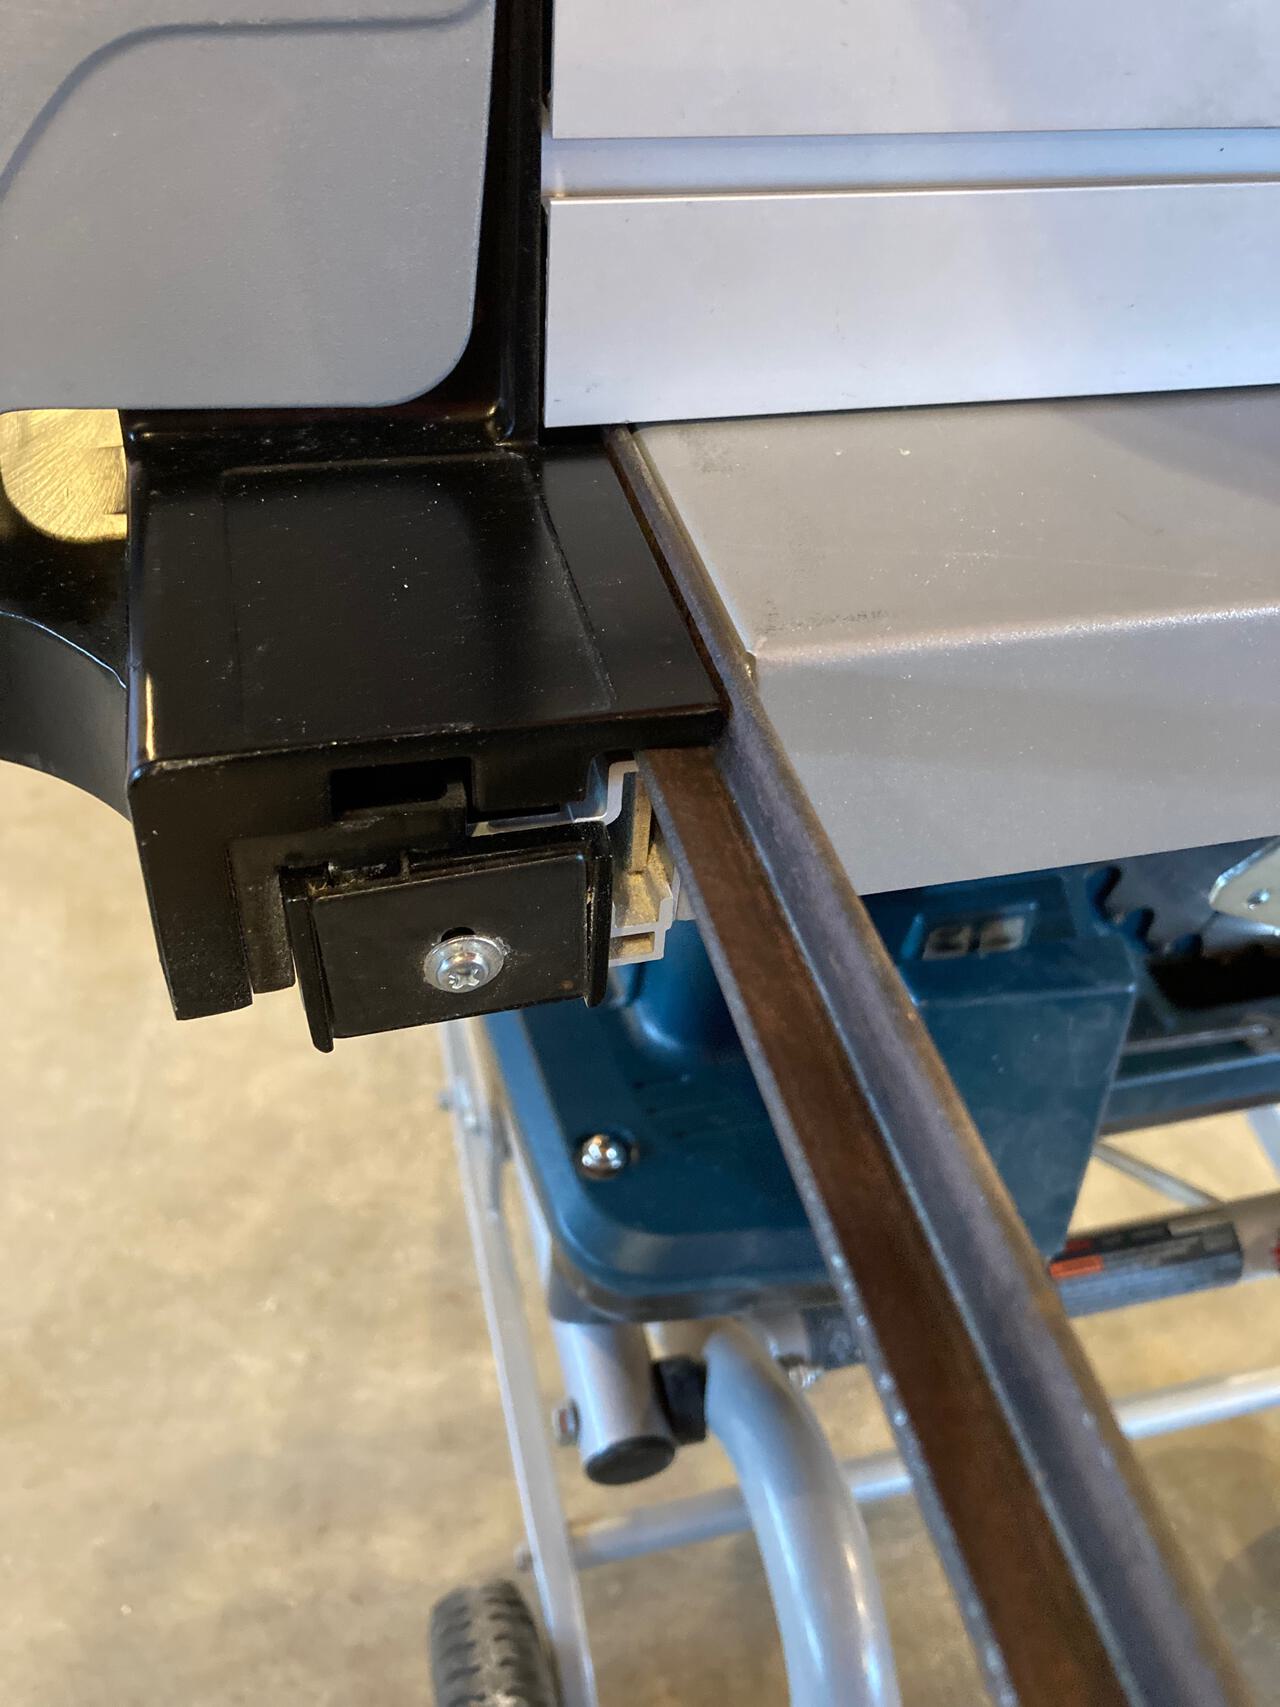
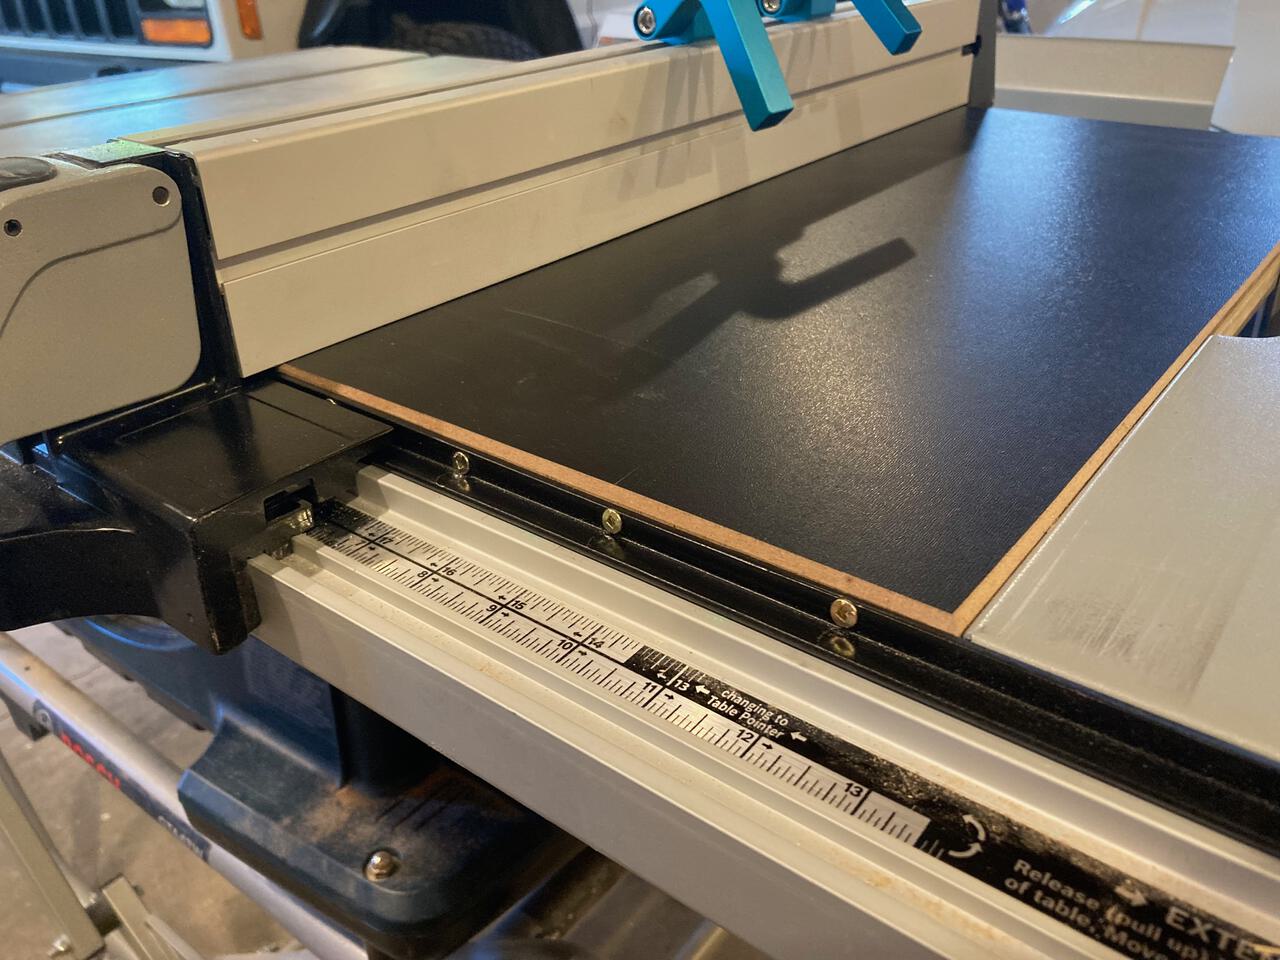
The router lift itself then needs to be the same width as the table saw tabletop. This will allow the fence to slide past it. But, we need to support this router table somehow. We could add some pins or support from below, but these could interfere with closing the saw. Instead, we’ll add steel angle iron supports to the sides of the router table. We’ll need to make some bars and pre-drill some holes.

In the photo above, you can see enough room under the fence to place some angle iron.
I’ll include some Amazon affiliate links below. Purchasing any of these items does help fund my hobbies and these posts. These are all items that I’ve purchased and used - there’s no sponsorships here.
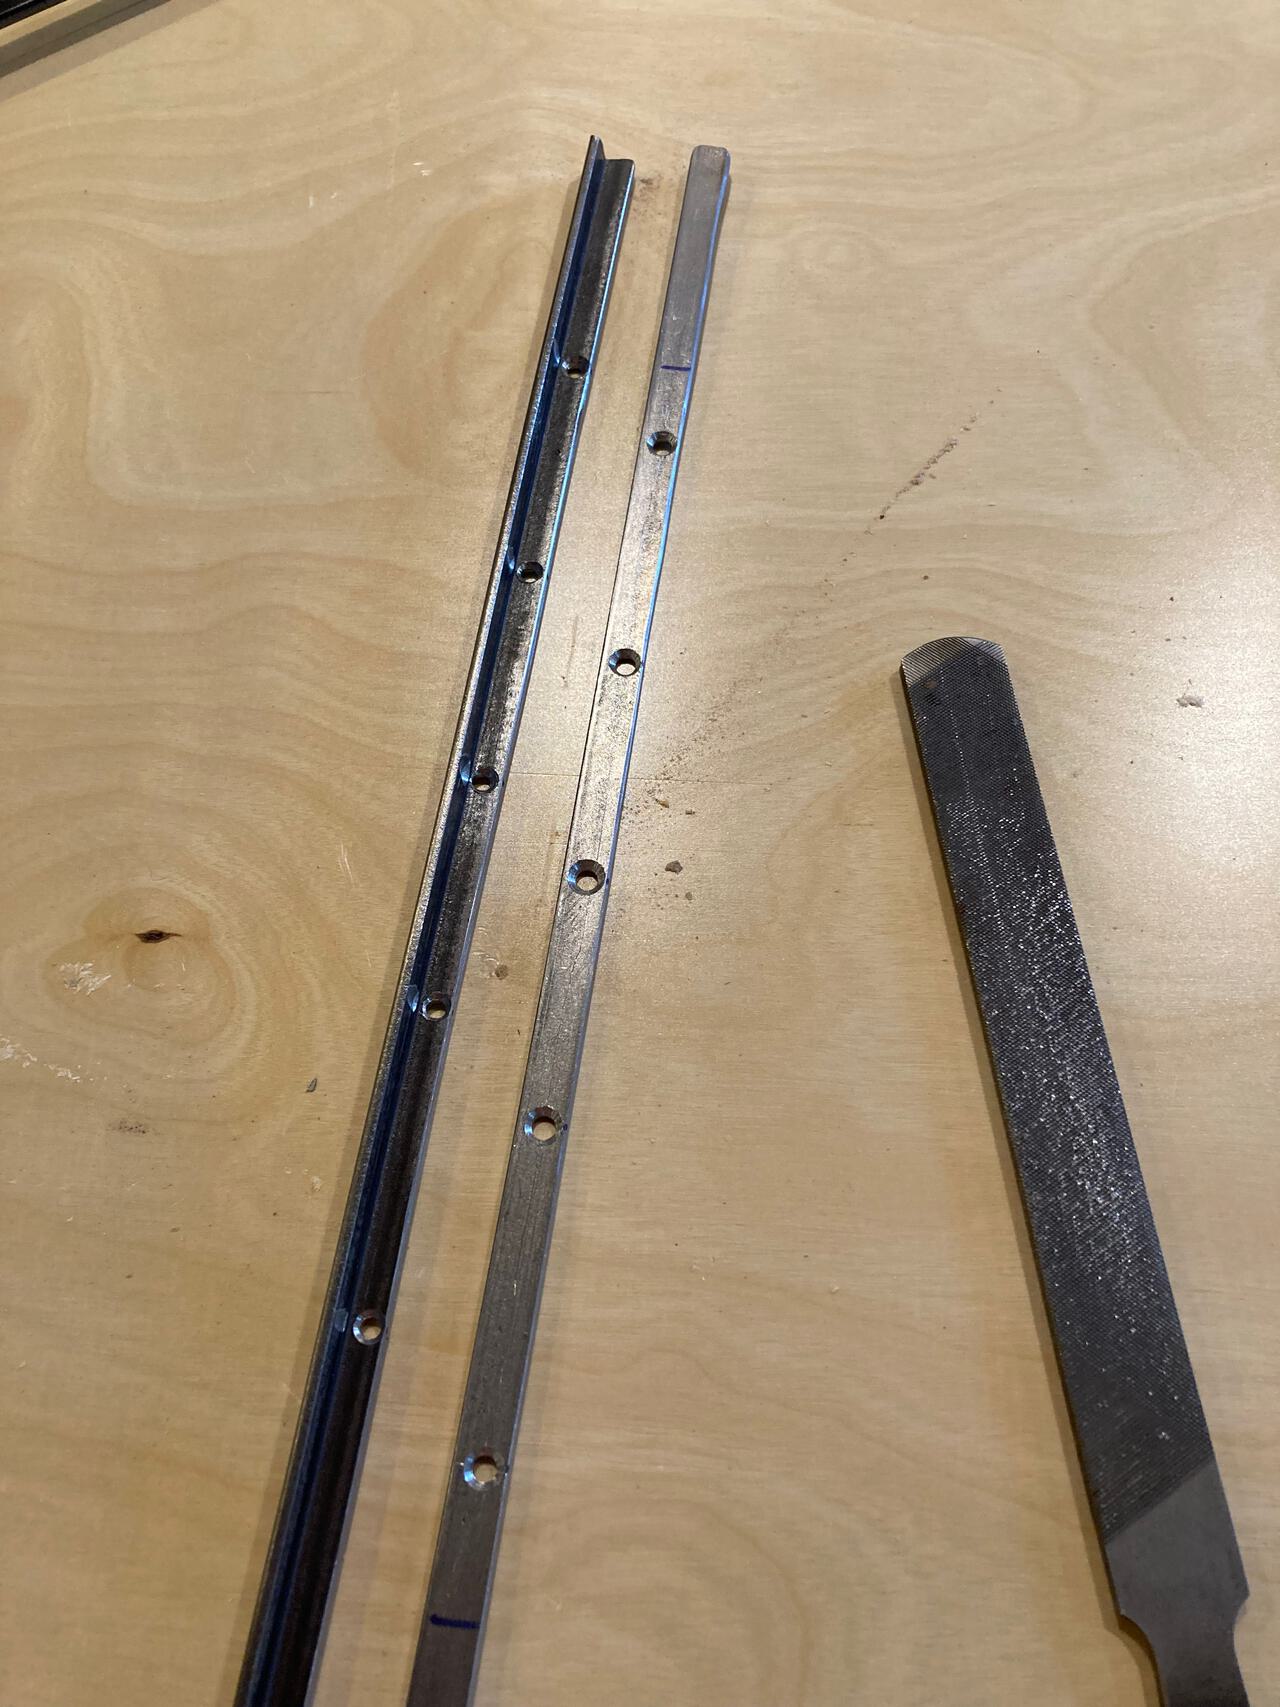
Preparing the angle iron supports
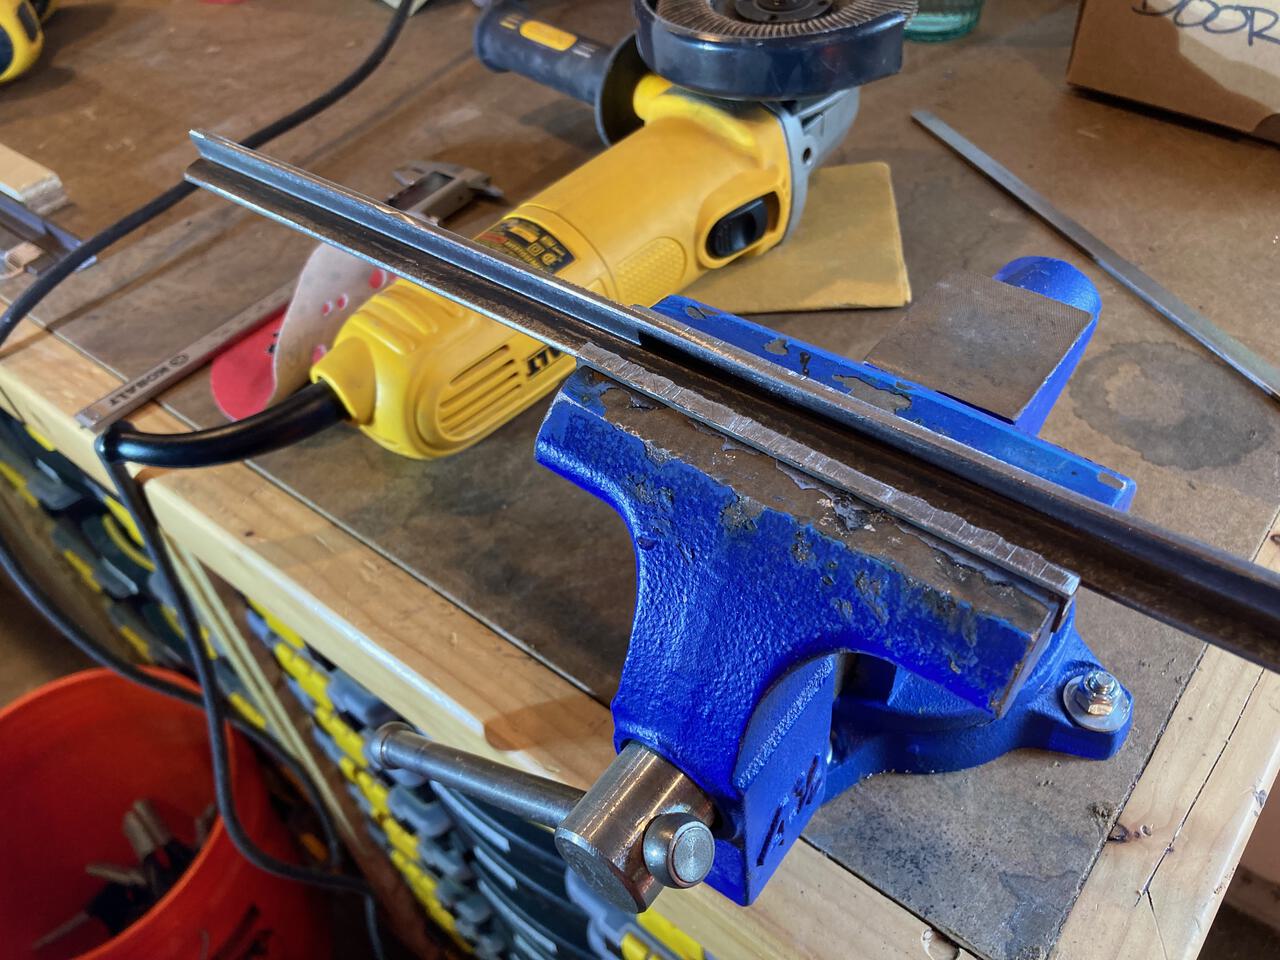
Here’s some ½” angle iron underneath the fence. There is enough room on the near side of the fence for angle iron, but the far side will need flat bar.

Both the angle iron and the flat bar are just a little too tall. They both protrude above the top of the table. I used a grinder top thin one side of the angle iron and the width of the flat bar. I’ve started using these flap discs from Pferd and they are quite good.
After grinding, I drilled out some evenly spaced holes and countersunk each so that the fence would still clear the bars. I gave it a quick scrub with a Scotch-Brite disc, wiped with acetone and gave it a coat of black spray paint.
Preparing the table top
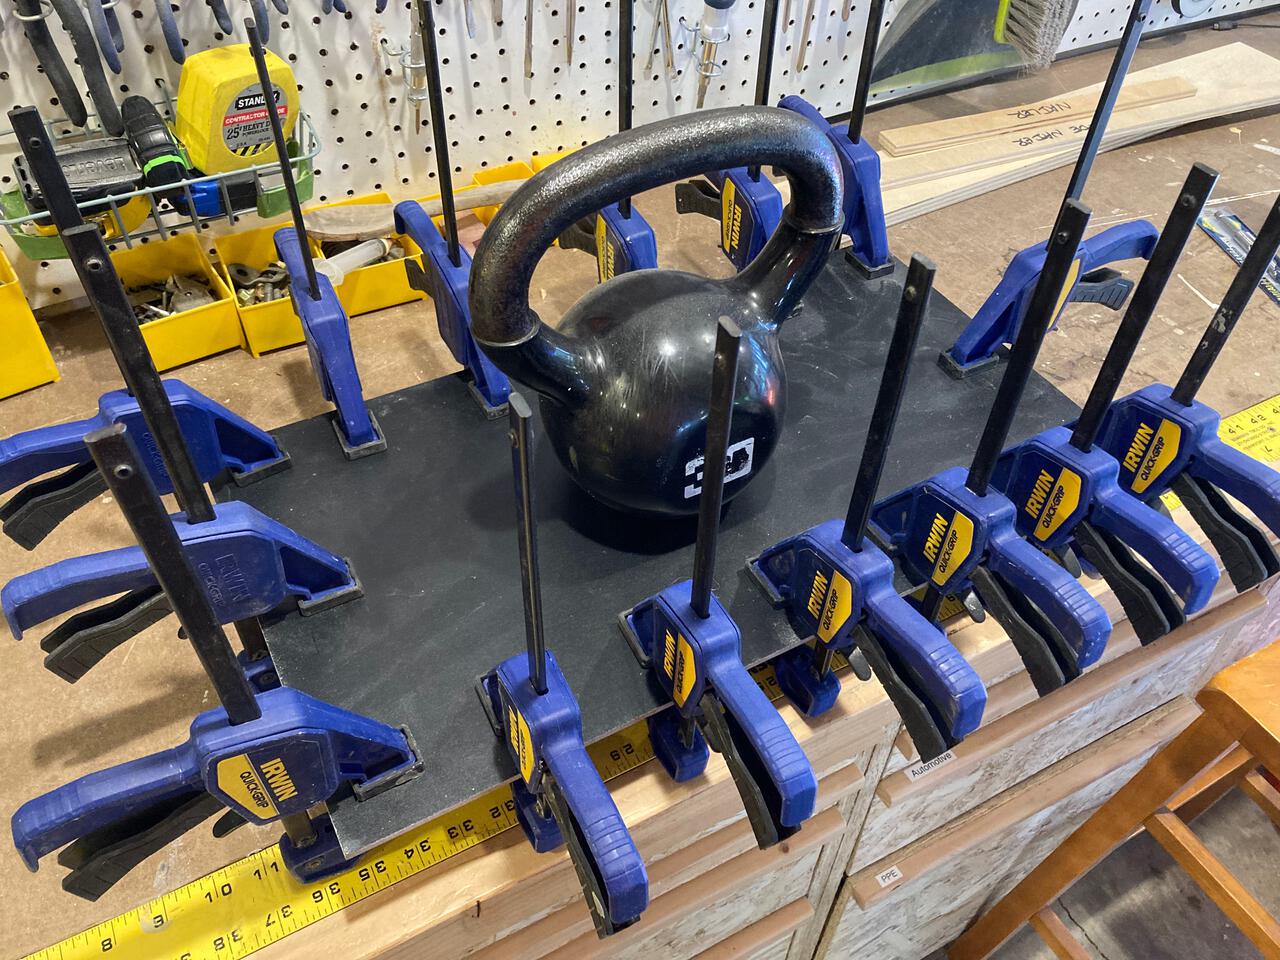
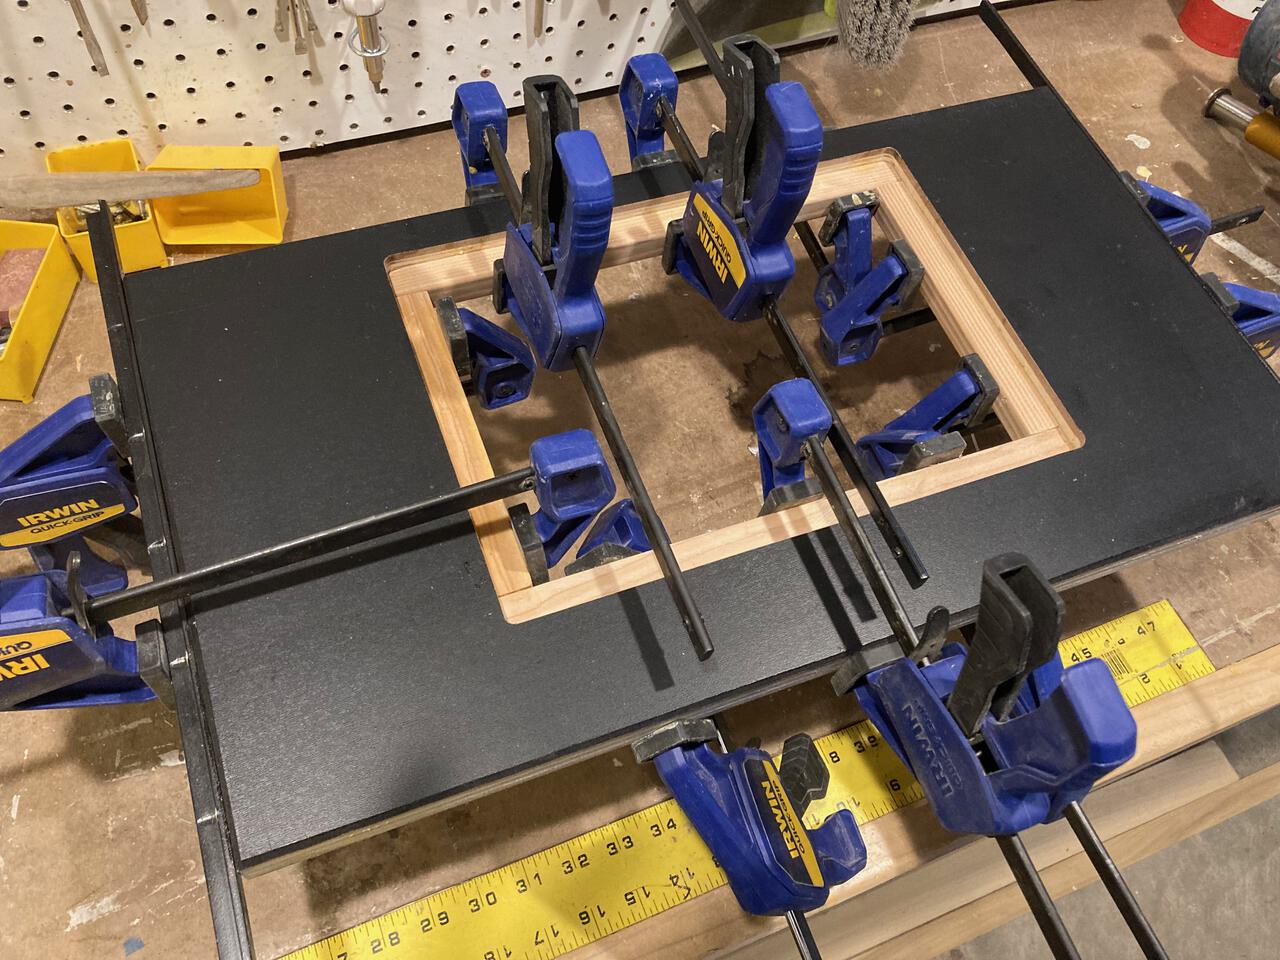
For the table table, I used some 18mm pre-finished plywood and laminated a 1/8” coated hardboard to it. One day at the local wood supply, they had a sign on a pallet of hardboard with a black plastic coating. I’m not really sure what it’s meant for, but I brought a few sheets home with me. I’ve been using it for all sorts of little projects.
Here’s a photo of laminating the hardboard to the plywood. You can never have too many clamps.
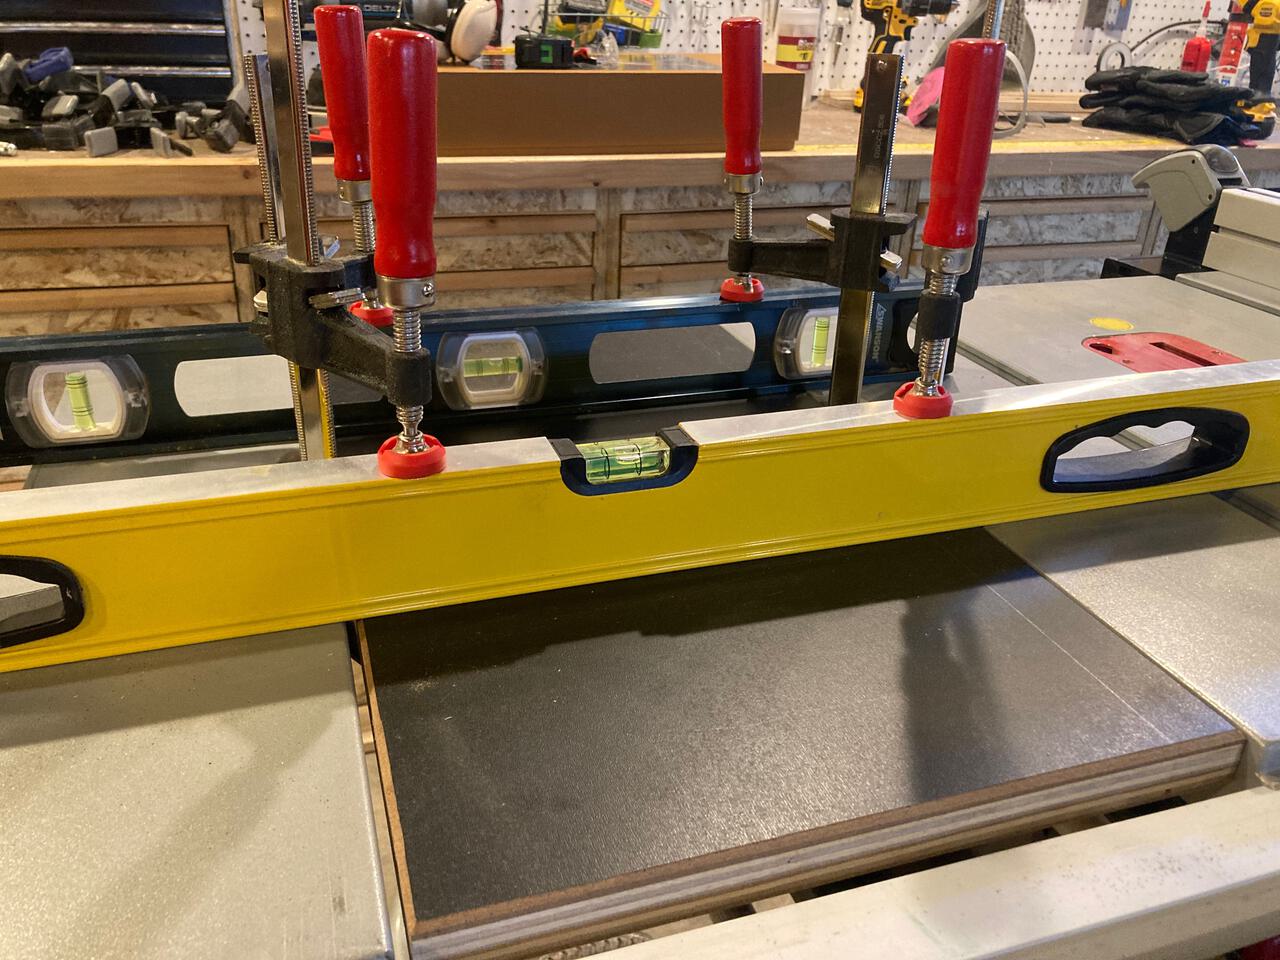
This next step is a bit of a trick. In order to get the router top perfectly flush with the top of the table saw, I first clamped the router table to a couple of levels. I then clamped the levels down to the table top. This made sure that the router table was flush with the top.
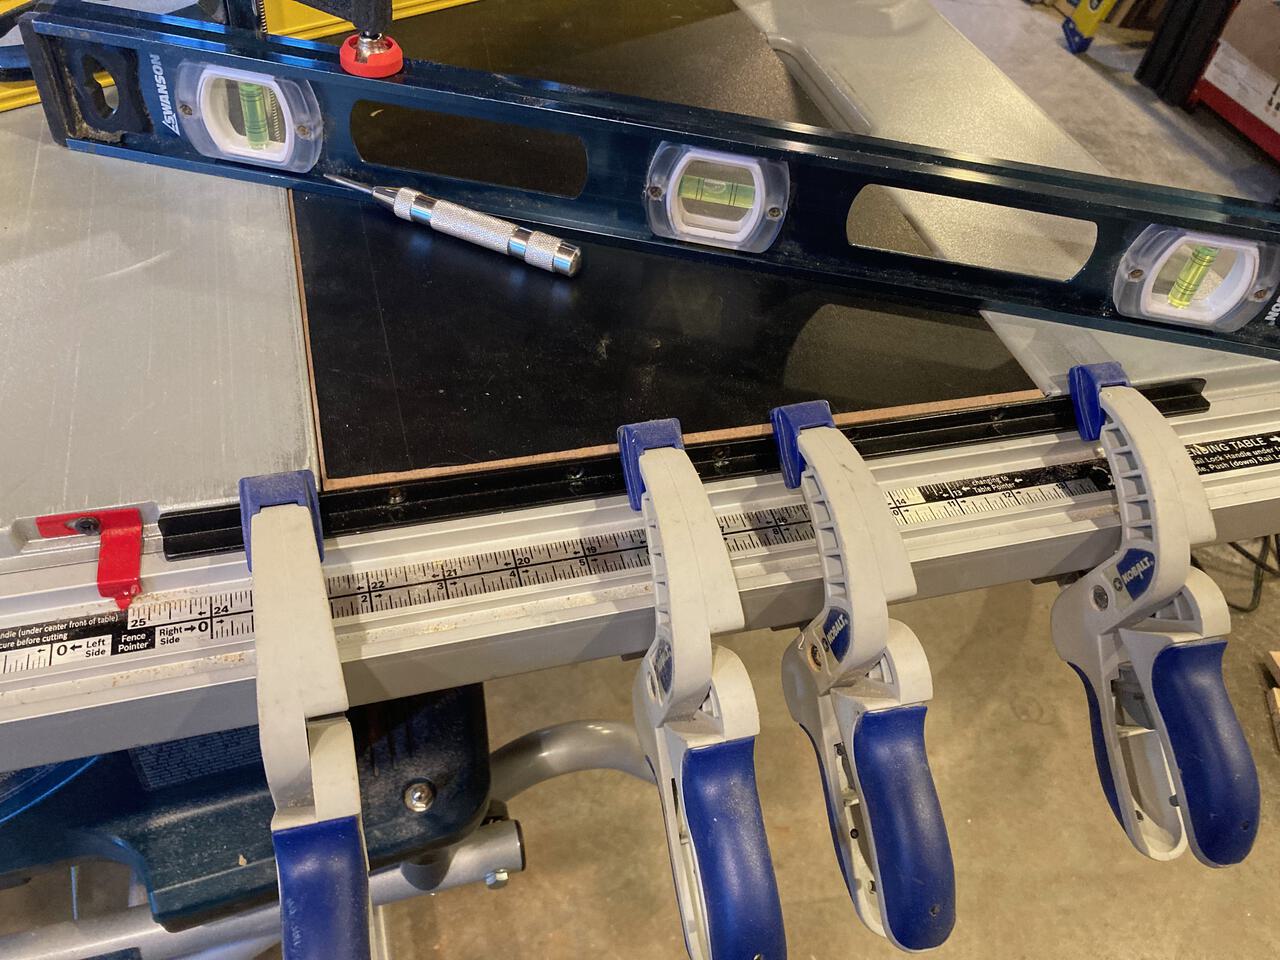
With the table top held flush, we can center punch for our rails to make sure we don’t drift when we predrill for our screws.
The far side rail was actually a little easier - the heads of the screws didn’t interfere with the bottom leg of the angle iron.
I didn’t countersink the near side quite as much as I wanted to. Because the screws that I had on hand had a larger head, I had to move the holes up a little bit for clearance. If I’d countersunk more I’d have made a very thin web at the top of the holes.
Adding the router lift
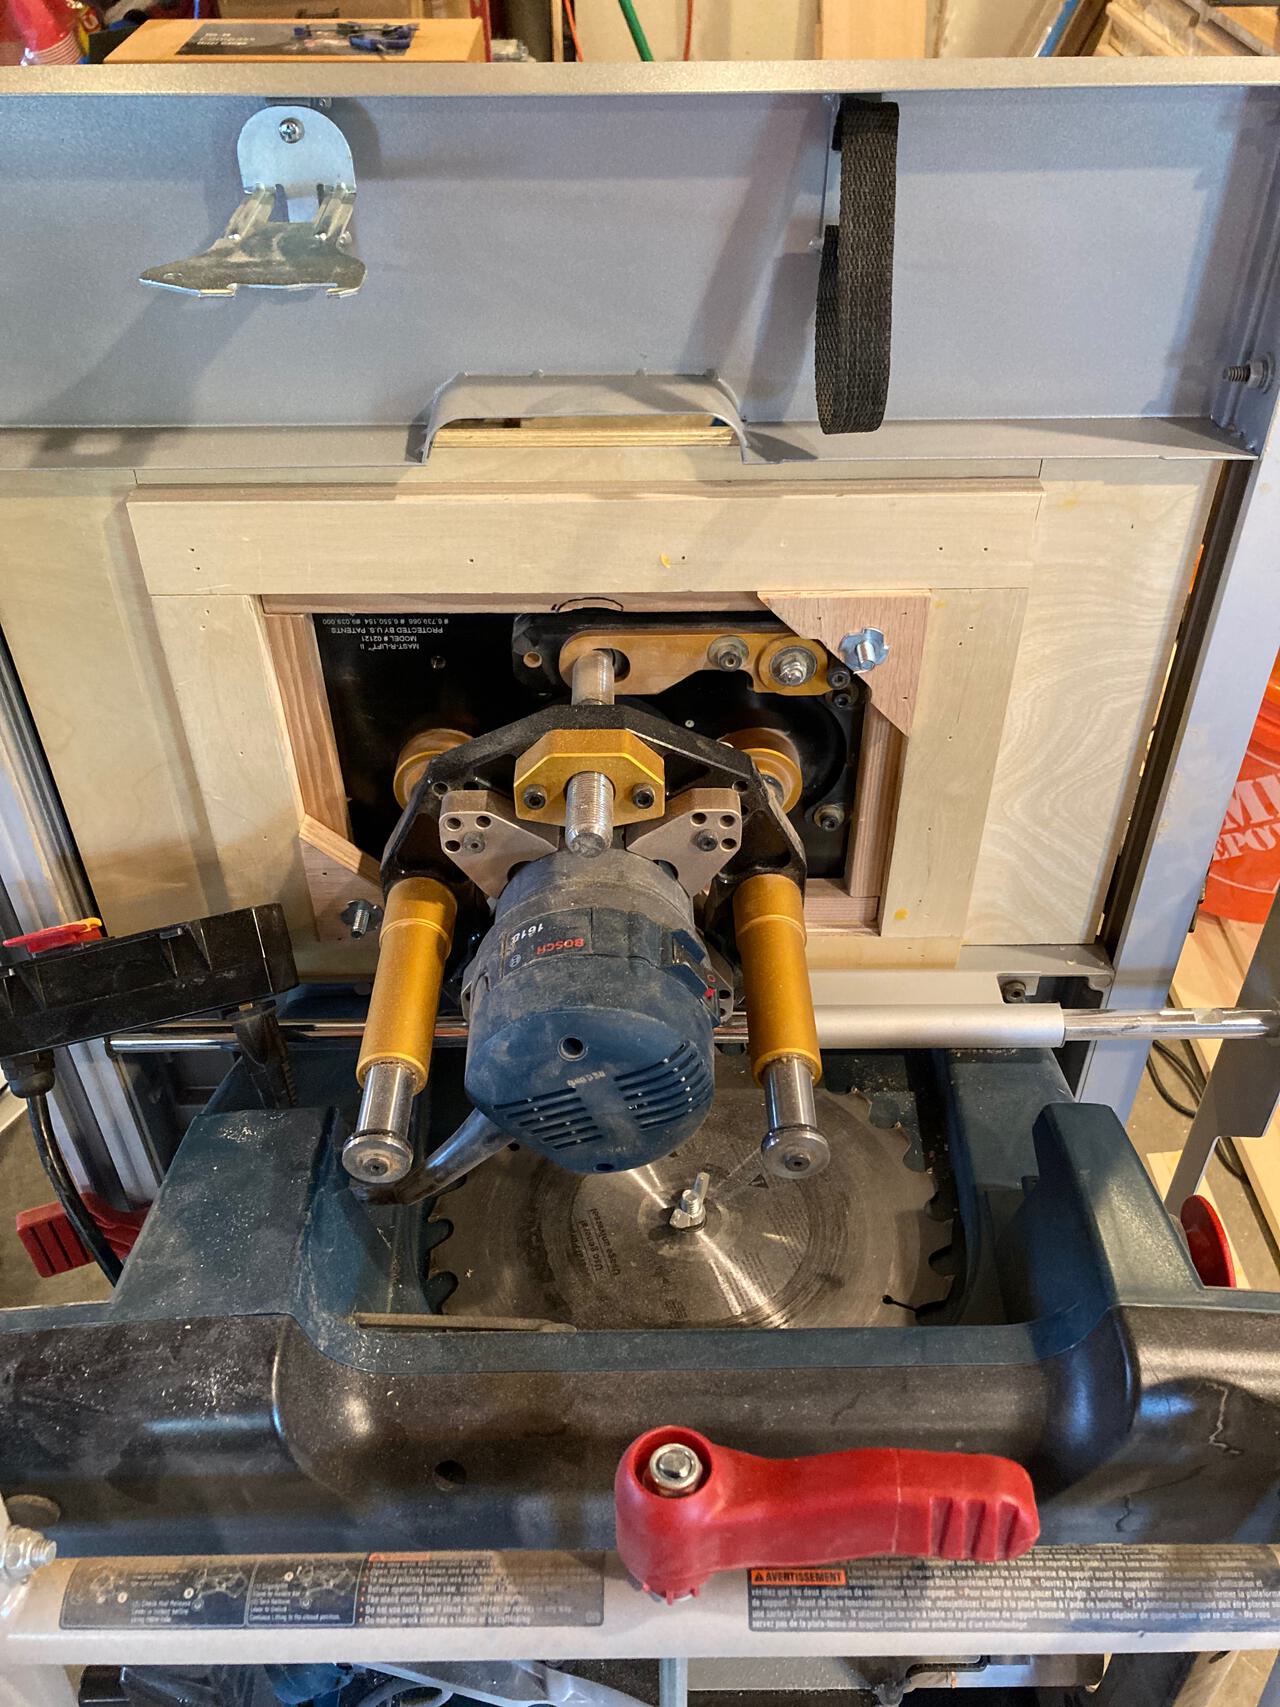
Here you can see the underside of my prototype router table and my Bosch 1618 router. It’s a really great router for this application. It’s compact with great torque. It has very little vibration and I’ve got both a ½ and ¼ Collet for it. Sadly, it’s no longer made. If you can find a used one, I’ve seen some rebuilt kits available. The new version appears to be a Bosch MRP23EVS. I haven’t used one, but I suspect it’s quite good.
For my router lift, I chose an Incra router lift. This seemed like a buy-once, cry-once item. I can’t find anything to complain about. The magnalock inserts are nice - I’ve never had any problems and they work better than the twist inserts on others. It’s worth getting Collet wrenches with offset heads so that you don’t have to raise and lower the router as much to change bits.
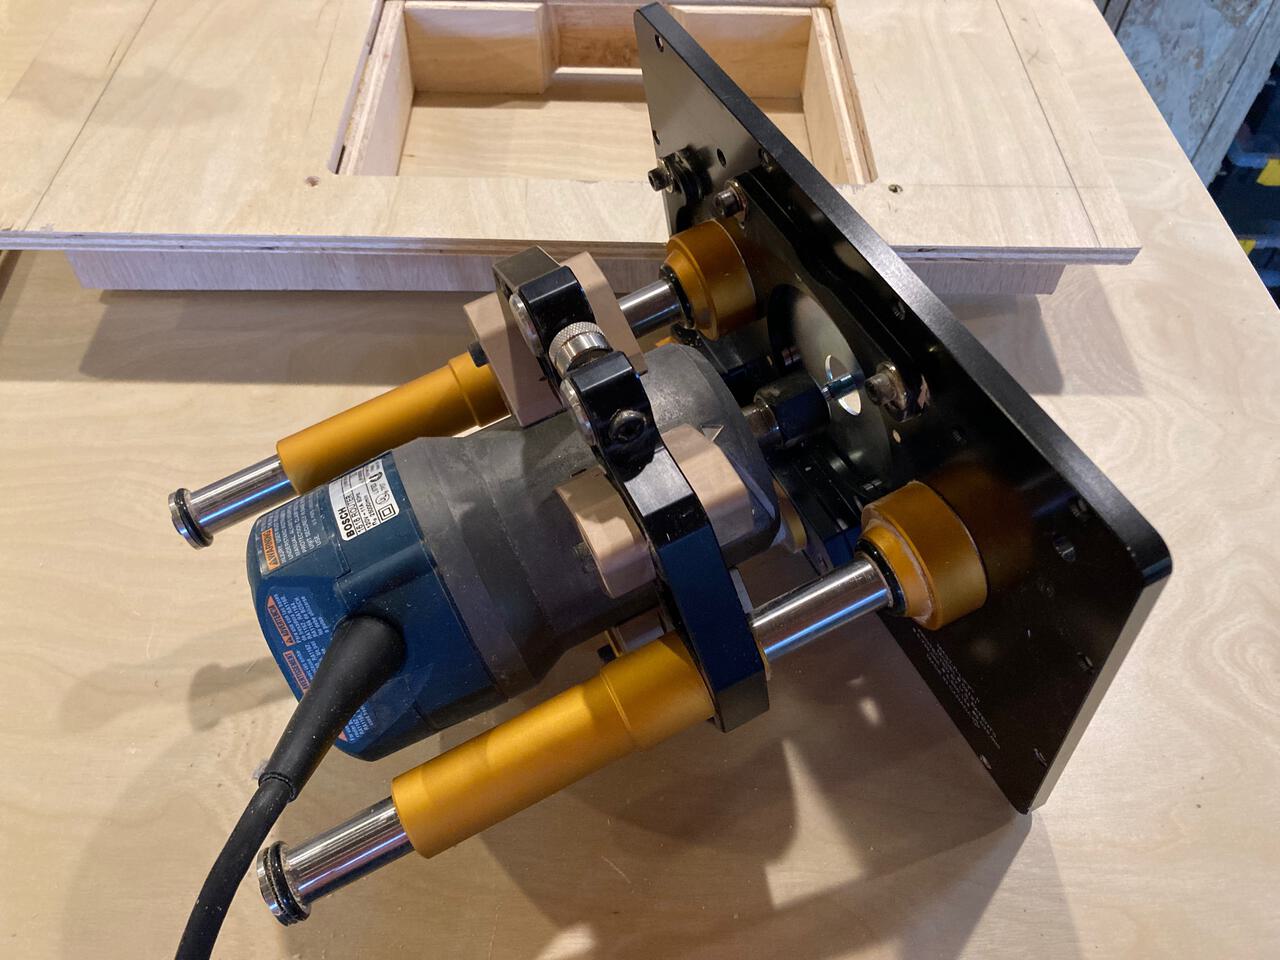
After making a hole all the way through that matched the router, I then added some simple supports for the lift. I chose to save a few pennies and use wood supporting the router lift. The router corner plates are nice. Maybe I’ll use them on my next build.
The complete unit
Here’s the completed router table from above.
Here it is from below.
Bosch 4100 upgrades
I ordered some accessories for this little saw. I think all them should come with the saw, and I think they’re worth buying. I’ve never seen them at a store, and in case you didn’t know they exist, here they are:
- Left side work support for holding wider plywood. This is nice for making cabinet panels.
- Outfeed support for longer stock. I like using my assembly table, but this is nice for cutting trim and longer boards.
- Dust bag is handy for times when your shop-vac isn’t available.
Speaking of dust collection, I really like using an automatic switch to turn on dust collection. This switch will automatically turn on your shop vac when you turn on the saw, and it’ll pause just long enough that it won’t trip the breaker by having both motors startup together.
Future upgrades
In an upcoming post, I hope to share some photos of a dust collection box for this little router table as well as a mount for switch for it.
If you’ve got questions about any of this, please feel free to send me an email.