Brown Dog Motor Mounts
I recently installed a set of rubber Brown Dog Motor Mounts. This version installs with the factory engine brackets and replaces my worn out frame side motor mounts. I recommend that you also replace the through bolts and frame side hardware with the Brown Dog replacement hardware. While you’re at it, you should also replace your transmission mount.
Before and After
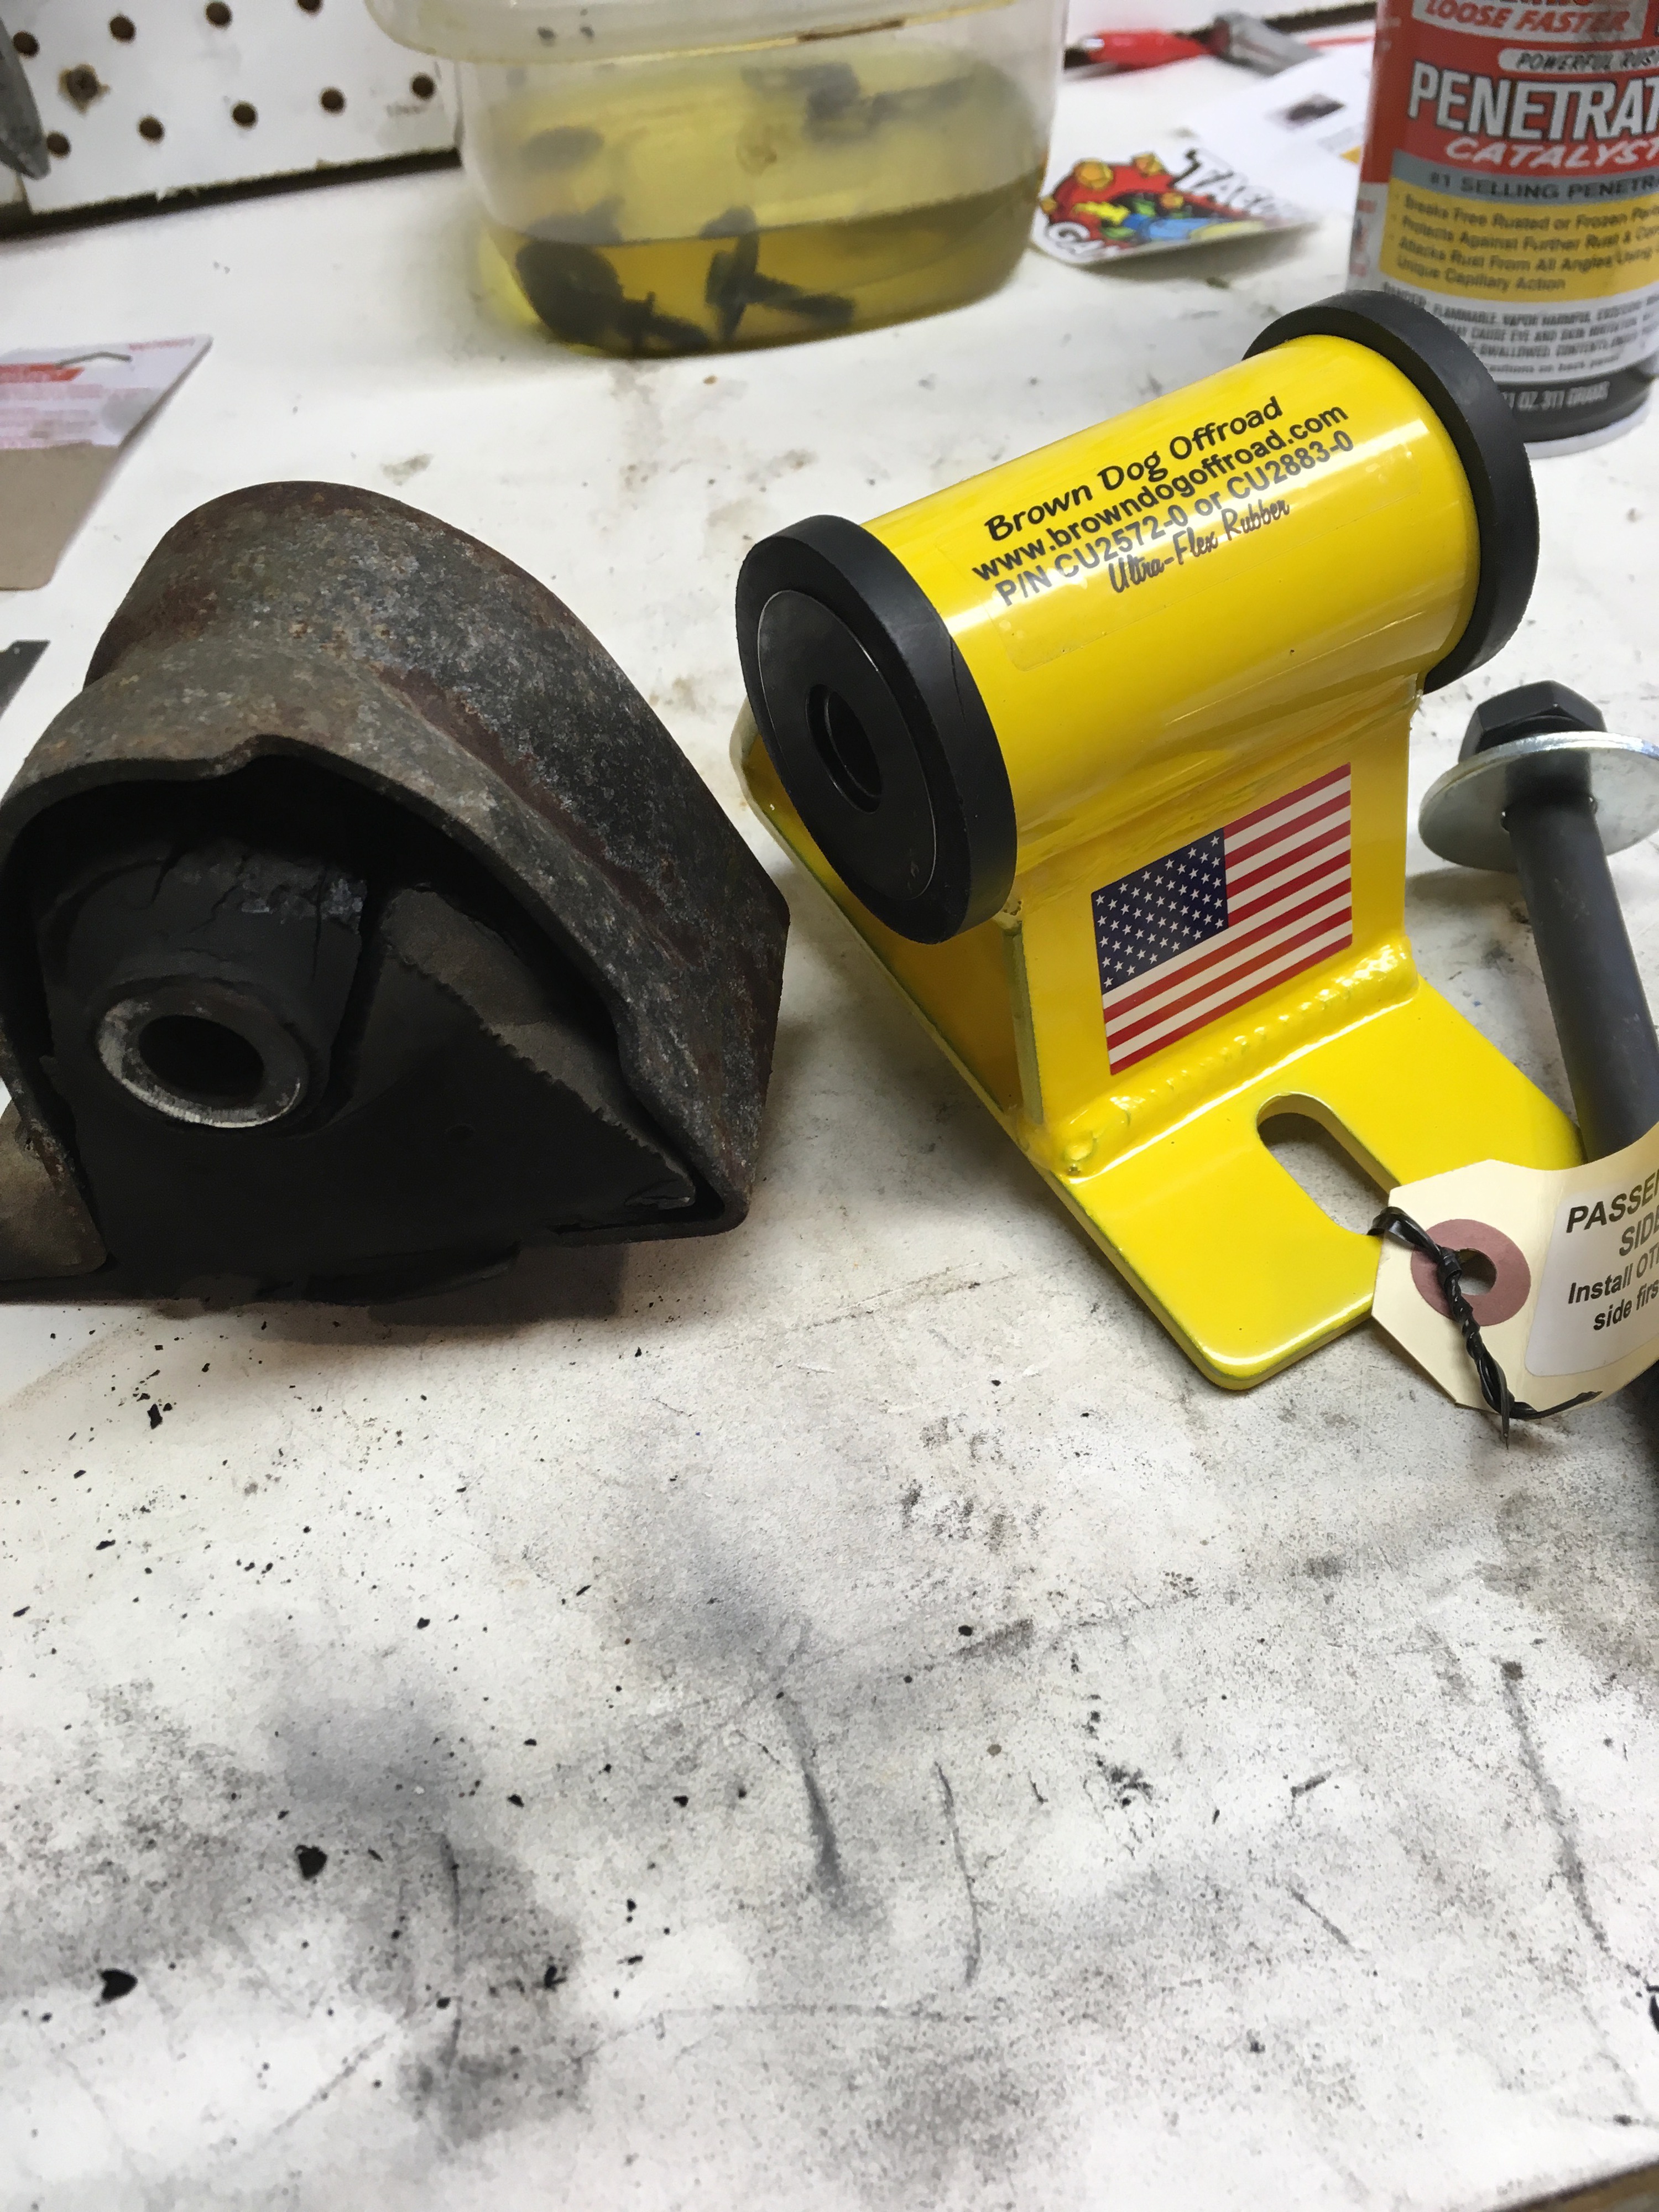
In this photo you can see an original mount alongside a new motor mount. My mounts have 220k miles on them, and have certainly been through a lot of adventuring. They haven’t lost any chunks, but they’ve certainly lost some height.
In the background of this photo you can see some Evap-O-Rust. I’m really impressed with this stuff, I wire wheel hardware to remove surface rust and then soak the parts for a few hours in the rust converter. The parts are generally left with a nice black coating and a nice surface finish. If there is rust left over I’ll wire wheel one more time. It doesn’t pit the metal and seems to do a great job removing rust. The hardware from my air box is in that tub in the photo.
Review
These motor mounts are a worthwhile upgrade if you’re okay with a little buzziness at idle. These mounts are absolutely solid and will prevent unwanted movement in offroad wheeling. I’m impressed with the finish and the welds are all double welded and look great. The hardware is high quality and nicely finished. All of the holes aligned perfectly and the fit and clearances are all correct.
At idle, there’s a little buzziness in the whole Jeep. You can feel it a bit in the steering wheel and there’s a little more noise in the cabin. I think the exhaust note even changed a little bit. The extra buzz settles down pretty quickly after you leave idle and are moving and the engine gets to higher RPM.
I think the buzz is really only noticeable at idle and certainly isn’t objectionable even if this was a daily driver. I suspect that the poly version of these mounts would be really harsh.
I think this is a worthwhile upgrade, and I’d absolutely do it again on any other XJ or MJ.
Installation
I did almost all of the work from above, and only needed to remove two nuts from below. I made certain to remove my battery negative because the passenger mount is quite close to the always-hot starter terminal. I removed my air box from the driver side and I removed my coolant tank from my passenger side. This gave me plenty of room to work with an end wrench and a socket for the through bolt. I did use a six inch wobble extension with a three inch extension to access the driver side frame mount bolt. I sprayed all of the bolts and nuts on the Jeep a couple of days before I did the project, and I didn’t have any problems with broken hardware.
The instructions require that you loosen the transmission mount nuts. I am running a crossmember and skid plate from Rusty’s that incorporates a 1 inch drop. I found that I had to completely remove my transmission mount bolts and raise the transmission and transfer case back to their level location before I could successfully thread the through bolt on the driver side.
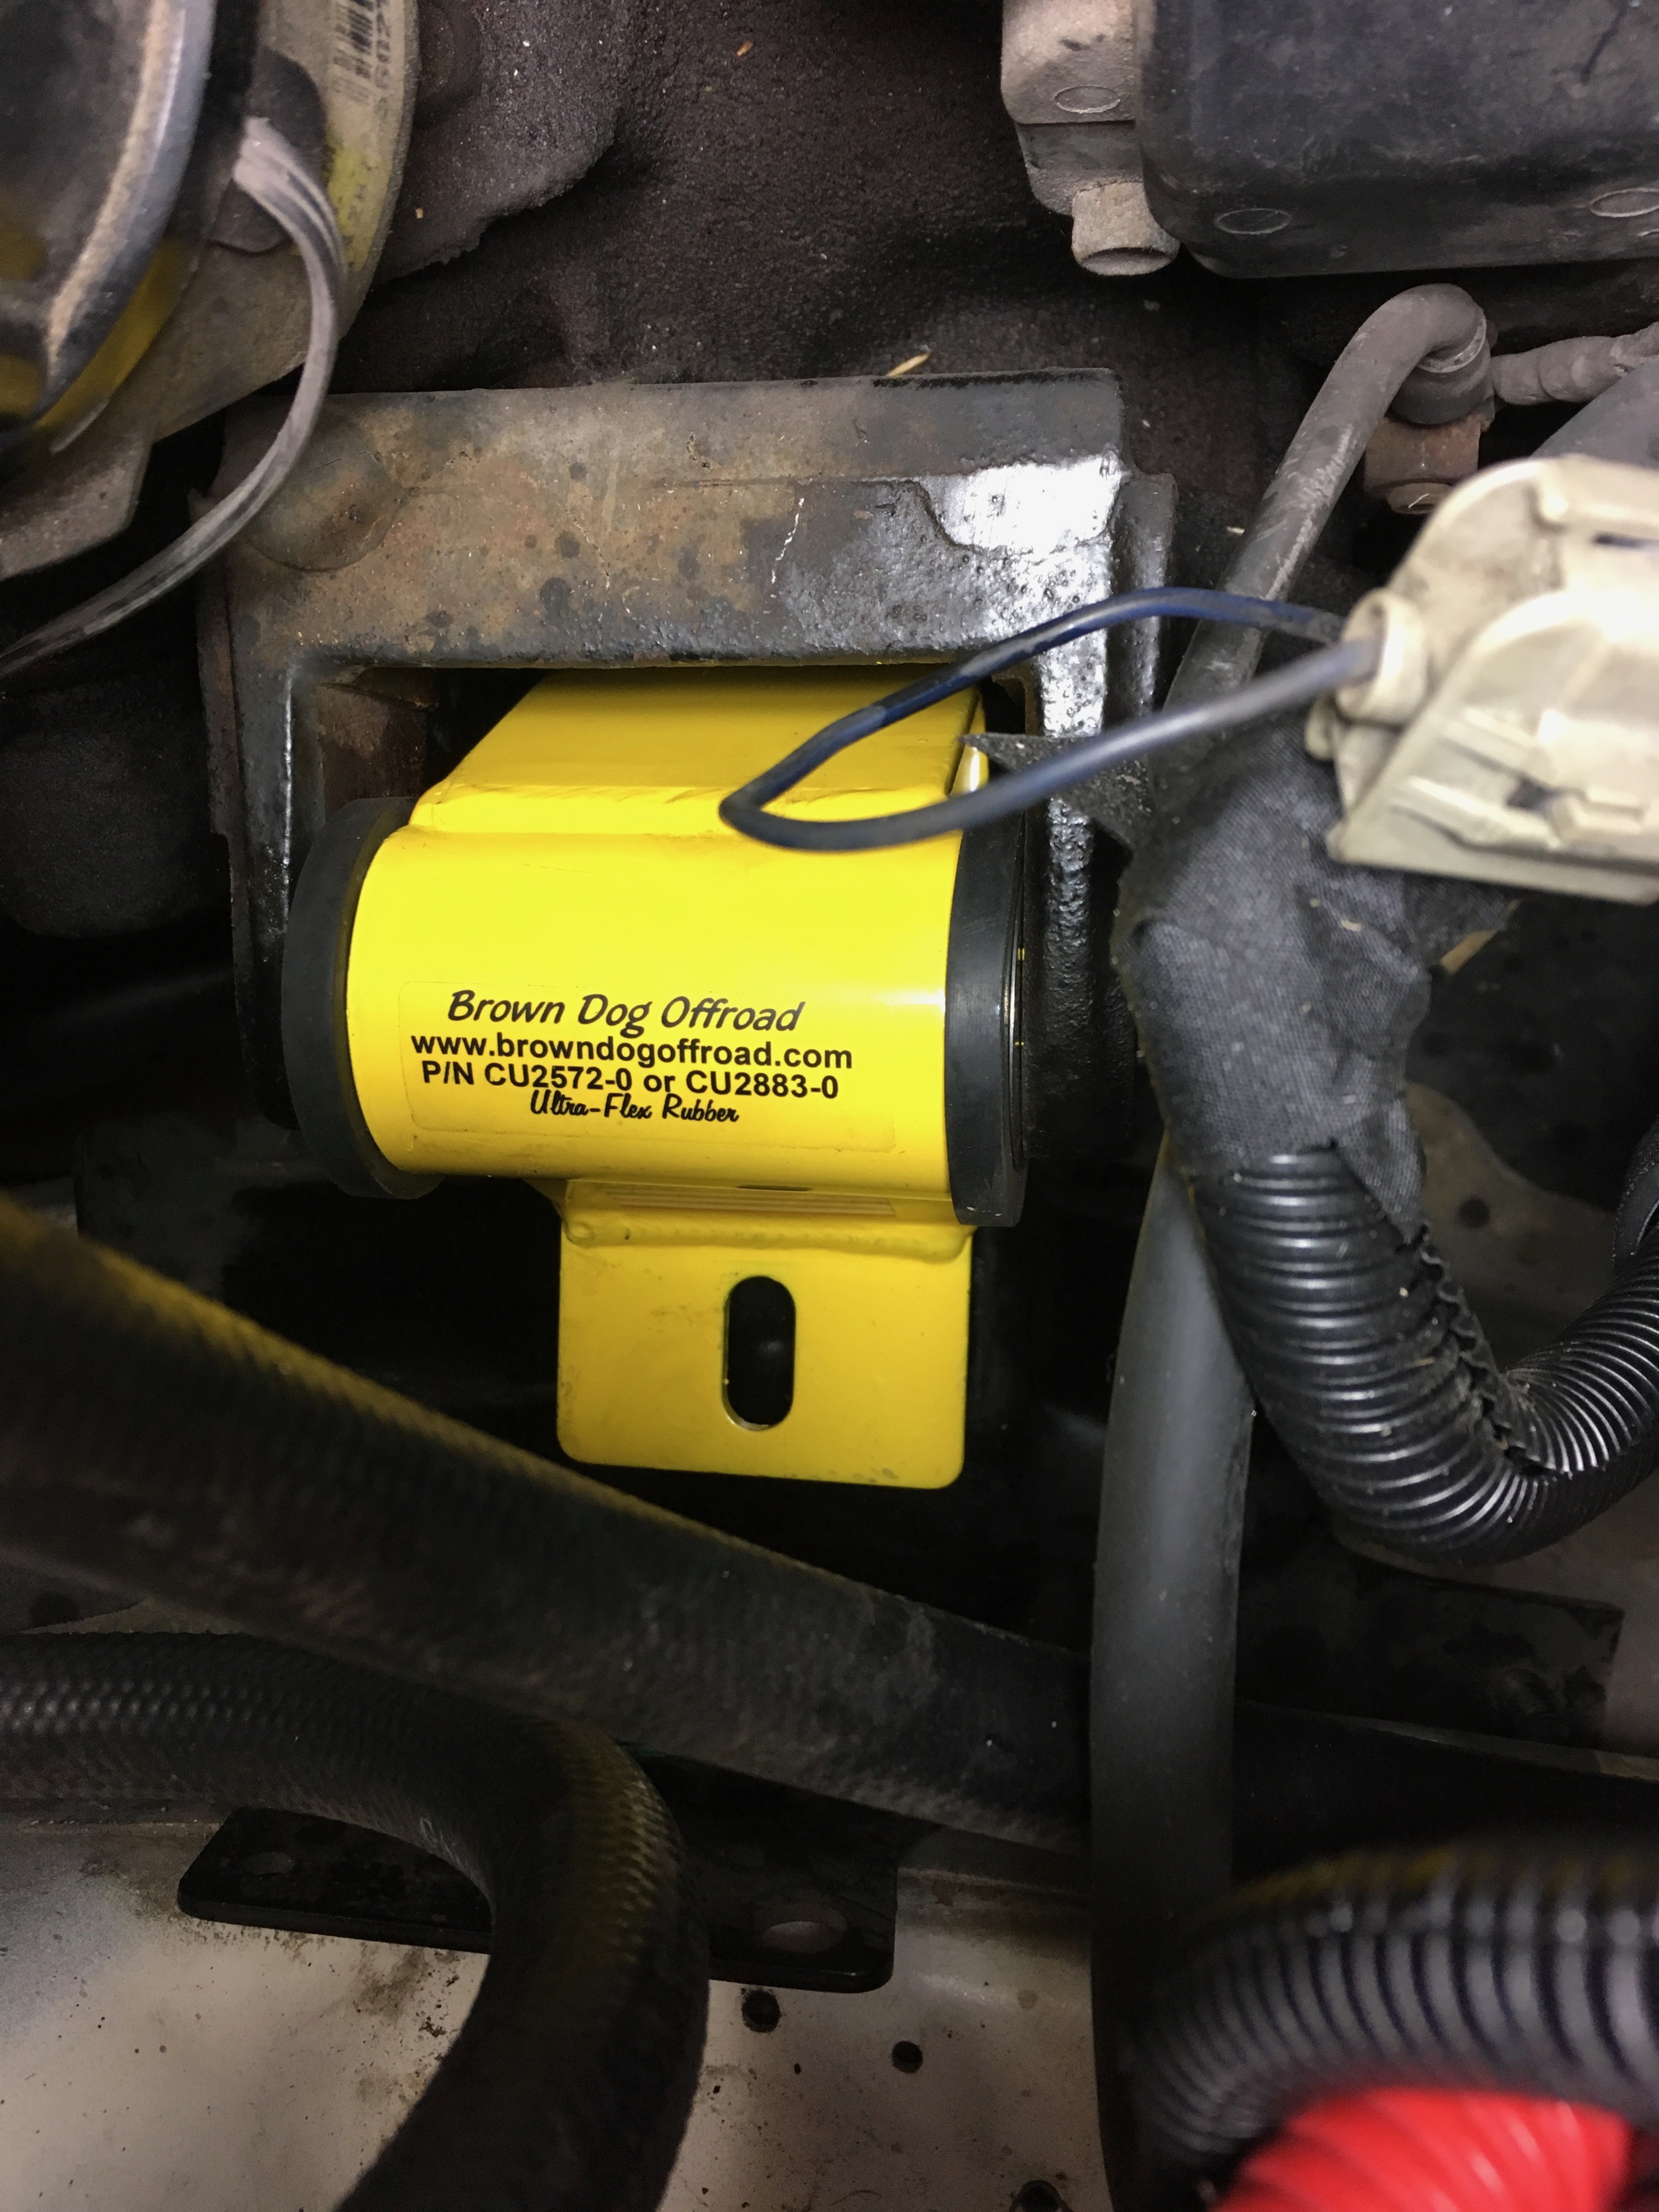
The driver side was very straight-forward, and took just a few minutes. I used a jack with some wood to support the engine from the front lip of the oil pan. The old mount came out with just a tap from a mallet and the new one dropped into place and I loosely installed the nuts and bolts.
The passenger side took some work. After I removed the old mount, I found that the new mount simply didn’t align. I spoke with the tech support line at Brown Dog and they were helpful. They suspected that the engine either shifted as the old mounts broke down, or that the engine shifted some while I was removing the passenger mount. They suggested using a ratchet strap to move the engine around. I first slung a strap around my transfer case and to my JCR slider by the back of the front passenger door. I was able to rotate the engine a bit, but not enough. I then slung the tail of the transfer case and went to the front axle next to the C hub. I lifted the engine just a little more with my jack and put the engine mount onto the passenger side of the engine. I then cranked on the ratchet strap and the engine moved forwards and then the mount bolt dropped into the frame side hole. I was able to then shove the engine around a bit until it was centered between the uniframe rails. I removed the engine jack and torqued everything down.
It was then time to change my transmission mount. I added jack stands under my transmission and then removed my crossmember and replaced that mount with a fresh OEM rubber mount. I reinstalled the crossmember and lowered the transmission and transfer case into position and torqued those nuts. Remember that the torque on the transmission mount to transmission crossmember nuts is really low.
If you’ve got questions, please feel free to send me an email.