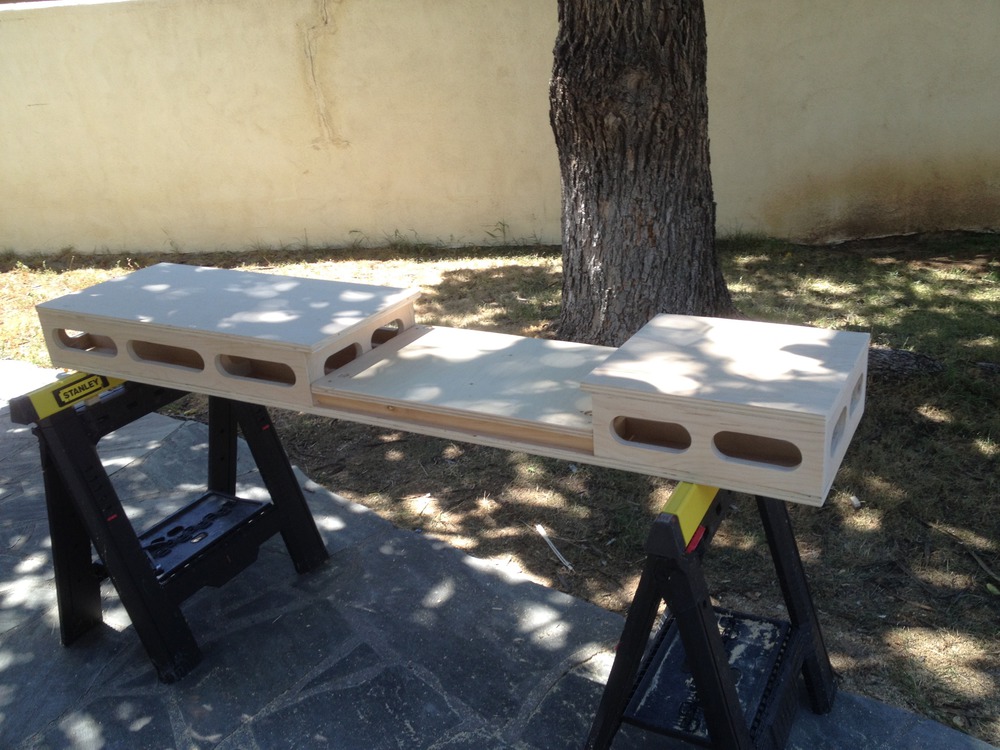
Inspired by the Paulk Workbenches, I built a new miter saw station from scrap plywood from a previous project. I had two 18 inch x 8 foot sections of ¾” Maple Plywood and I created plans to use this efficiently. As a result, you could build this from a single sheet of plywood.
I created this using a Kreg RipCut Jig, and the cut plan that I generated reflects this. With this jig instead of a tablesaw, it’s best to nibble away from the large sheet instead of breaking it down initially. If you have access to a tablesaw, then I might suggest he Paulk plans. They look quite nice.
The structure is made rigid by two runners that run the entire length of the platform board, and the sides and ribs are cut to the correct height for the saw so that the deck of the saw is flush with the working surfaces. The joinery is glue and Kreg Pocket Screws.
This particular bench has been built to fit my Dewalt DW715. However, with a little measuring and alteration, this could easily be changed to fit any other miter saw.
1. The Plan
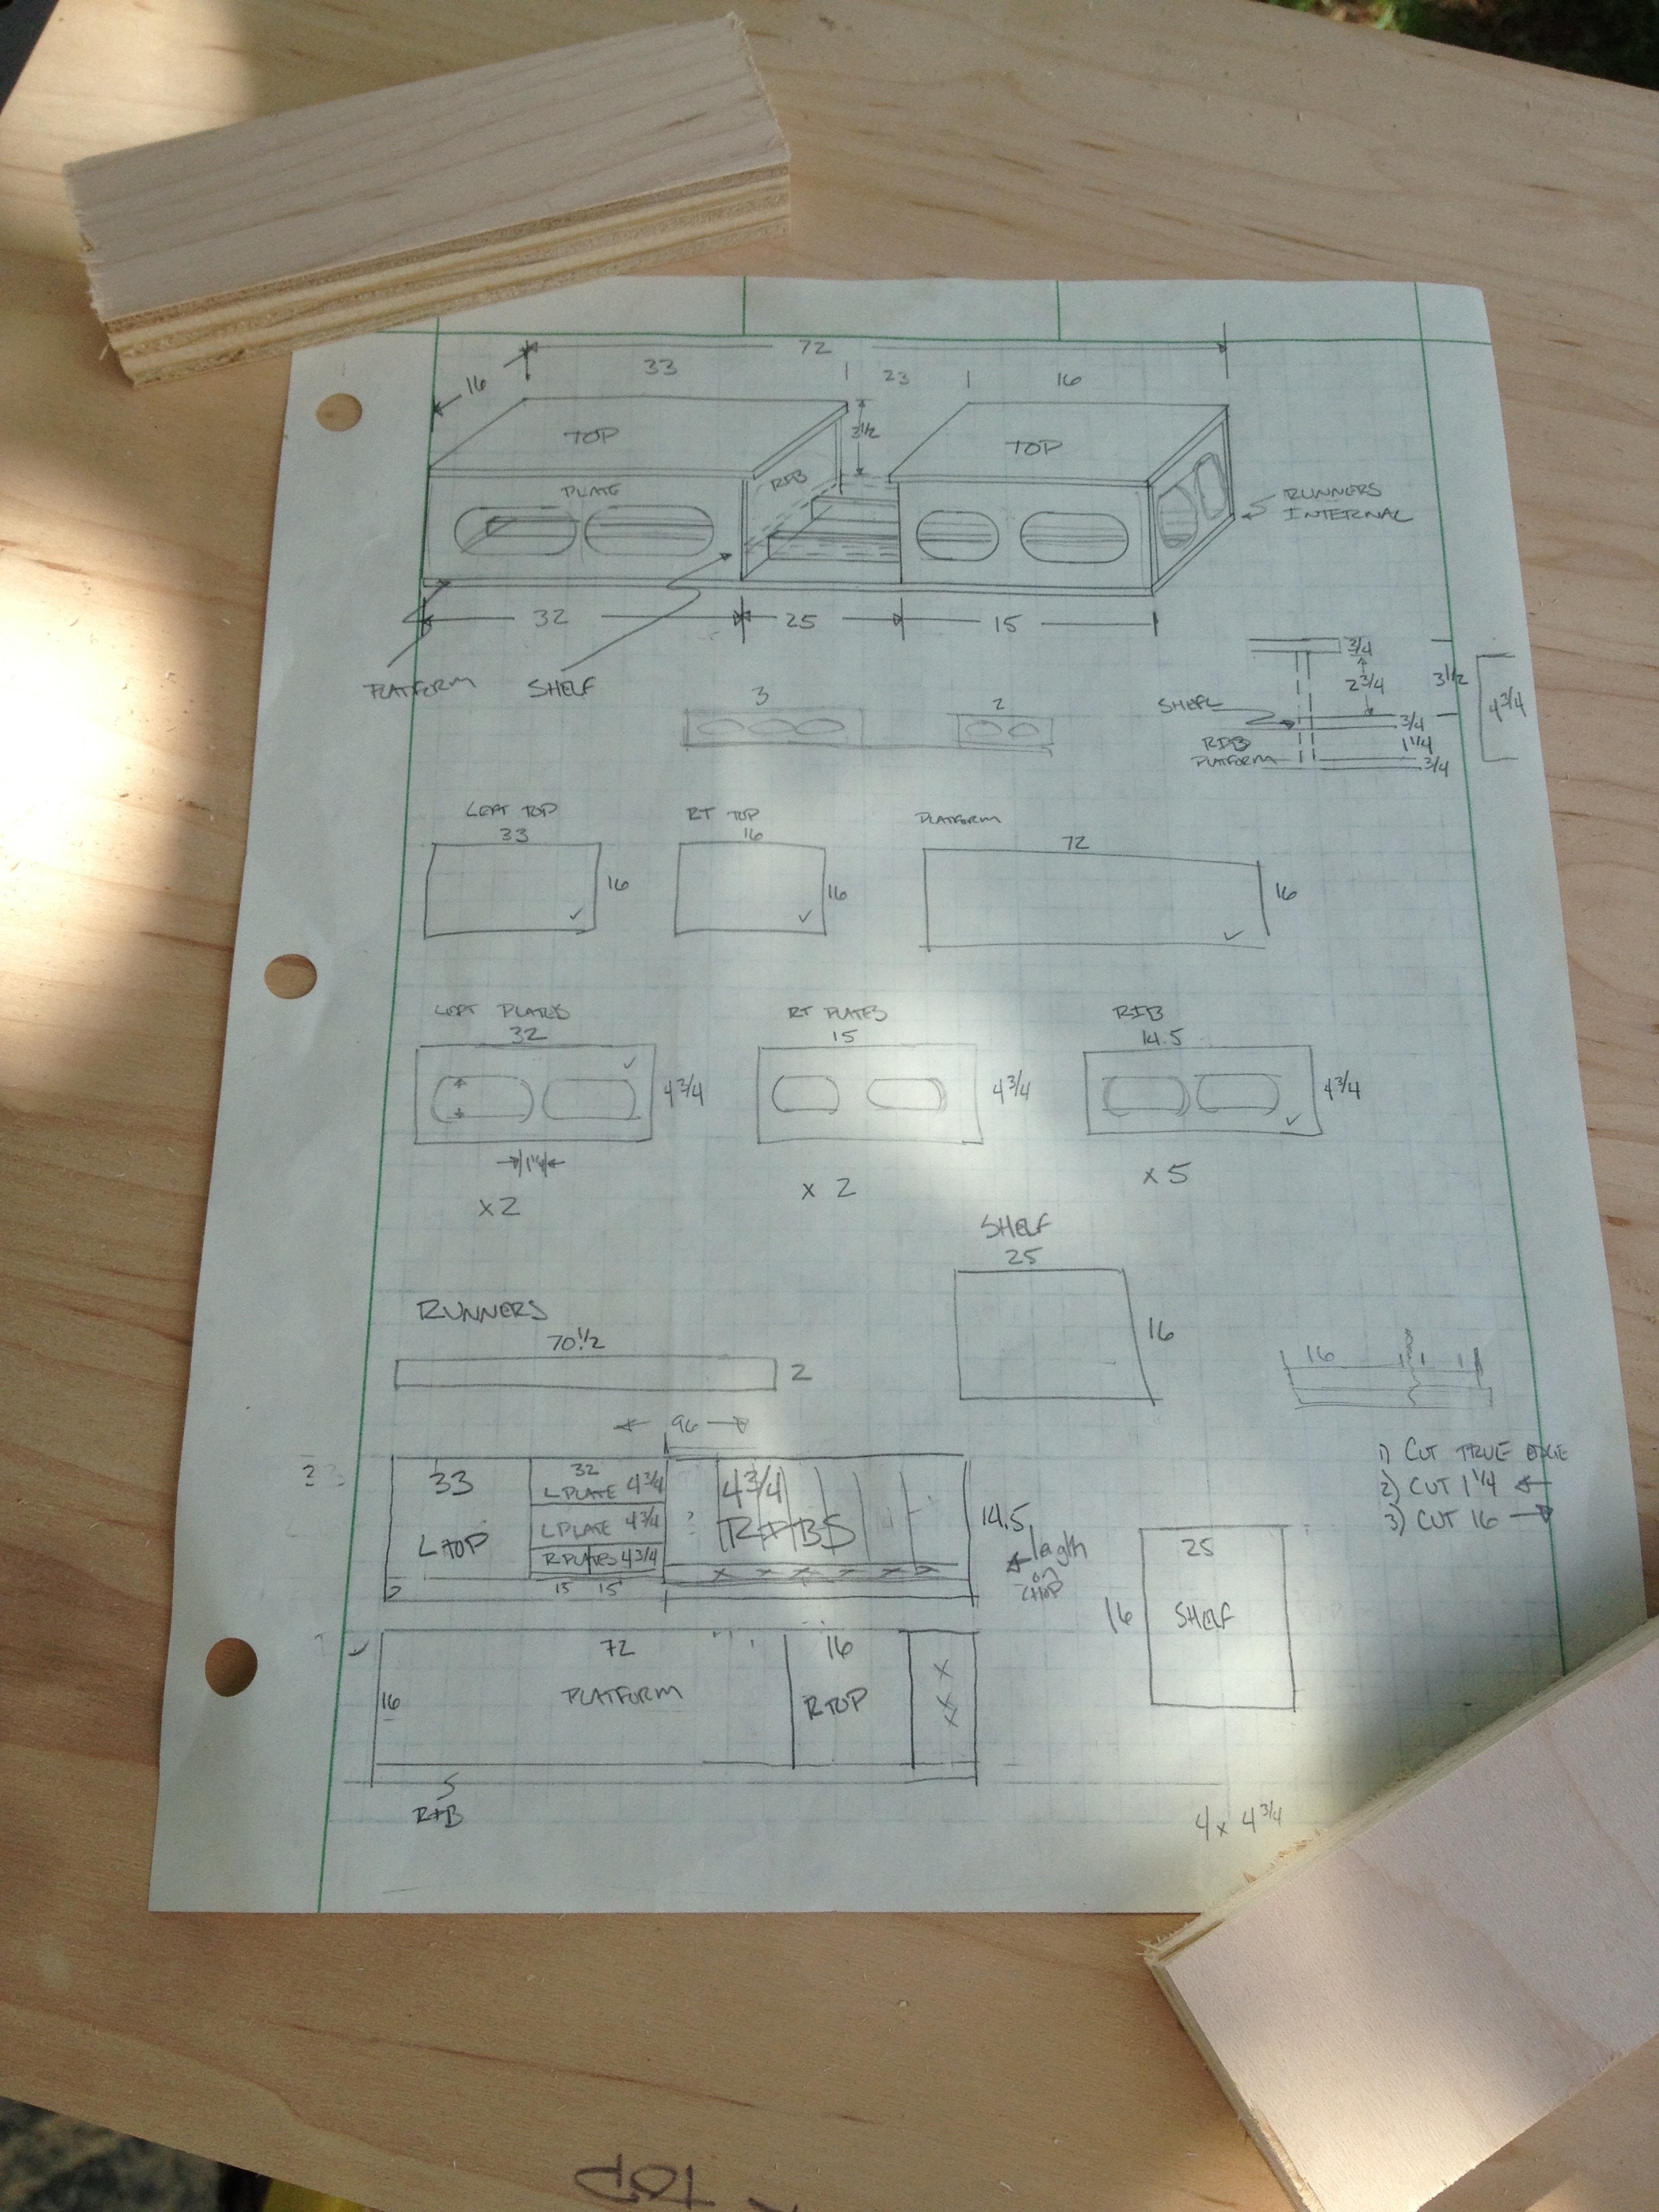
This is the basic design and important measurements. Your measurements will be different based on the saw. The runner height + your saw deck gives you the height from the top of the bottom platform surface to the top of the work surface. Be careful to measure your plywood! This was built from maple ply that was actually ¾. Many plywoods measure between a sixteenth and a thirty-second under. When in doubt, make the box a little tall and then shim the saw upwards.
2. Dry fit to check for saw height and width
This is a dry fit of all the parts to check for height and sizes. Note that with the runners in place, you cannot place the internal ribs. In the plans, there is a 1” overhang of the top work surfaces. This allows the opening for the top of the saw to be fine tuned. At this stage, you can do the initial tuning of this, and in the final step you can do the final fitting of the saw into it’s new home.
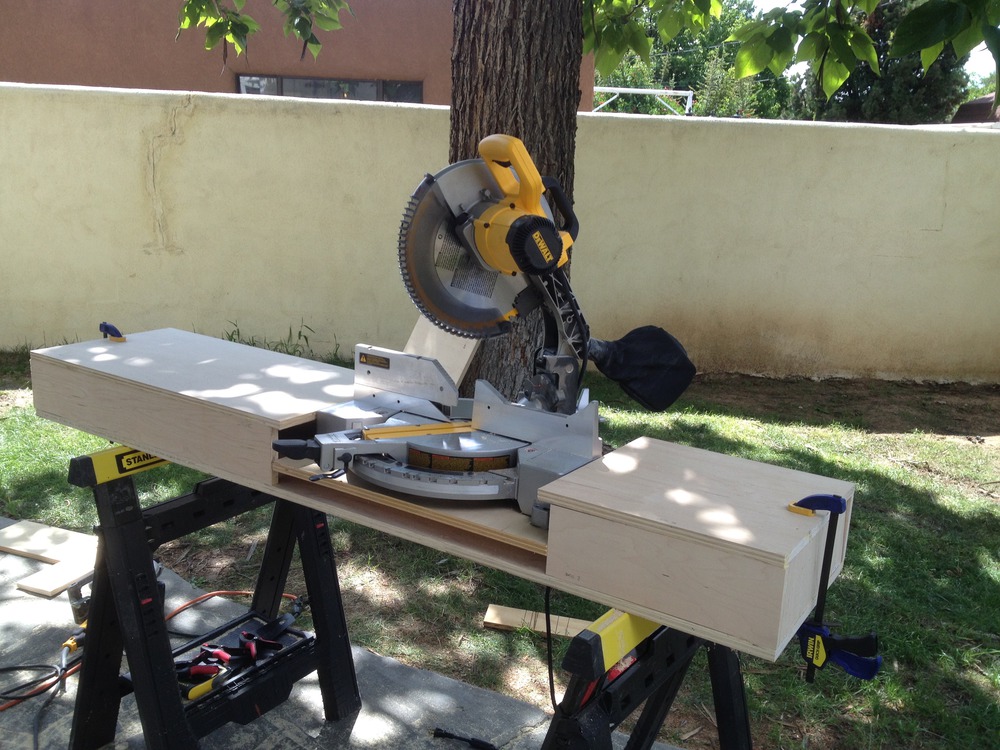
3. Runners for strength

This is where the rigidity of the workbench comes from. This prevents the two end boxes from flexing the center open space. The runners are secured with glue and pocket screws. Be certain that they are cut to length to allow a rib to be placed on each end. The internal ribs will have slots cut into them for the runners, the end ribs should be full. This means that the runners are cut to the length of the platform less twice the thickness of your plywood.
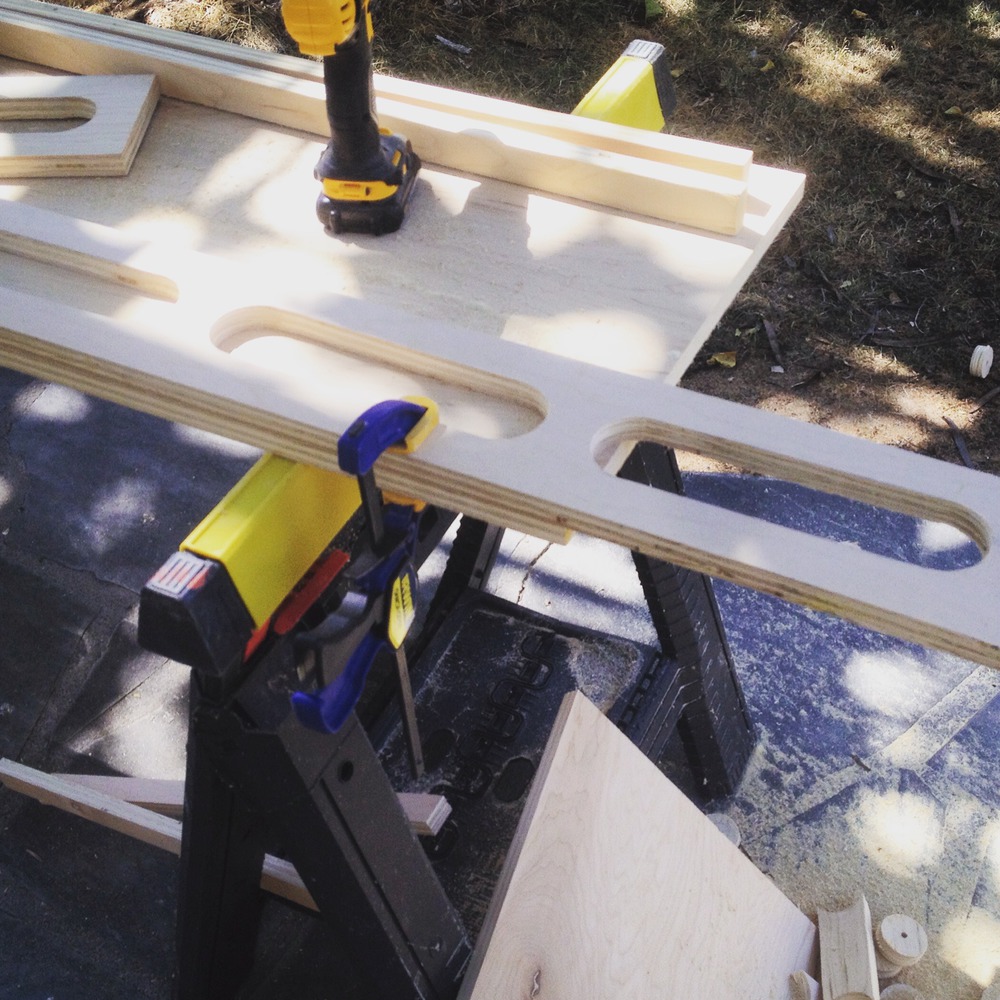
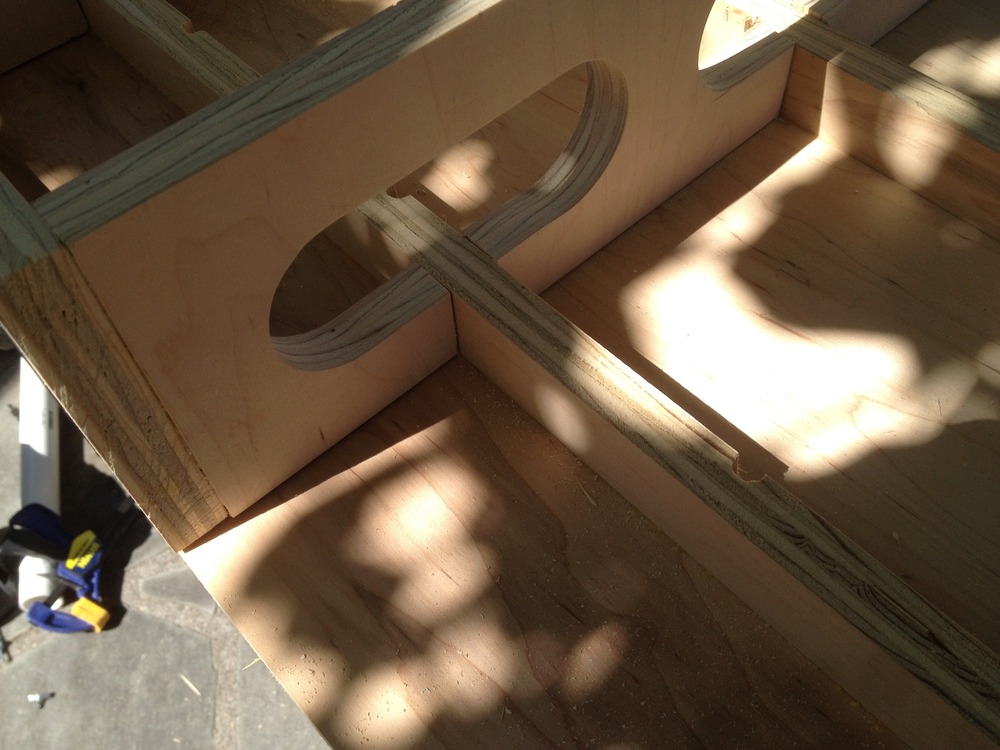
4. Cutting the holes
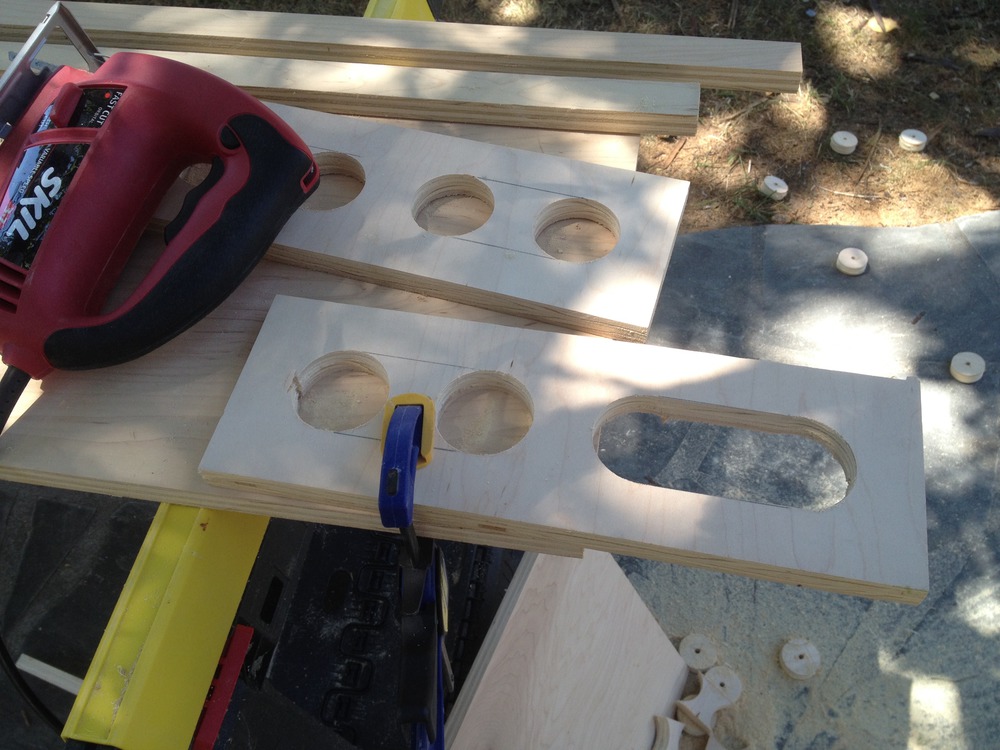
A hole saw makes it easy to make the new openings in the box. The plans use five matching ribs, and it’s best to make a template so that they all match.
5. Creating the long face plates
Use a jig saw to connect the two hole saw cuts together. You can see the cutouts on the ground in ths photo. Take your time and draw a line connecting the edges of the two holes that you’ve cut. It will help you cut a straight line with the jigsaw.
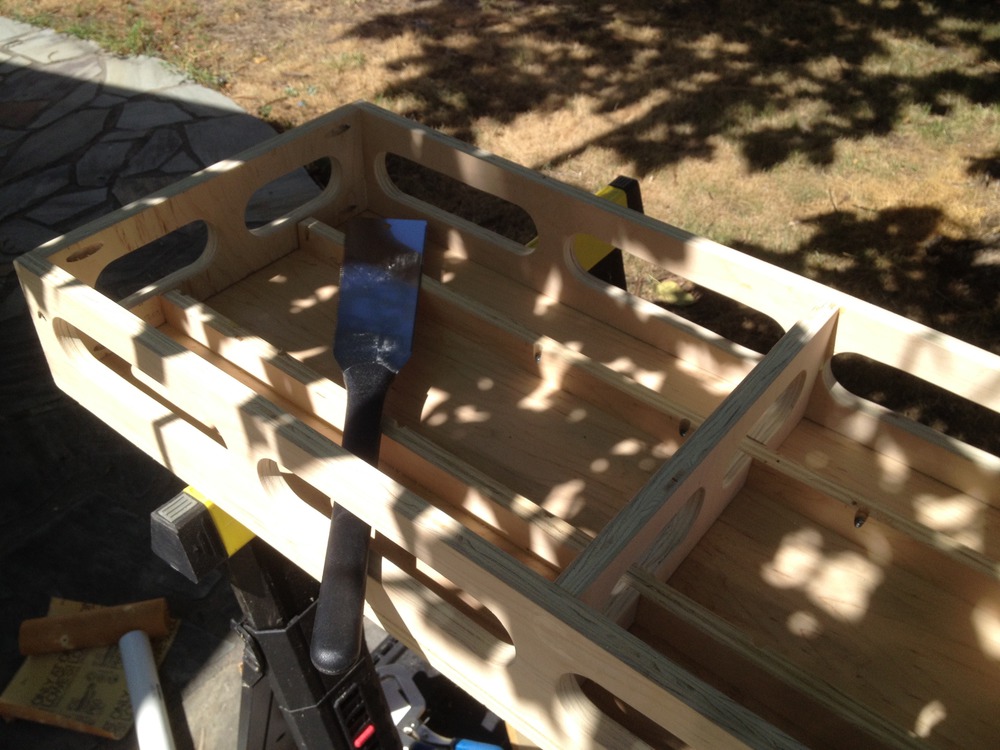
6. Sanding, lots of sanding
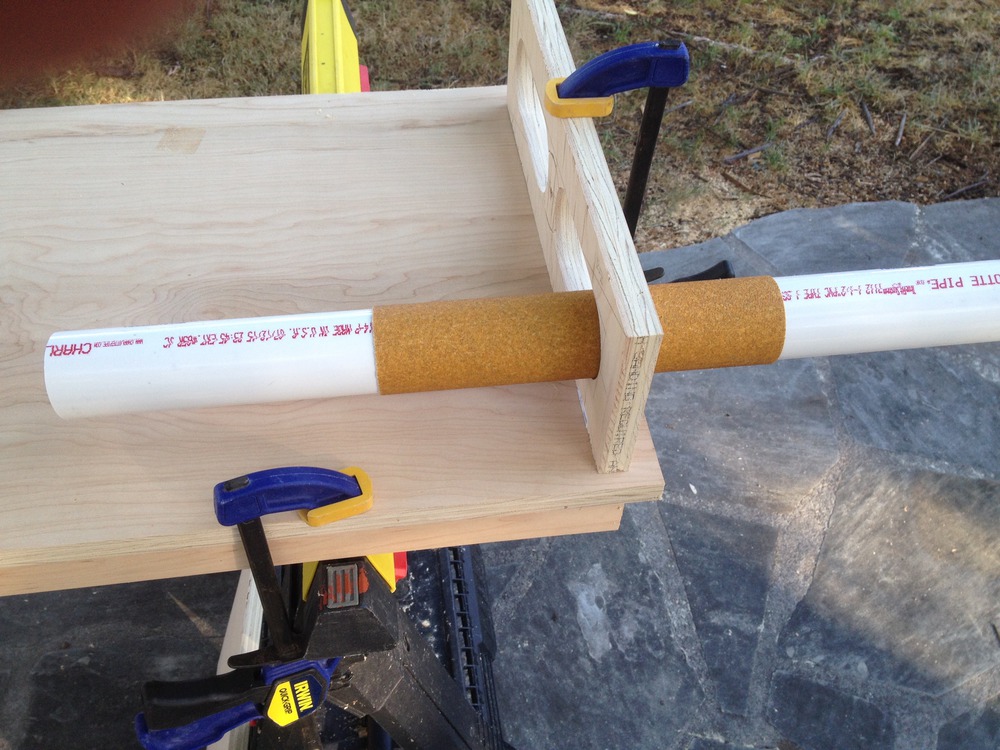
I used a 1½” PVC pipe to help to the sanding. The outside diameter is about 2” and so this was perfect for these holes. One day I’ll have a oscillating spindle sander, but for now… In addition to sanding the cuts smooth, I eased the edges of the plywood quite a bit. The holes will be used to pickup and move this around and it’ll make it easier on your hands.
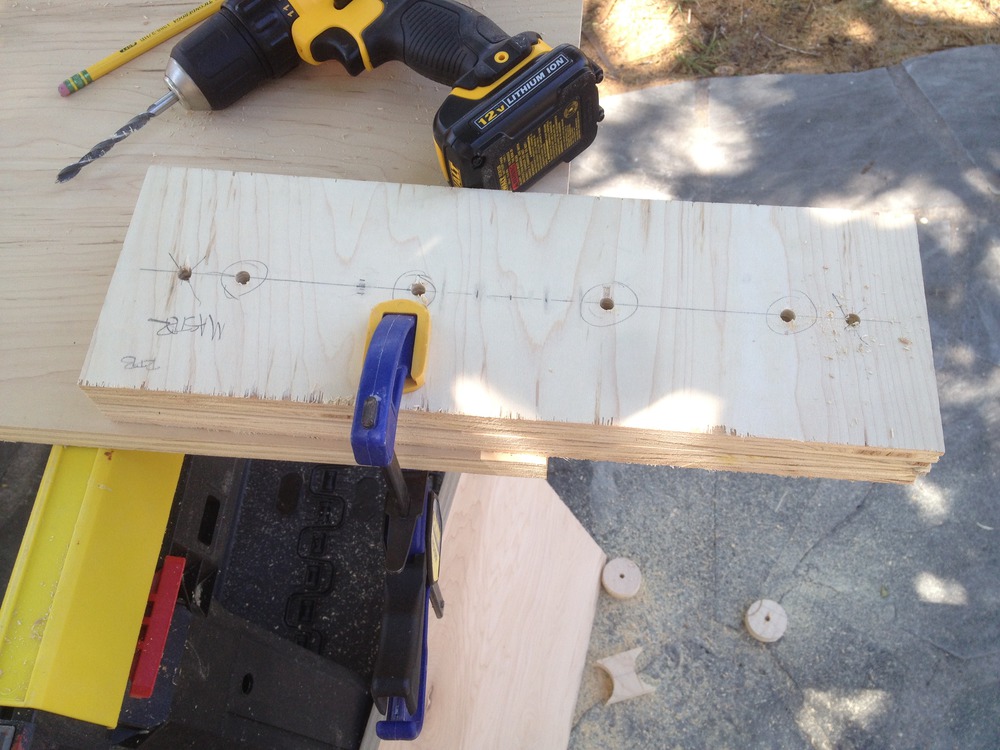
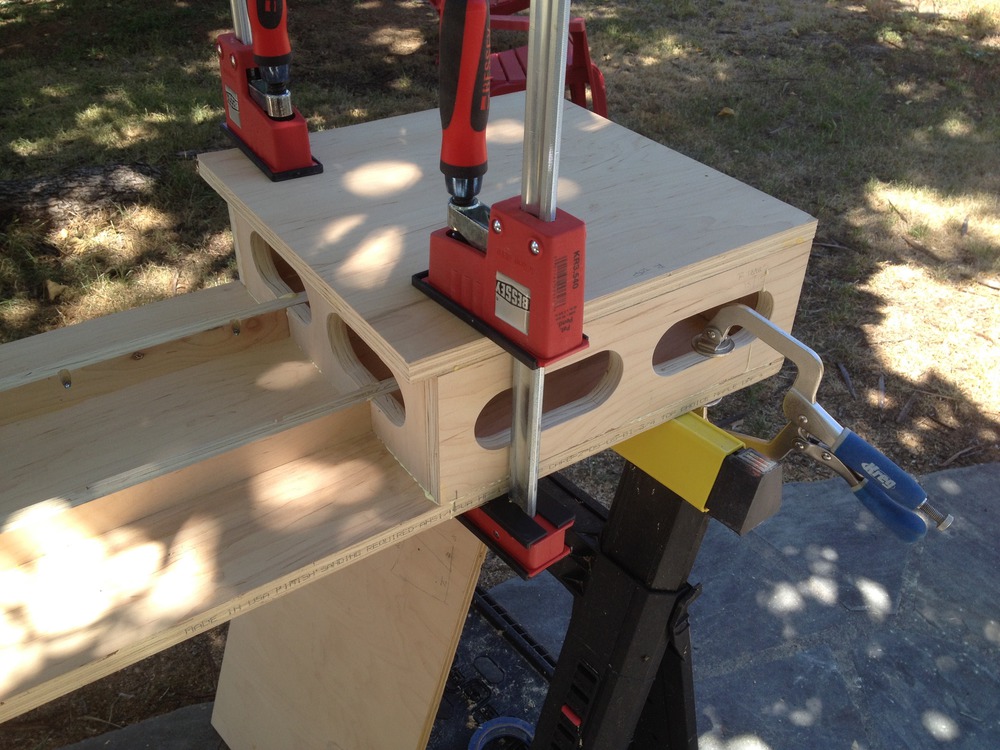
7. Pocket Hole Joinery
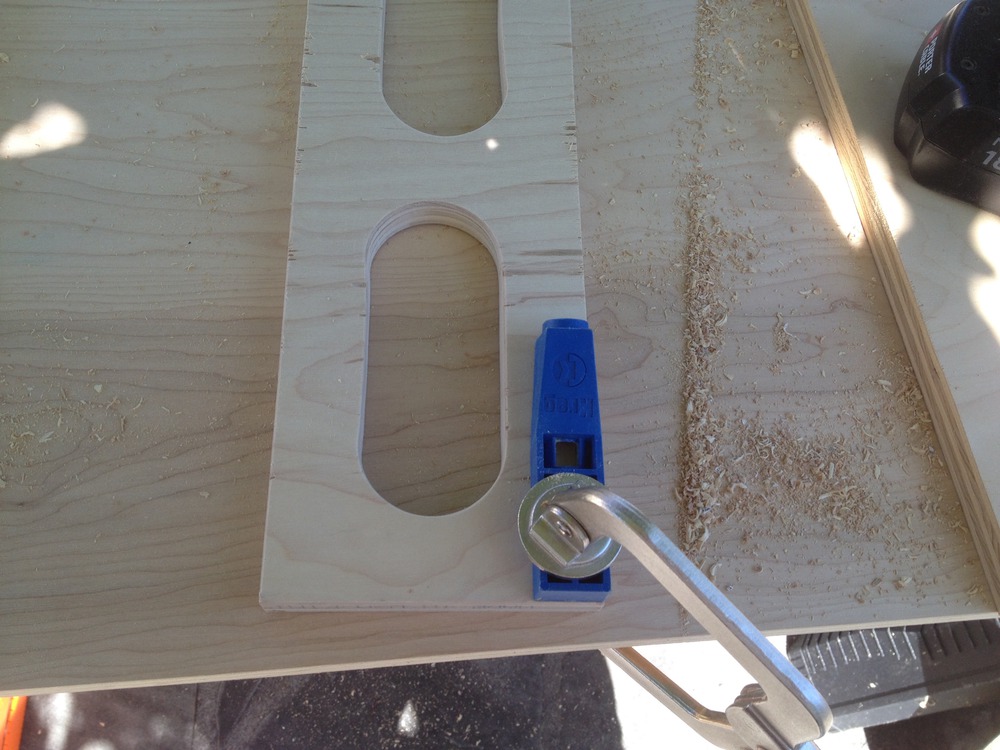
The ribs each get four pocket holes to attach them to the front and rear plates. These can all be drilled before assembly. Remember to drill them on the uglier side of the plywood. You can see some plywood tearout in this photo that will be hidden after assembly. Assemble the boxes as normal with pocket screws. First assemble the ribs on the end to the face plate with glue and screws, and then in the left box add the internal rib. Once you’ve built the box attach it to the top work surface with more pocket screws.
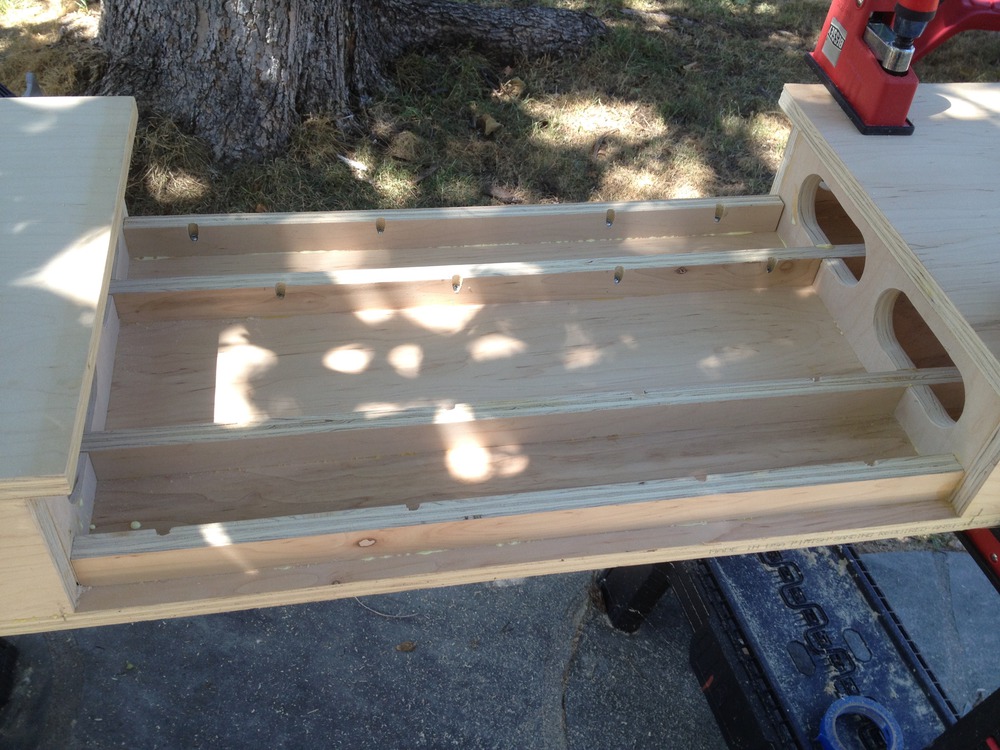
8. Cut the ribs to clear the runners
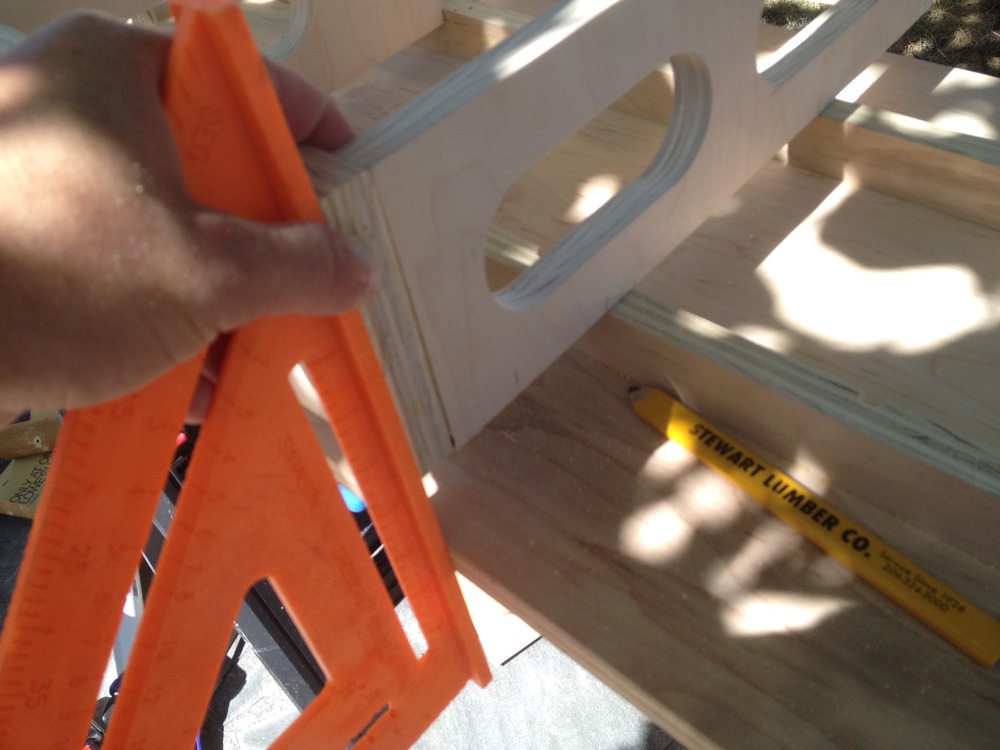
Drop the box into place, and carefully mark the position of the runners on the ribs. Then, using a saw of your choice cut out the openings for the runner. I have really enjoyed my pull saw lately.
9. Box in place on the runners
With the runners trimmed, you can now finally fully seat the box into their permanent location.
10. Storage space in the left box
I’ve left out a rib in the left hand box to allow for a little more storage space. Here you can see my favorite saw in a spot to stash it.
11. Attach the boxes to the platform
The right and left boxes are attached with glue, pin nails, and held with clamps.
12. Add ribs to support the saw shelf
These ribs add a little extra support for the shelf that the saw sits on. These are attached with glue and pocket screws. Note that these can be cut long initially, and then trimmed to fit once the left and right boxes are in place.
13. Add the shelf
After you’ve added the short supports for the shelf, you can then trim it and put it into place.
14. Test fit the saw
Test fit the saw and trim the overhang of the opening until it’s snug. Add shims under the saw if needed. We’ll attach it later. If you’ve ended up with the deck of the saw too high, make a new shelf out of ½” plywood and shim until the saw is the correct height.
15. Position the saw to be exactly square
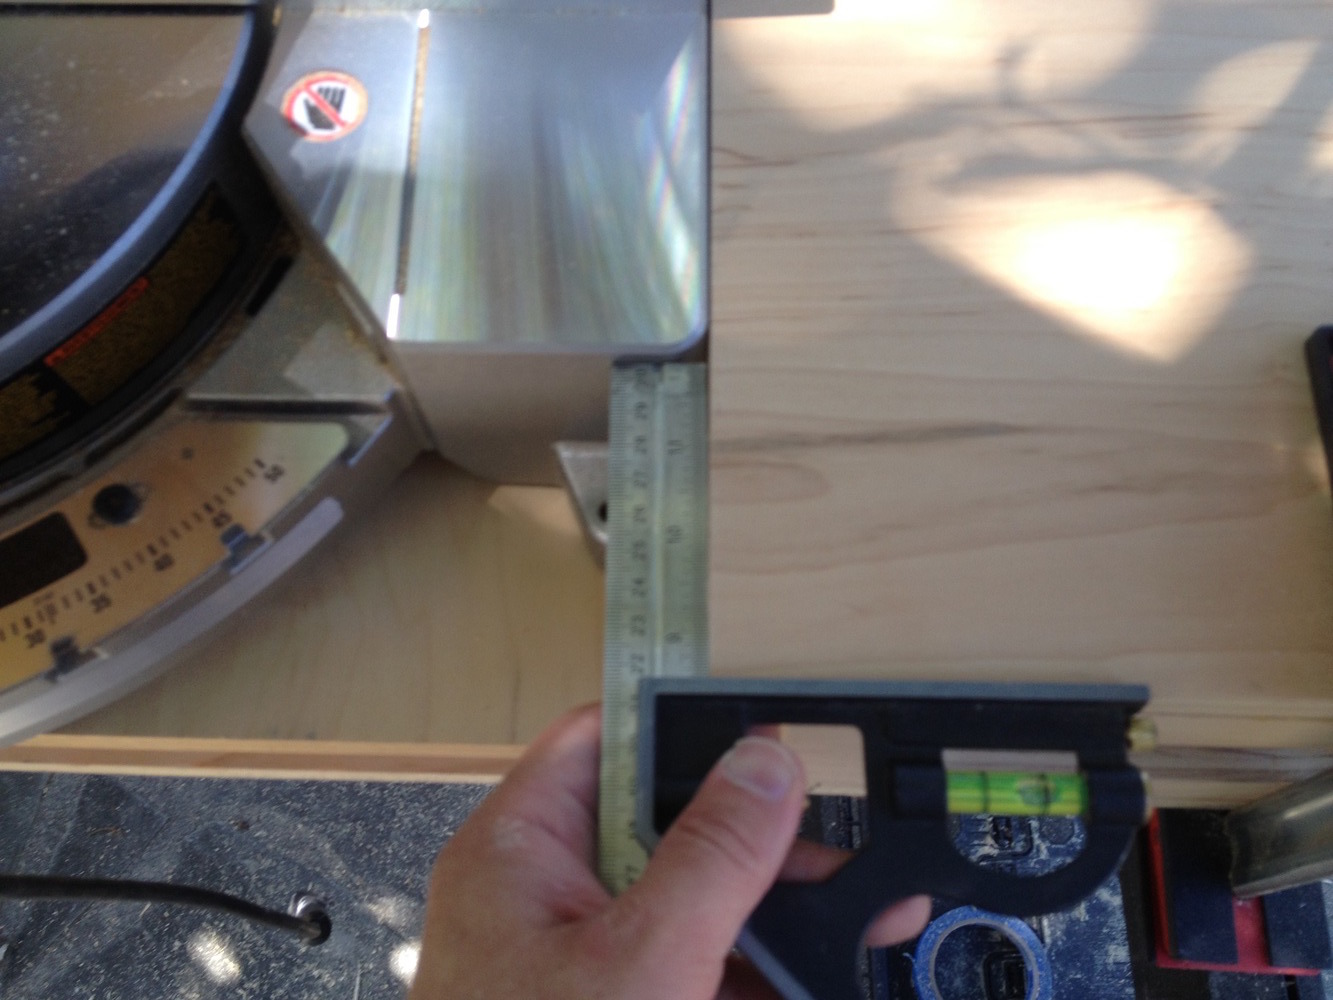
Use a square to check from the front edge of the work surface to the front edge of the saw. Check both sides and adjust until the saw is perfectly square This will make sure that the saw is sitting square in the center opening.
16. Drill locating pins
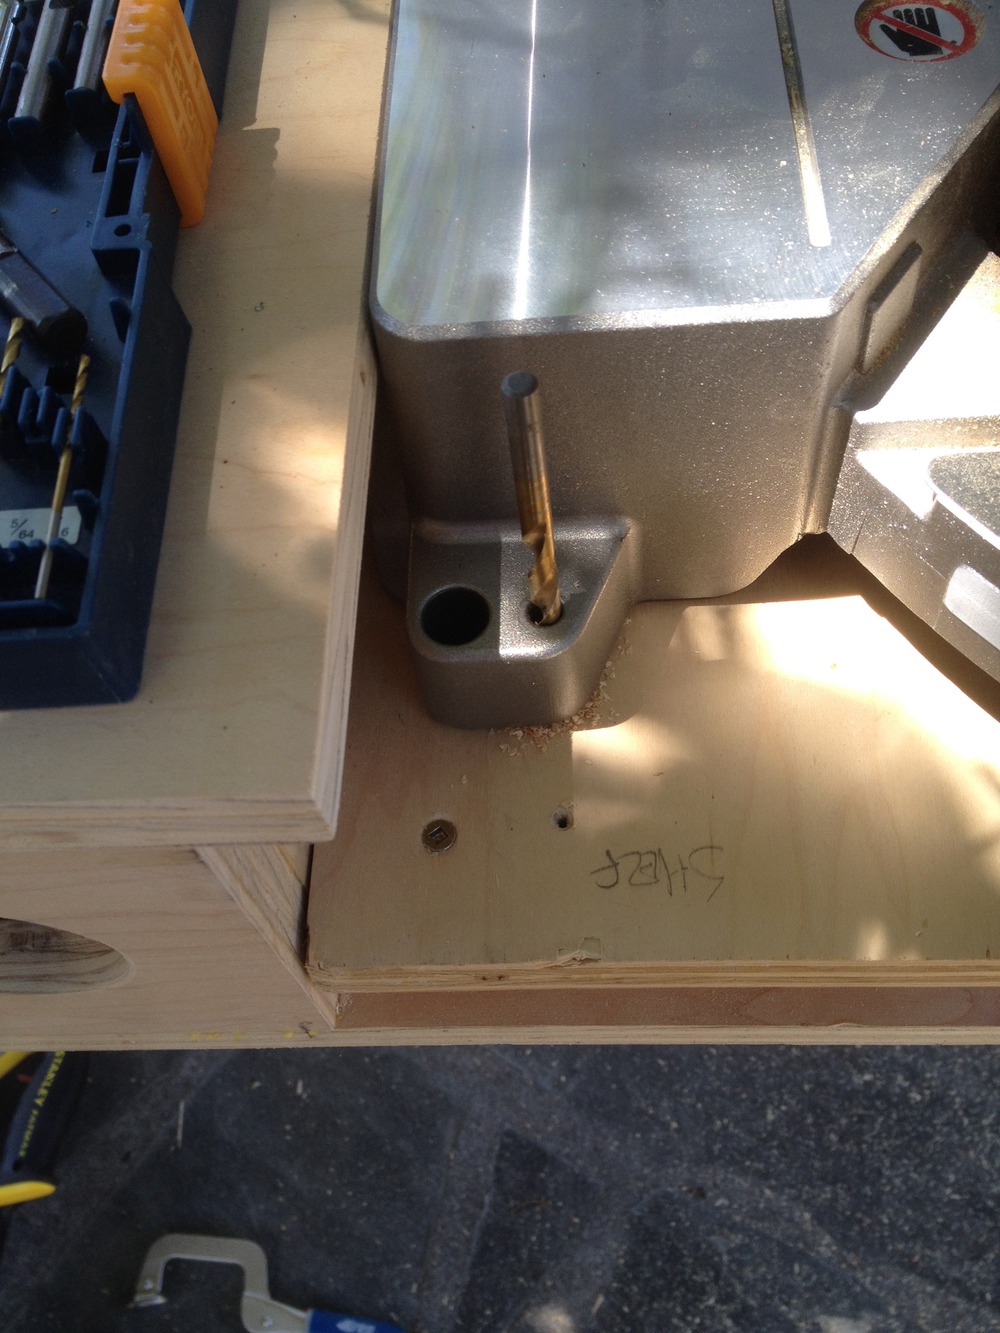
Drill through the bolt holes in the saw to locate it. With this saw, I can use ¼” bolts. Flip the board over and use t-nuts appropriate for your bolts in the back side of your holes. A dab of epoxy will help hold them in place. This will make it easy to secure the saw when you’re using it. Once you’ve sorted that, you can attach the shelf to the short runners with screws - no glue this time.
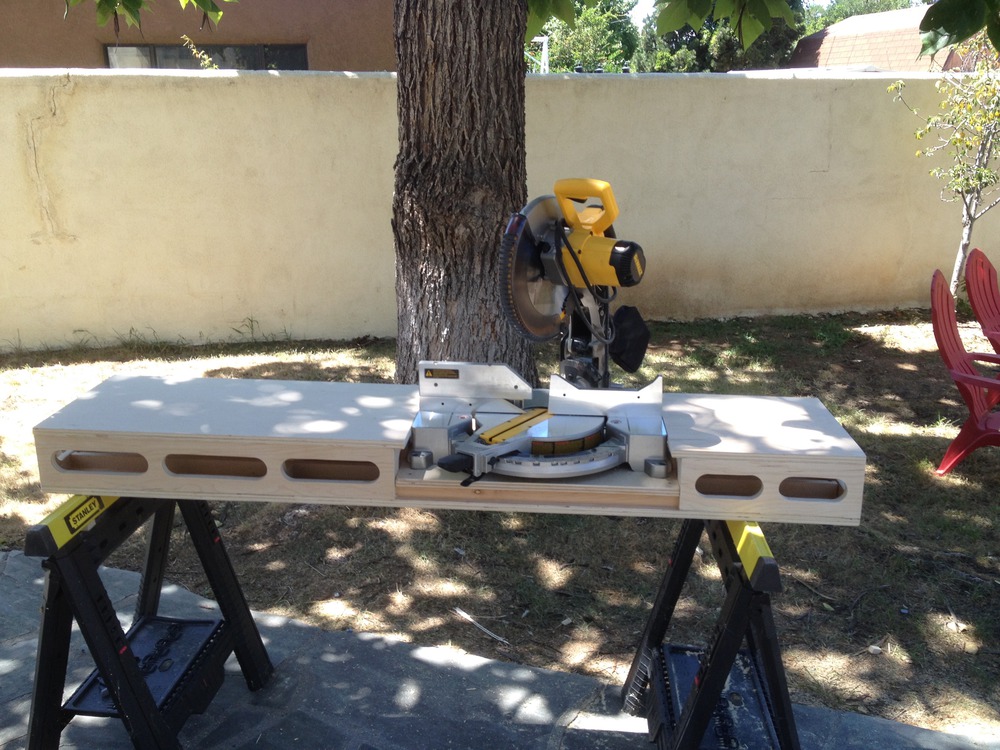
17. The completed project
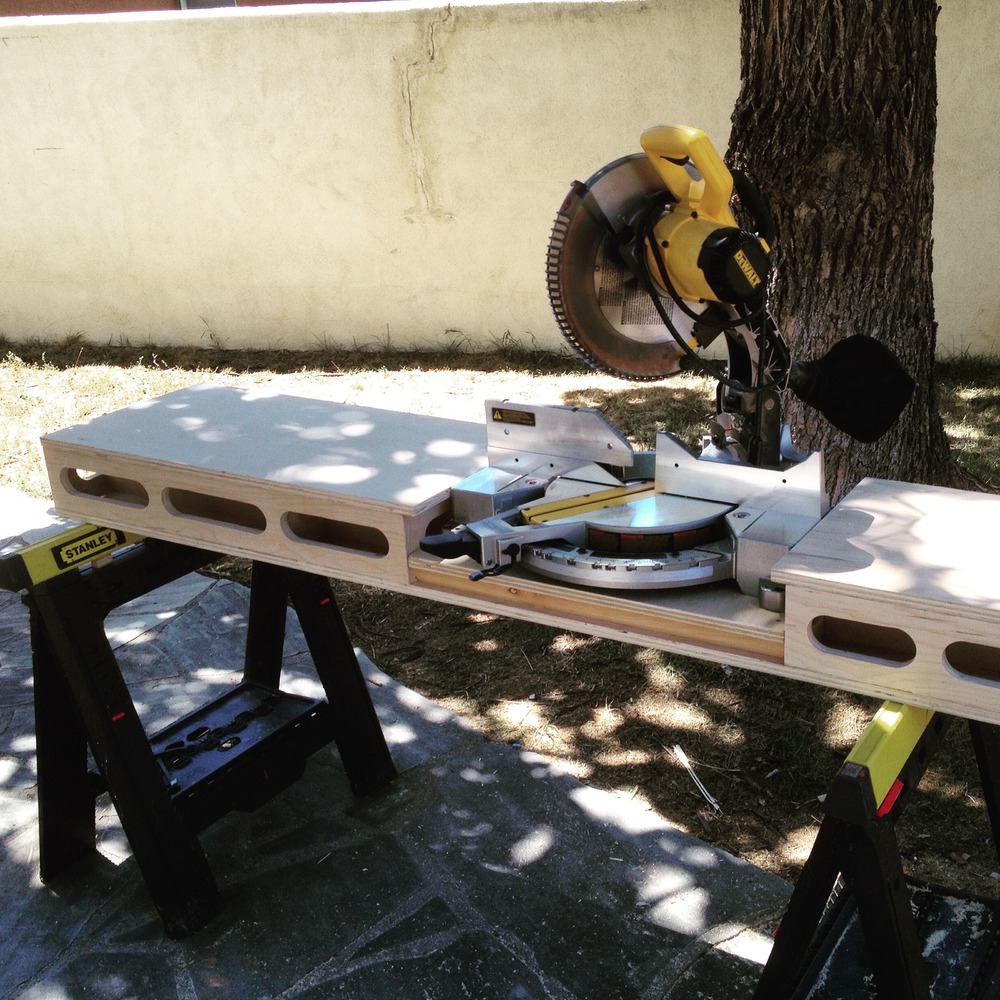
You’ll note that I haven’t built a fence for this. I’m short on space here, and want to be able to flip this over and use it as a workbench. The frame of this is very flat and stable, and so this is a valuable work surface! If this was dedicated only to the miter, I’d certainly add a fence.