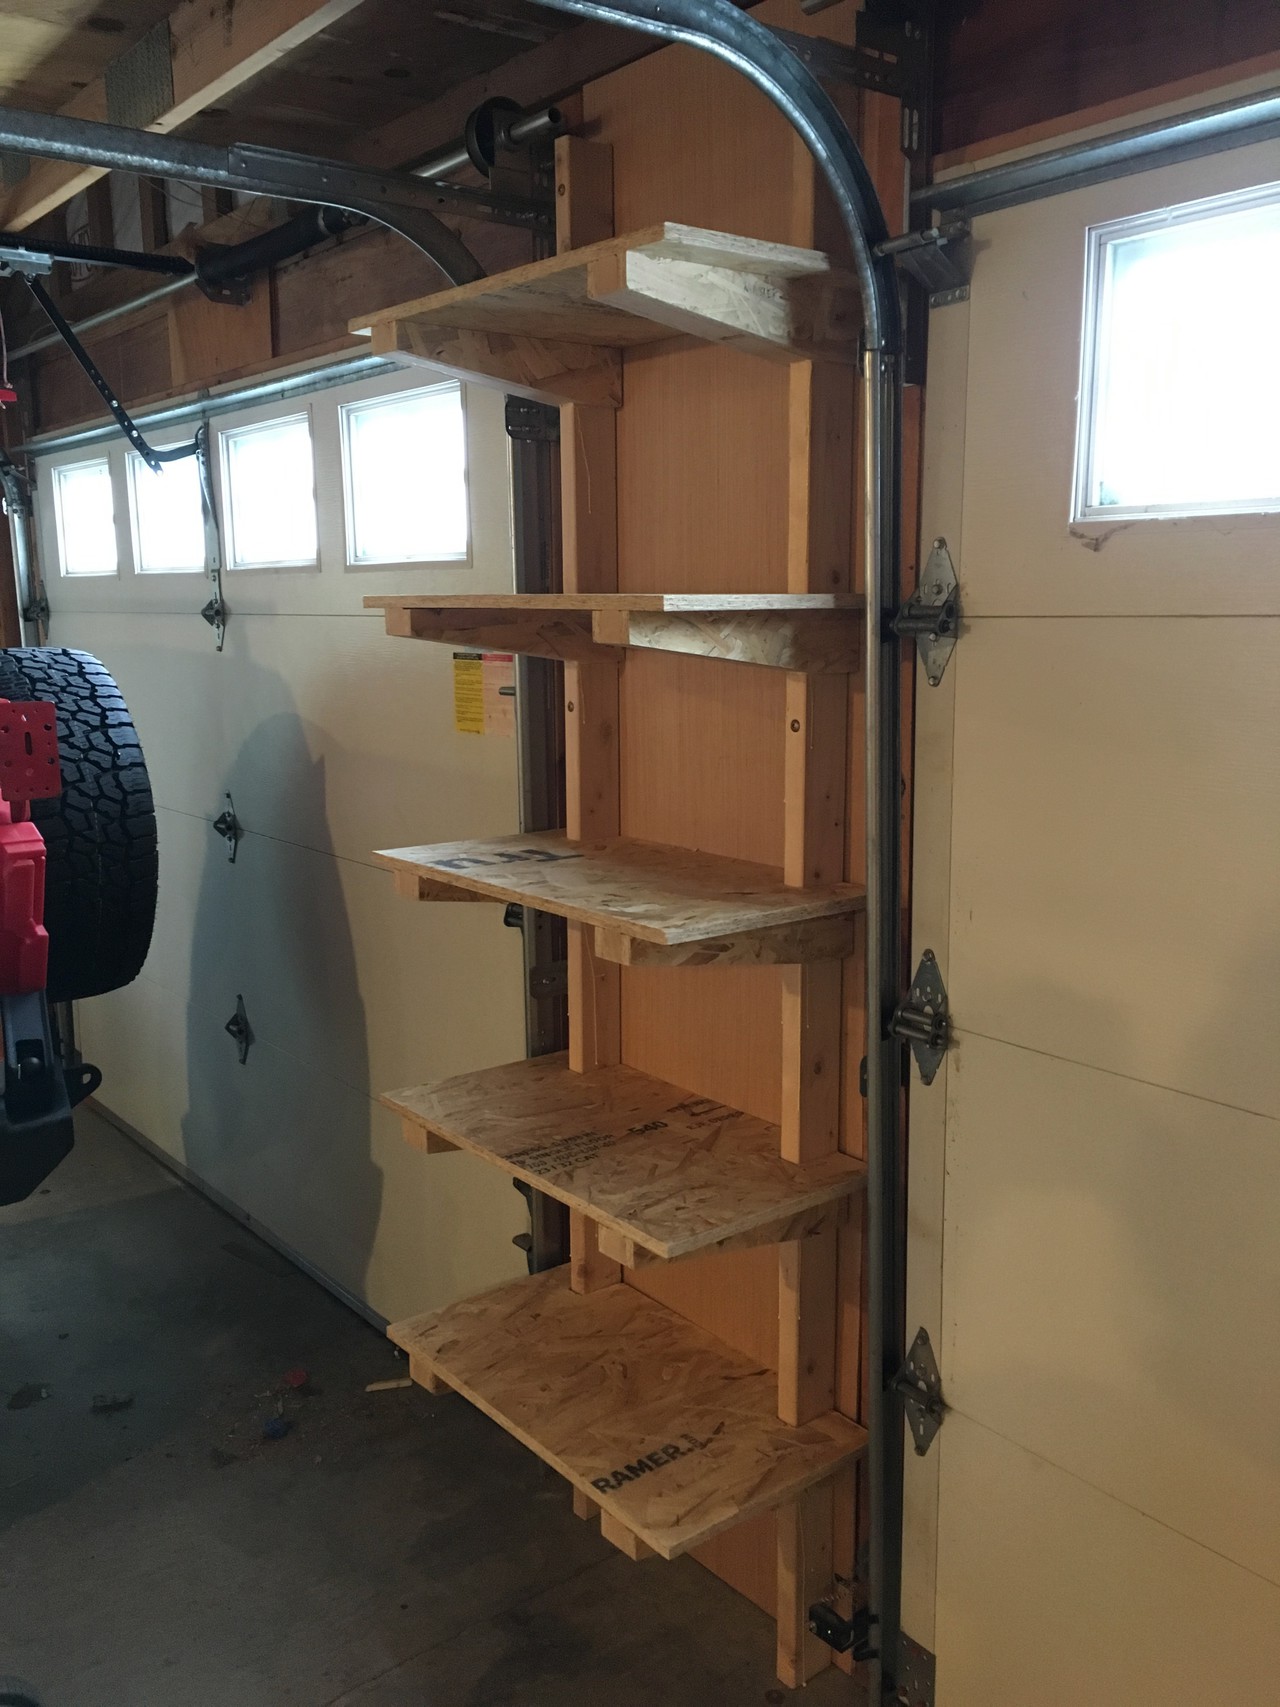
I had some unused space between my garage doors that could be used for storing car care items. I didn’t want to have a heavy looking set of shelves with front leg posts, nor did I want to build cabinets that would become cluttered. I decided that a set of cantilevered shelves would work well for this narrow space, and would give me a chance to try out some assembly with glue and my new nailer.
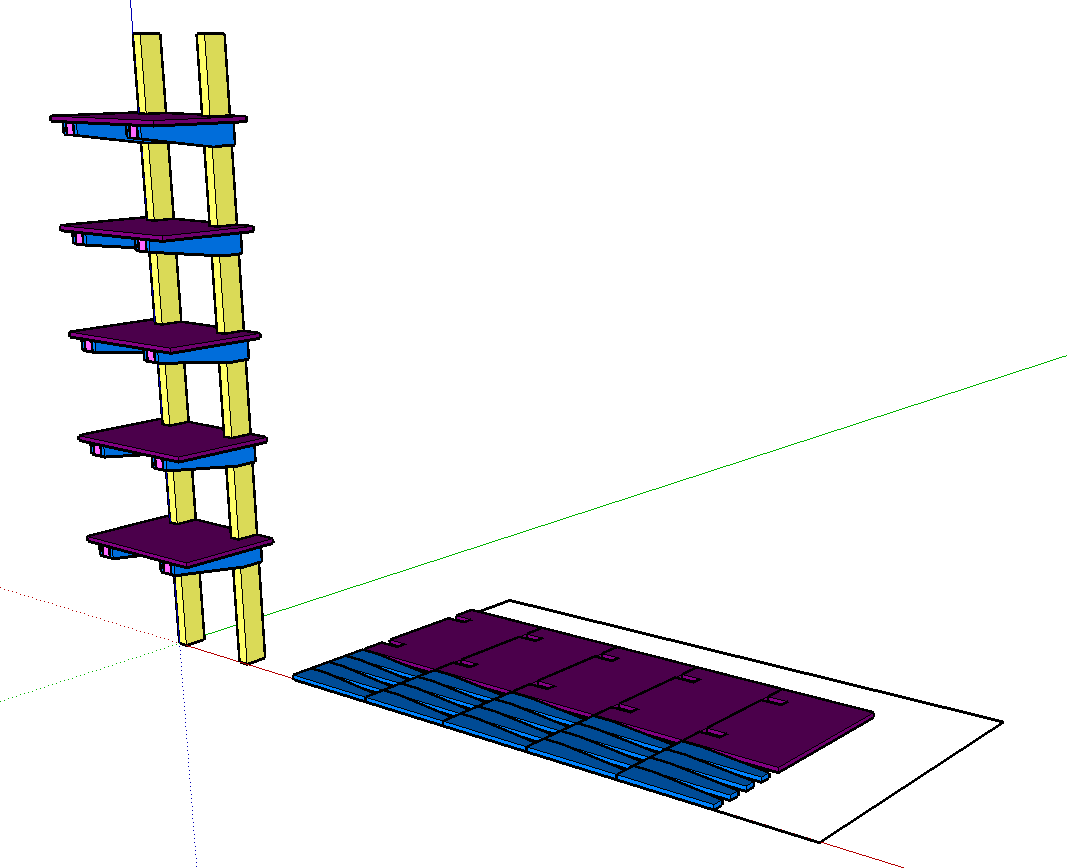
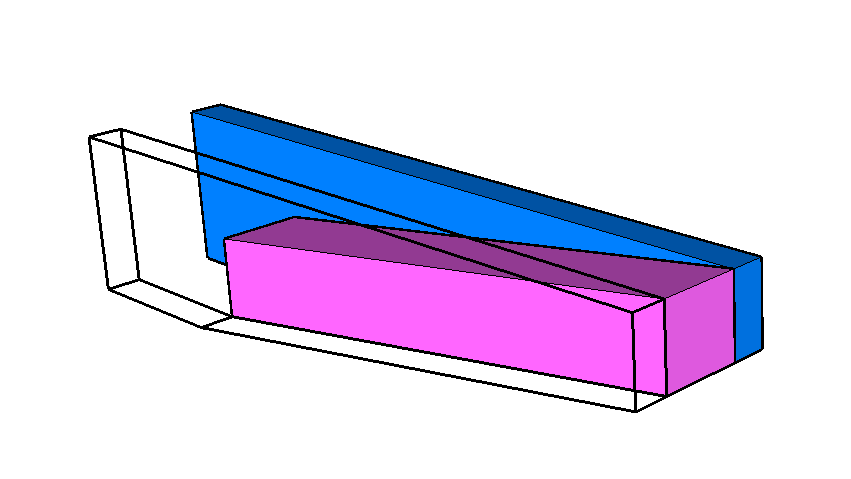
I made a quick model of these shelves in Sketchup. If you’re interested, you can download a copy of the file. If you’re new to woodworking modeling, you should start with the tutorials from Jay Bates. In this model, each color is a different part type. You can see the cut plan for the plywood next to the standing assembly. It’s worth noting the OSB has some directional strength, and I oriented the parts to the longer axis so that they’d be stronger along their length. I don’t really think this matters much in this application though.
The exact dimensions don’t really matter — this is more a building technique. However, in this particular case you can see that the nose of the shelf bracket is the width of the ripped 2x4, and the back part is the same width as the 2x4. Any of these dimensions can be changed!
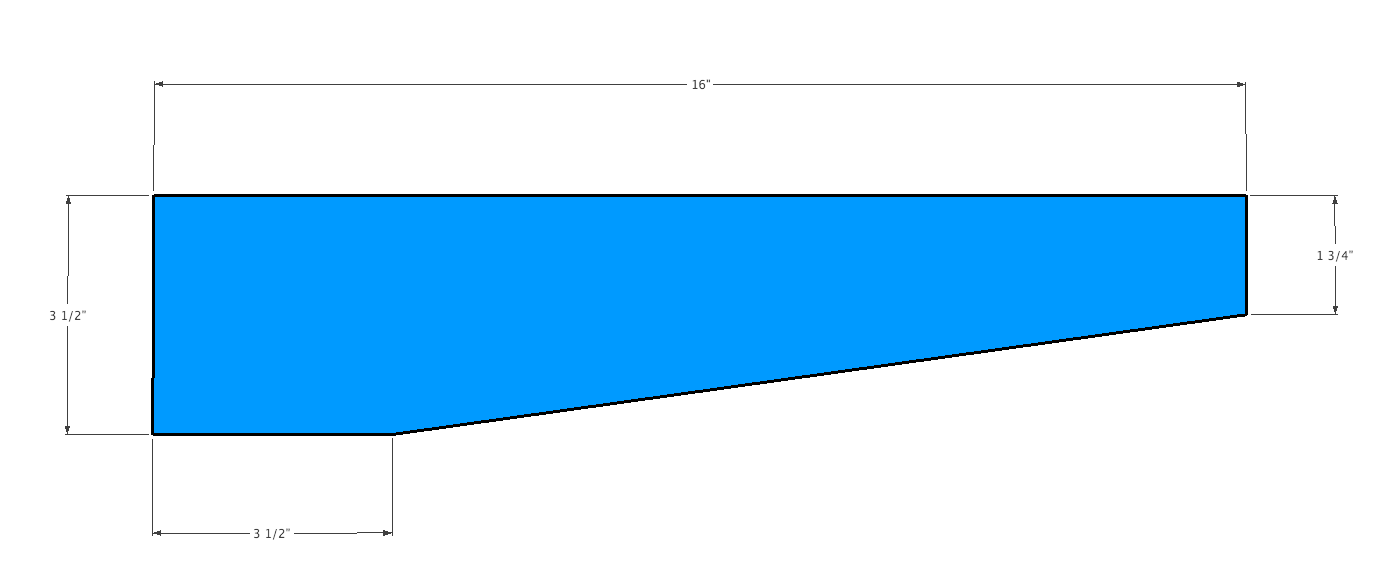
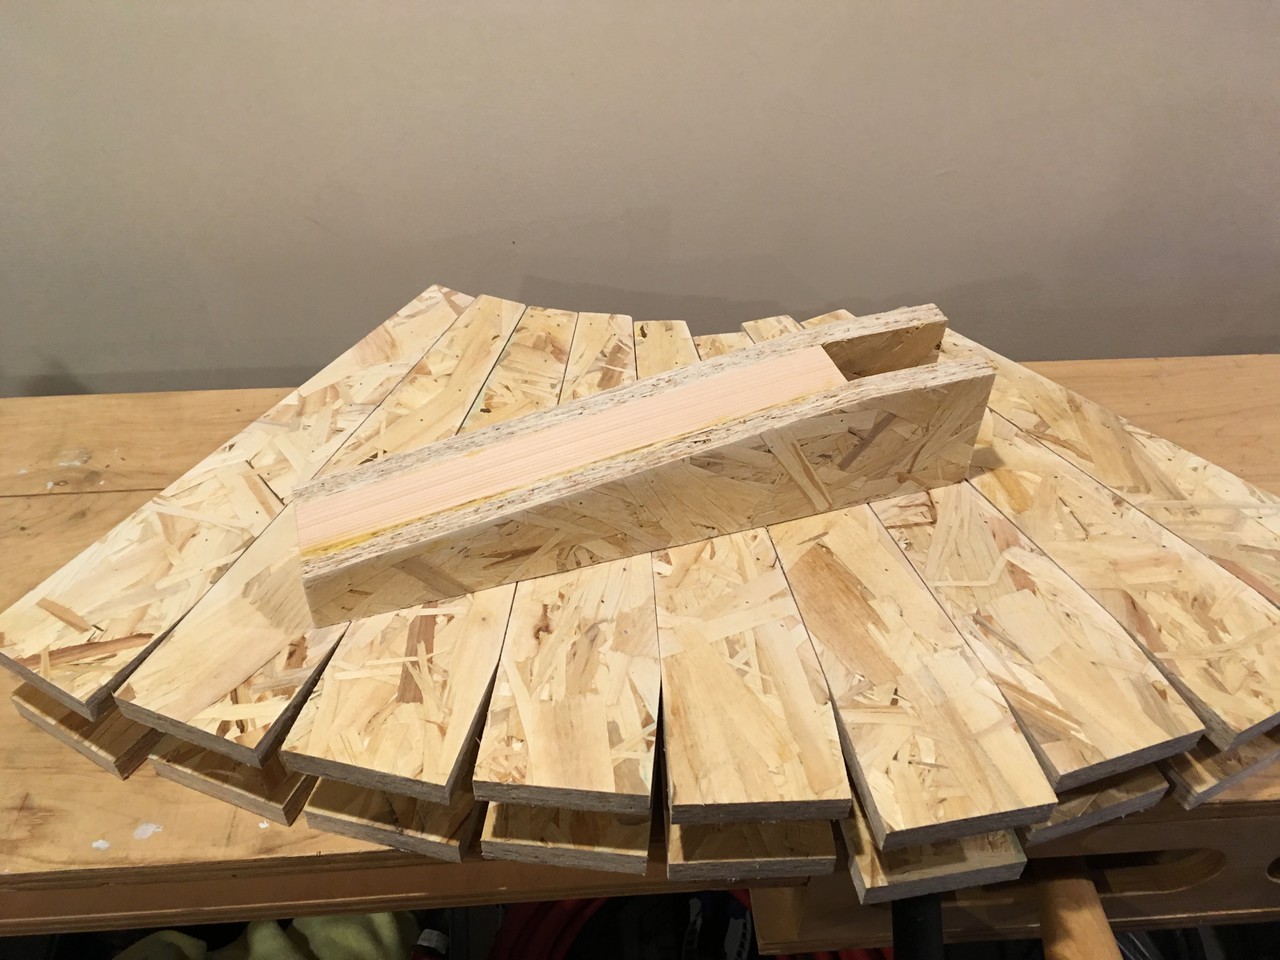
Each leg is made up of two pieces of plywood that sandwich a section of 2x4 that has been ripped in half. This properly spaces the side panels, and allows the weight of the shelves to be transferred into this center wood. It gives a great deal of strength even at a fairly shallow angle. In the photo below, the pink is the ripped 2x4 and the blue is the side panel made of OSB.
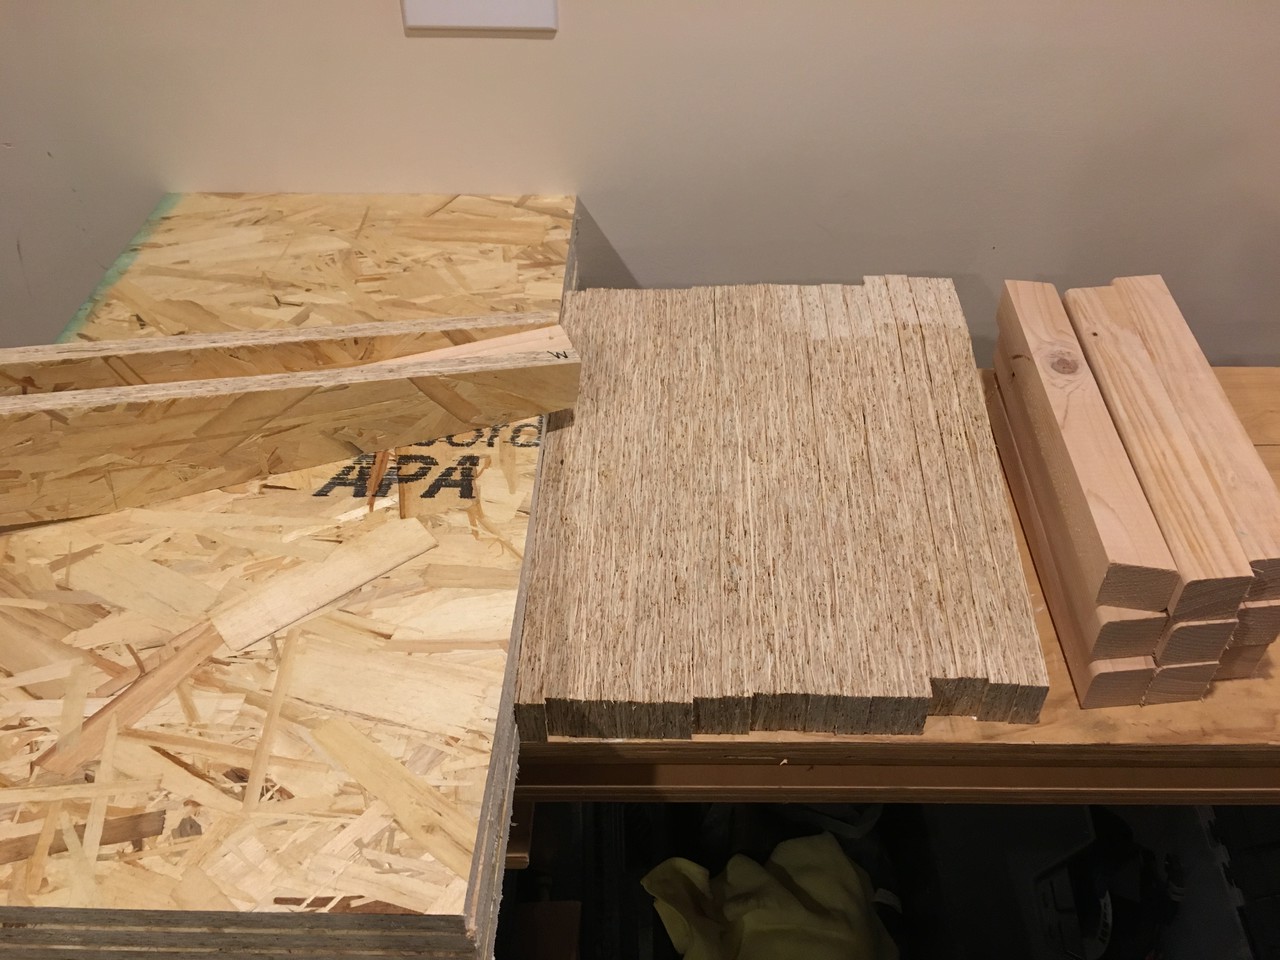
I cut the components by first breaking down the plywood with my homemade saw guide, and then cut to exact dimensions with my table saw and to length with my miter saw. The legs were then further cut with a tapering jig. In this photo below you can see all of the parts ready for assembly with glue. The bracing pieces made of the ripped 2x4 where cut on the miter saw set to an angle that was read directly from the part. I didn’t measure it.
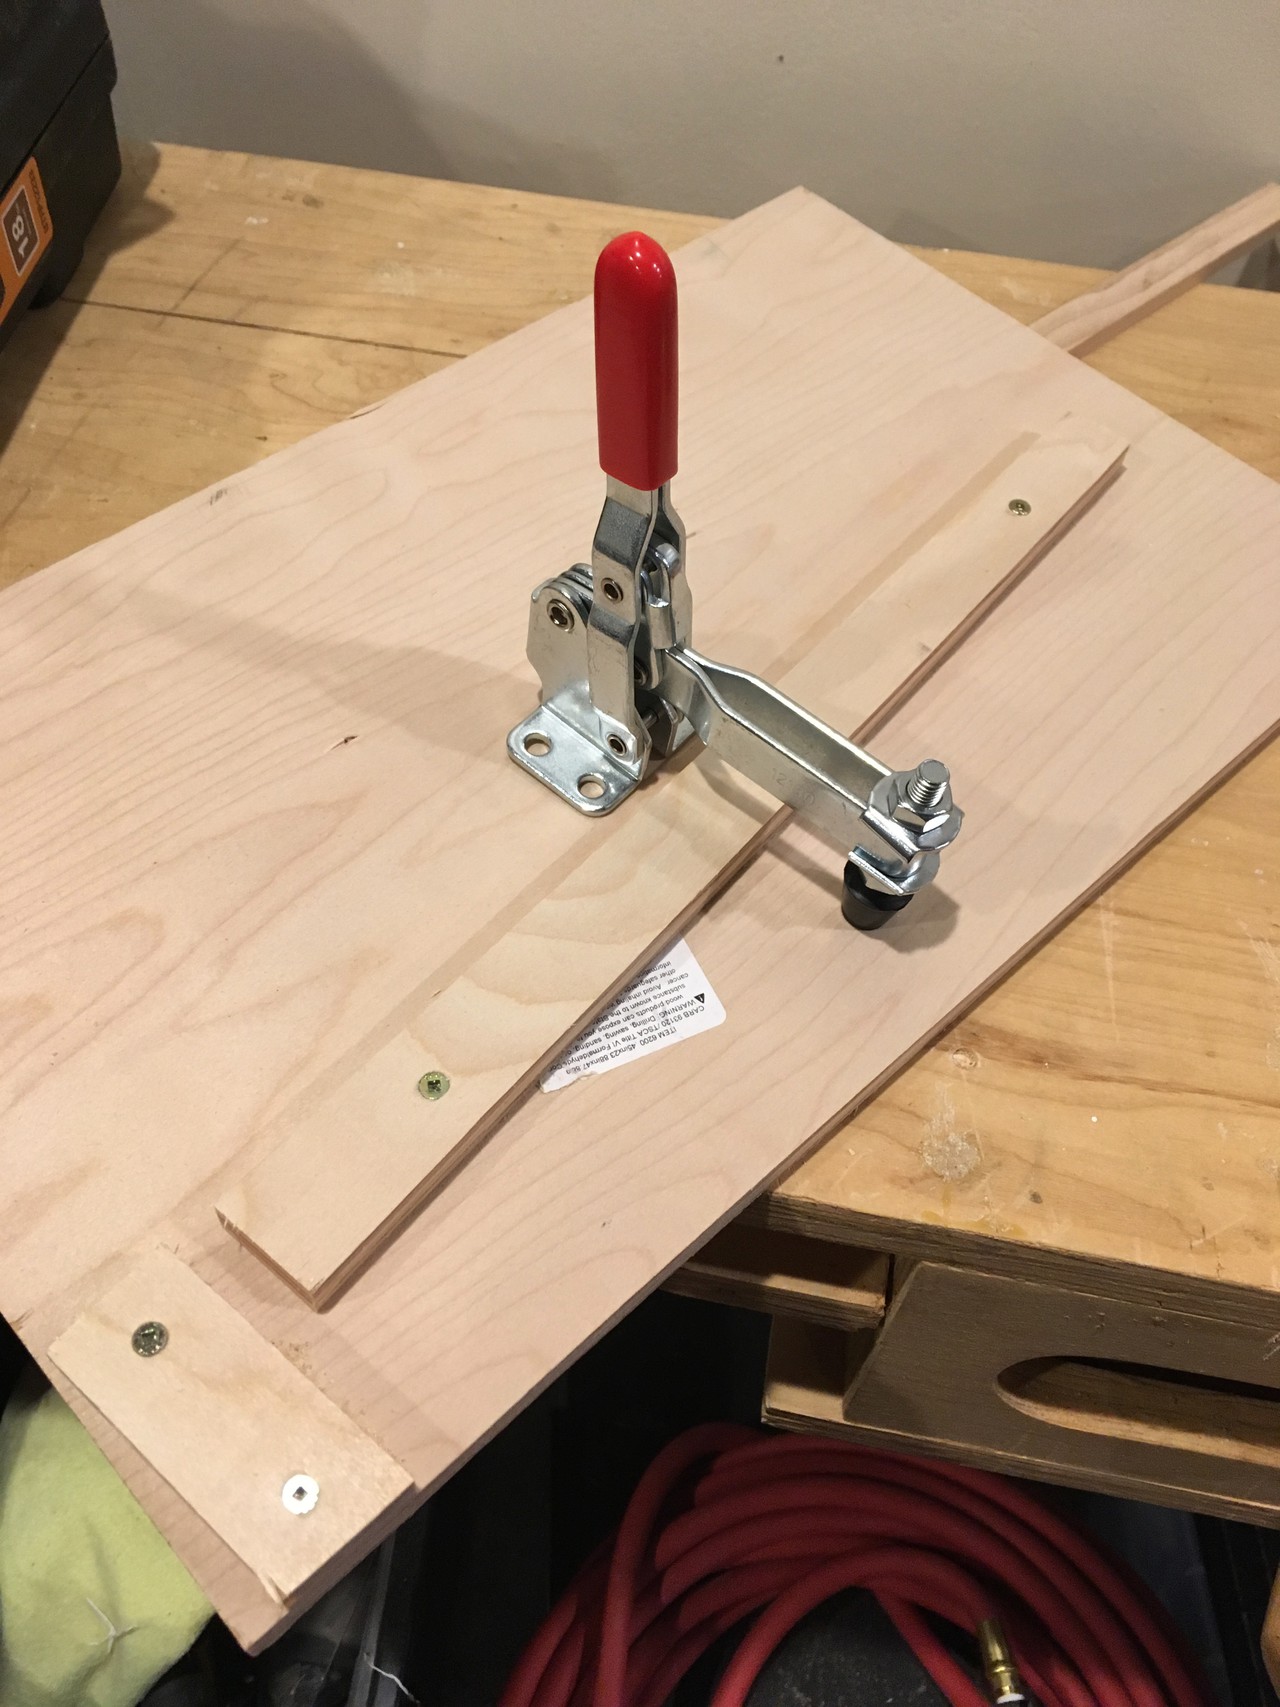
Here’s the tapering jig that I used to cut the angles on the side supports.
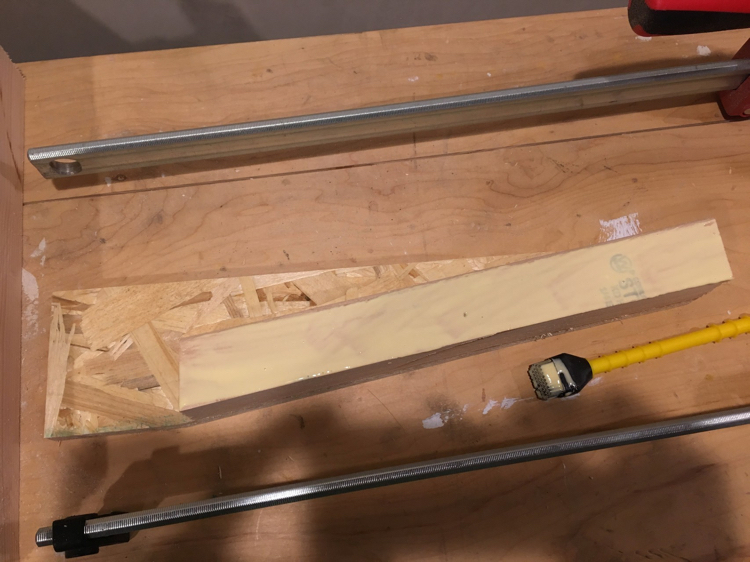
In this photo, you can see an ample amount of glue attaching the half 2x4 to the side panels. I wish I’d learn to use a proper glue brush years ago! I used 18 gauge x 1.5” nails to hold the parts together while the glue dried.
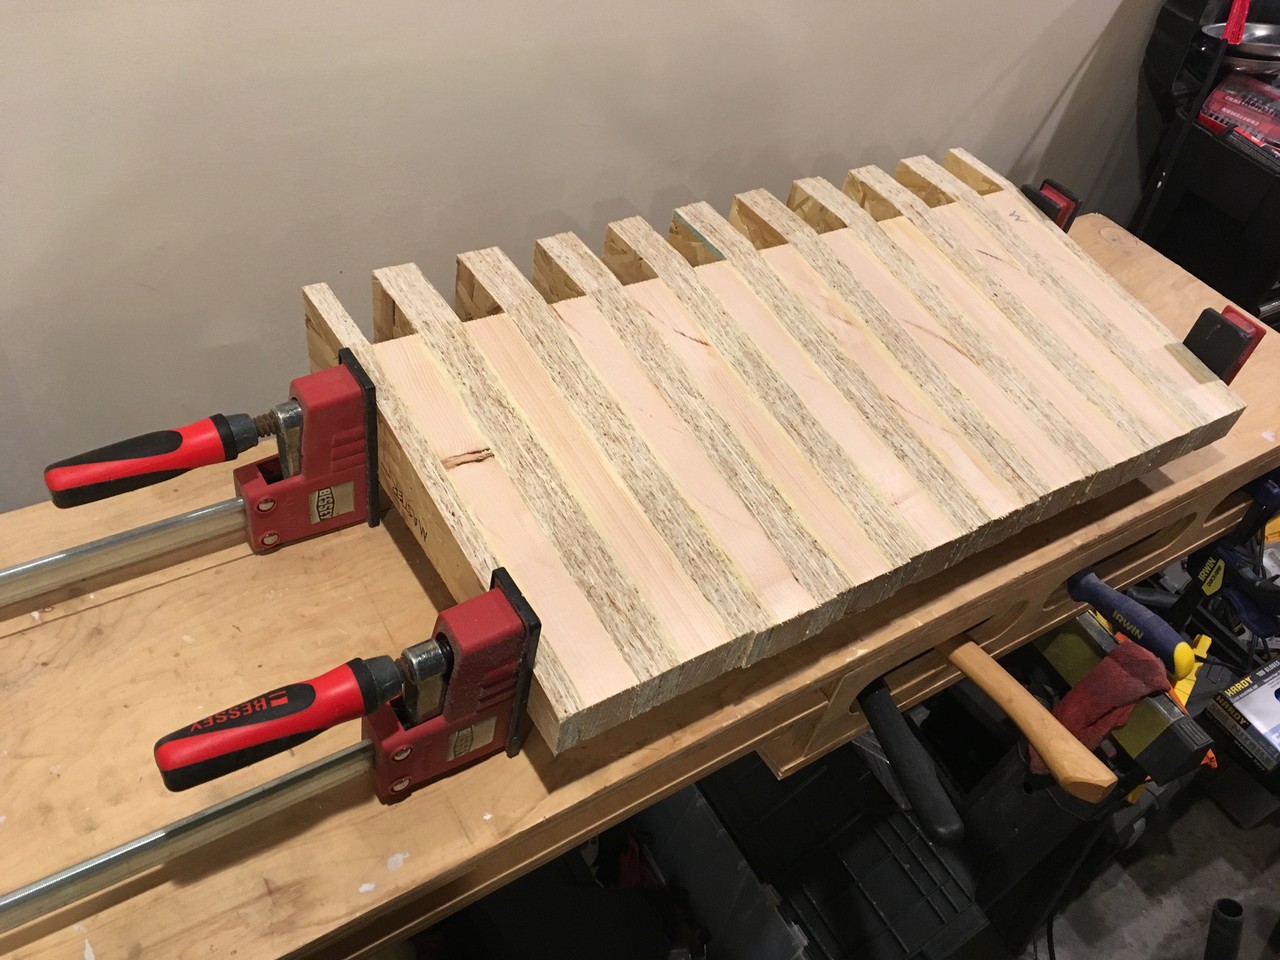
With the glue up of each one complete, they went into some clamps to dry overnight.
Once dry, the brackets got a quick sanding with 60 and 100 grit. My goal was to reduce splinters and not much else.
I then installed the brackets onto the 2x4 legs at 16” increments. Each was simply slipped over the 2x4 and then pinned with additional 1.5” 18 gauge nails. I gave the glue on these an afternoon to dry before installing the legs into their final locations and then cutting the shelves to match. Each shelf is attached to the legs with a few 1.25” nails.

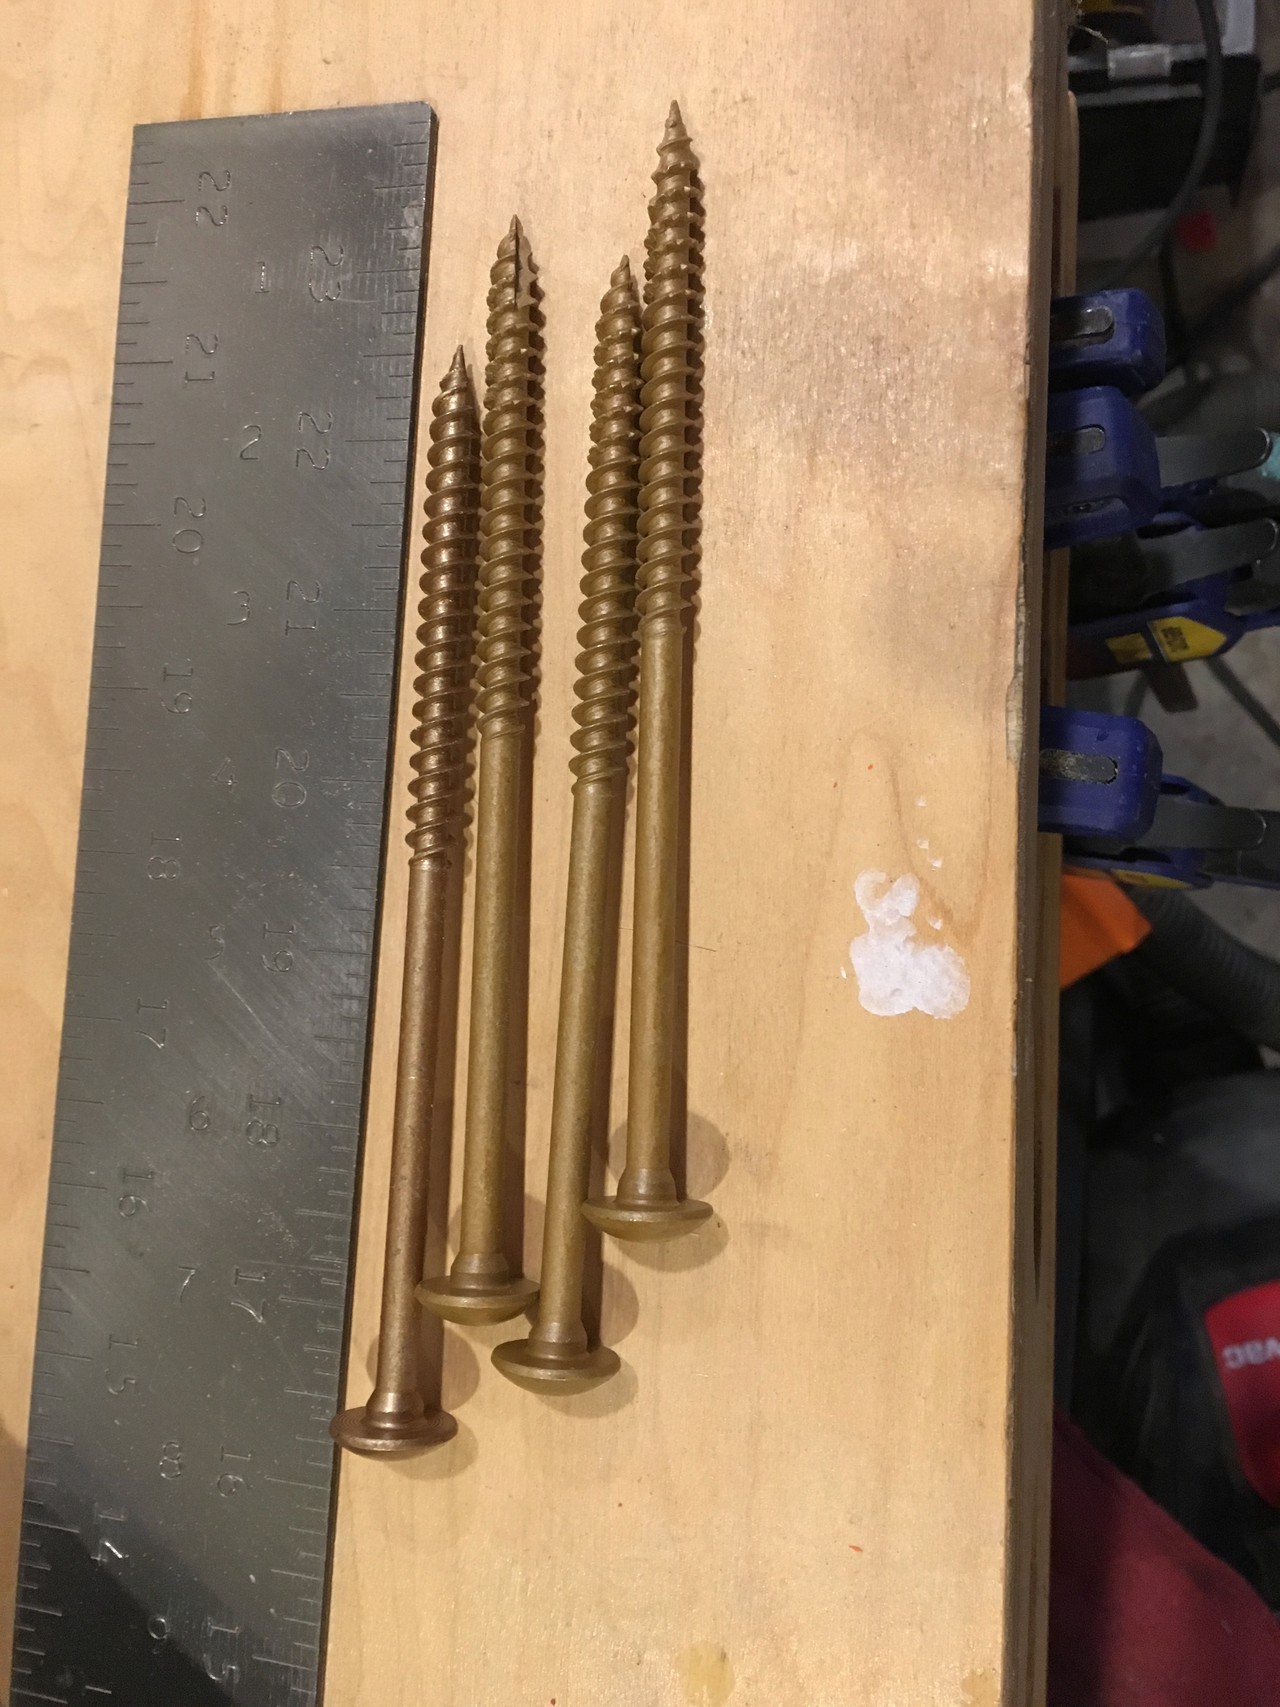
I’ve been using these wood screws lately for projects, and they are fantastic for attaching to wall studs. I do tend to predrill to help make sure they go in straight. In this case, I used two per side to attach these shelf rails to the walls.