Want to buy one of these? These aren’t available from a factory anymore, but @triple_t_customs is now making high quality replacements. Send him a message on Instagram!
My Jeep developed a new rattle. The rubber isolator mount for the middle of the exhaust was failing and allowing the exhaust to hit my transmission crossmember. You can see in this photo that the ½” hole in the middle of this hangar has wallowed.
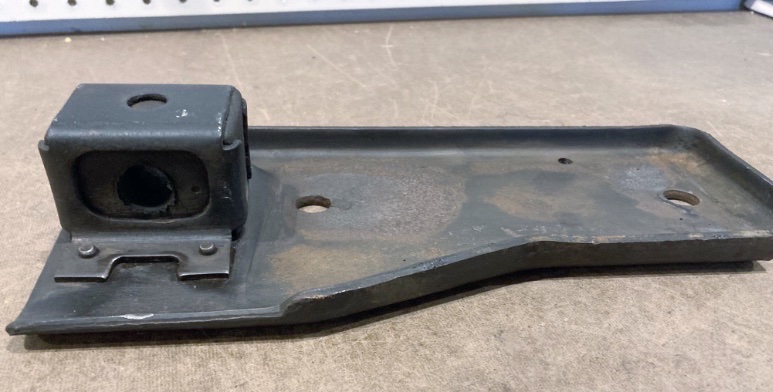
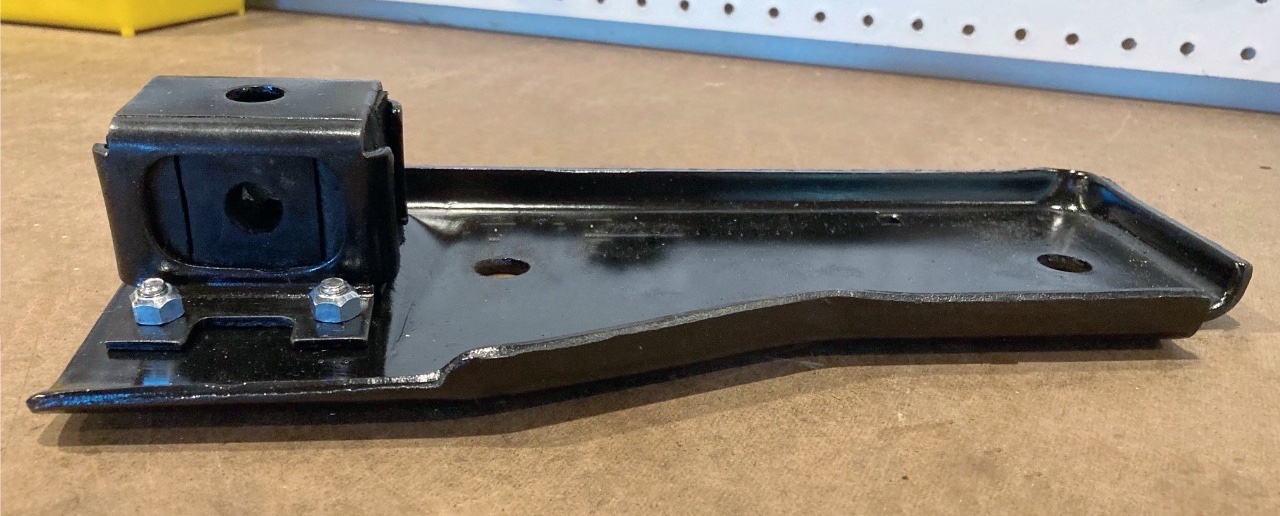
This bracket has a rubber bushing that accepts an exhaust hangar. Over time (20+ years!), this hangar deforms and can allow the exhaust to contact the transmission crossmember and rattle.
I searched online for this part without success. For the first time with my Jeep, I saw this message:
This part is discontinued. It is no longer available for purchase.
The part #52058882 is no longer generally available. It appears that a few NOS are available for upwards of $100. However, there are quite a few posts in the XJ forums with solutions.
- Replacing middle (crossmember) exhaust hanger
- DEA A5208 replacement bushing
- Rubber Isolator Replacement
The Plan
Disclaimer: I am not a professional. This is for informational purposes only. Please properly secure your transmission when working, and don’t do anything stupid. Be safe when under your Jeep, and please wear your safety glasses.
We’re going to replace the rubber isolator instead of the entire part.
There isn’t a direct fit replacement for this rubber. We’re going to have to make one ourselves, and we’re going to have to take apart the mount in order to do that.
Parts
As usual, there’s an Amazon affiliate link in case you’d like to support these posts and need this part. The nuts and screws you should be able to find at a good hardware store for just a couple of dollars.
- M6-1.00 Self Locking Stover Nuts
- M6 Washers
- M6-1.00x16mm Button Head Cap Screws
- DEA A5208 Transmission Mount
Remove the part and get it on your workbench
You’ll need to remove your transmission crossmember and then your transmission mount in order to access the exhaust mount. Remember to securely support your transmission when you do this.
Drill out the rivets and separate the parts
We need to remove the old rubber. Do whatever you need to in order to get the square “box” off of the main plate. I drilled out the rivets and hoped I’d be able to drive them out with a punch:
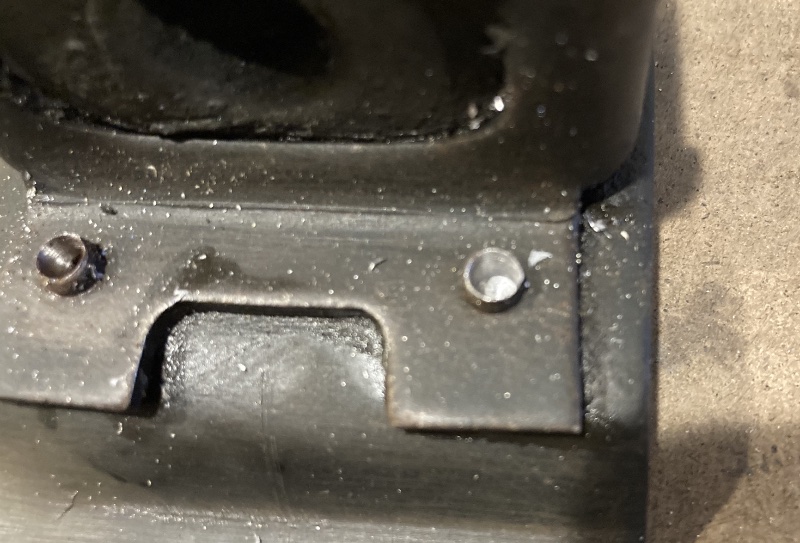
This didn’t work, and I instead ground the back of the rivets off with a grinder and a 40 grit flap disc. With the back of the rivets removed, I was able to punch out the remaining bits of the rivets.
I then drilled both the square body and the holes in the plate out to ¼” with a step drill bit.
Replace the worn out rubber
CCKen at CherokeeForum cleverly used a 3M sanding block to replace the worn out rubber mount. He details this in his post about this part. He includes a detailed drawing and excellent instructions.
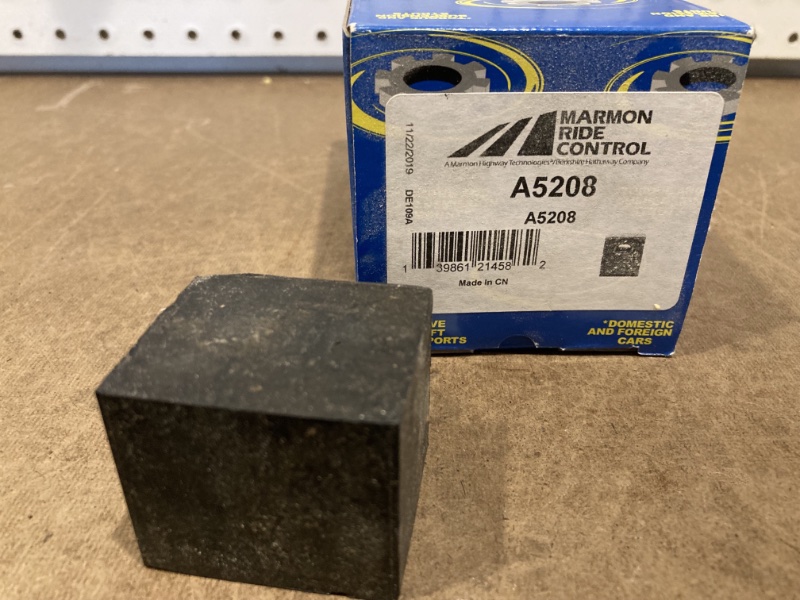
I instead chose to use a DEA A5208 Transmission Mount. It sounds like there are two version of this mount available. The one that I ended up with was both a little two narrow, and the hole was only a half circle. I chose to drill a new ½” hole off to the side of the factory hole. I then cut the sides off of the original rubber block and used those to make up the difference in width.
Sand and paint
I try to sand and paint everything that I can before I reassemble. This was no exception. I used a wire wheel and sandpaper to strip the parts bare and then repainted with Krylon Rust Protector.
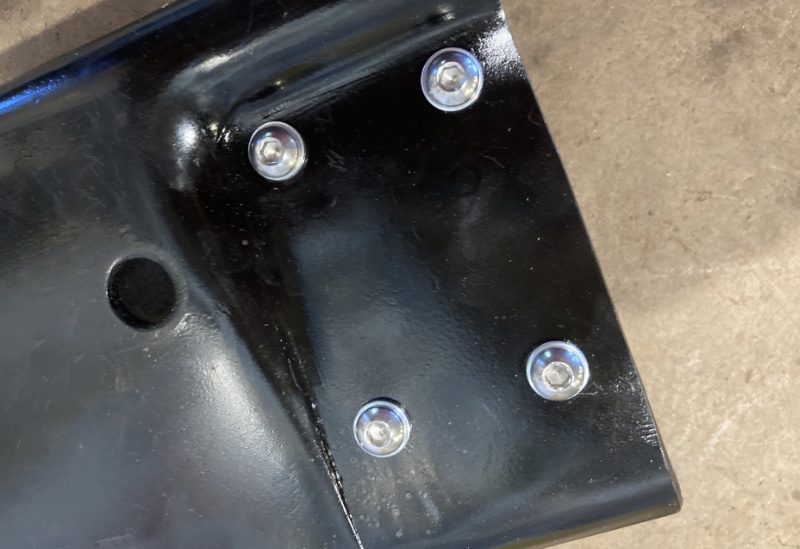
I assembled the part with button head screws and stover nuts. They have even more holding power than nyloc nuts and are safe for higher heat.
Admire your work
With the new rubber in place, you can attach the metal cage back to the base plate. You should have something that looks like this:
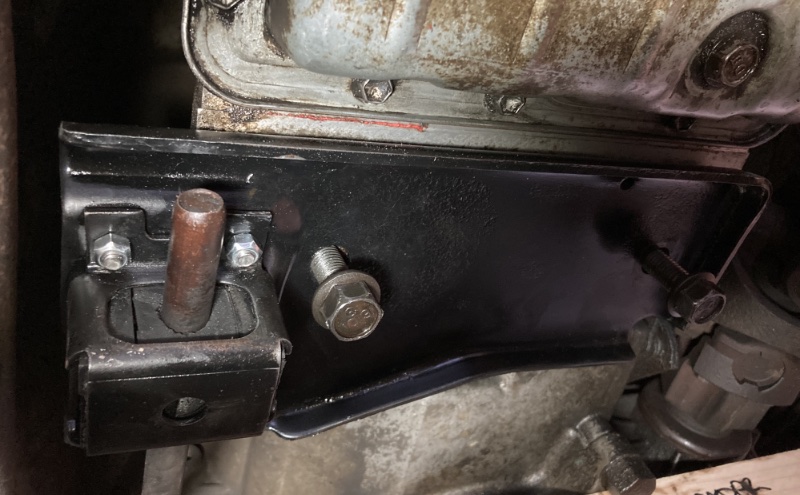
Installed in my XJ
Here it is in place without the transmission crossmember. This moved my exhaust nearly ¾” upwards.
If you’ve got questions about any of this, please feel free to send me an email.