When I installed my rear tire carrier, I relocated my license plate to the center of the spare tire. The license plate bracket that I used came with a small LED light but no other instructions or provisions for wiring. I used trailer light connectors and shrink wrapped wires to make a replaceable wire to connect the light to the Jeep. My new license plate light runs in parallel to the right rear running light by tapping into those wires. This is a tutorial for how I did this.
Disclaimer: I am not a professional. This is for informational purposes only. Please properly secure all wires, and don’t do anything stupid. Be safe when soldering and don’t breathe the fumes and be careful around wiring in general.
Ready for install on the tire carrier
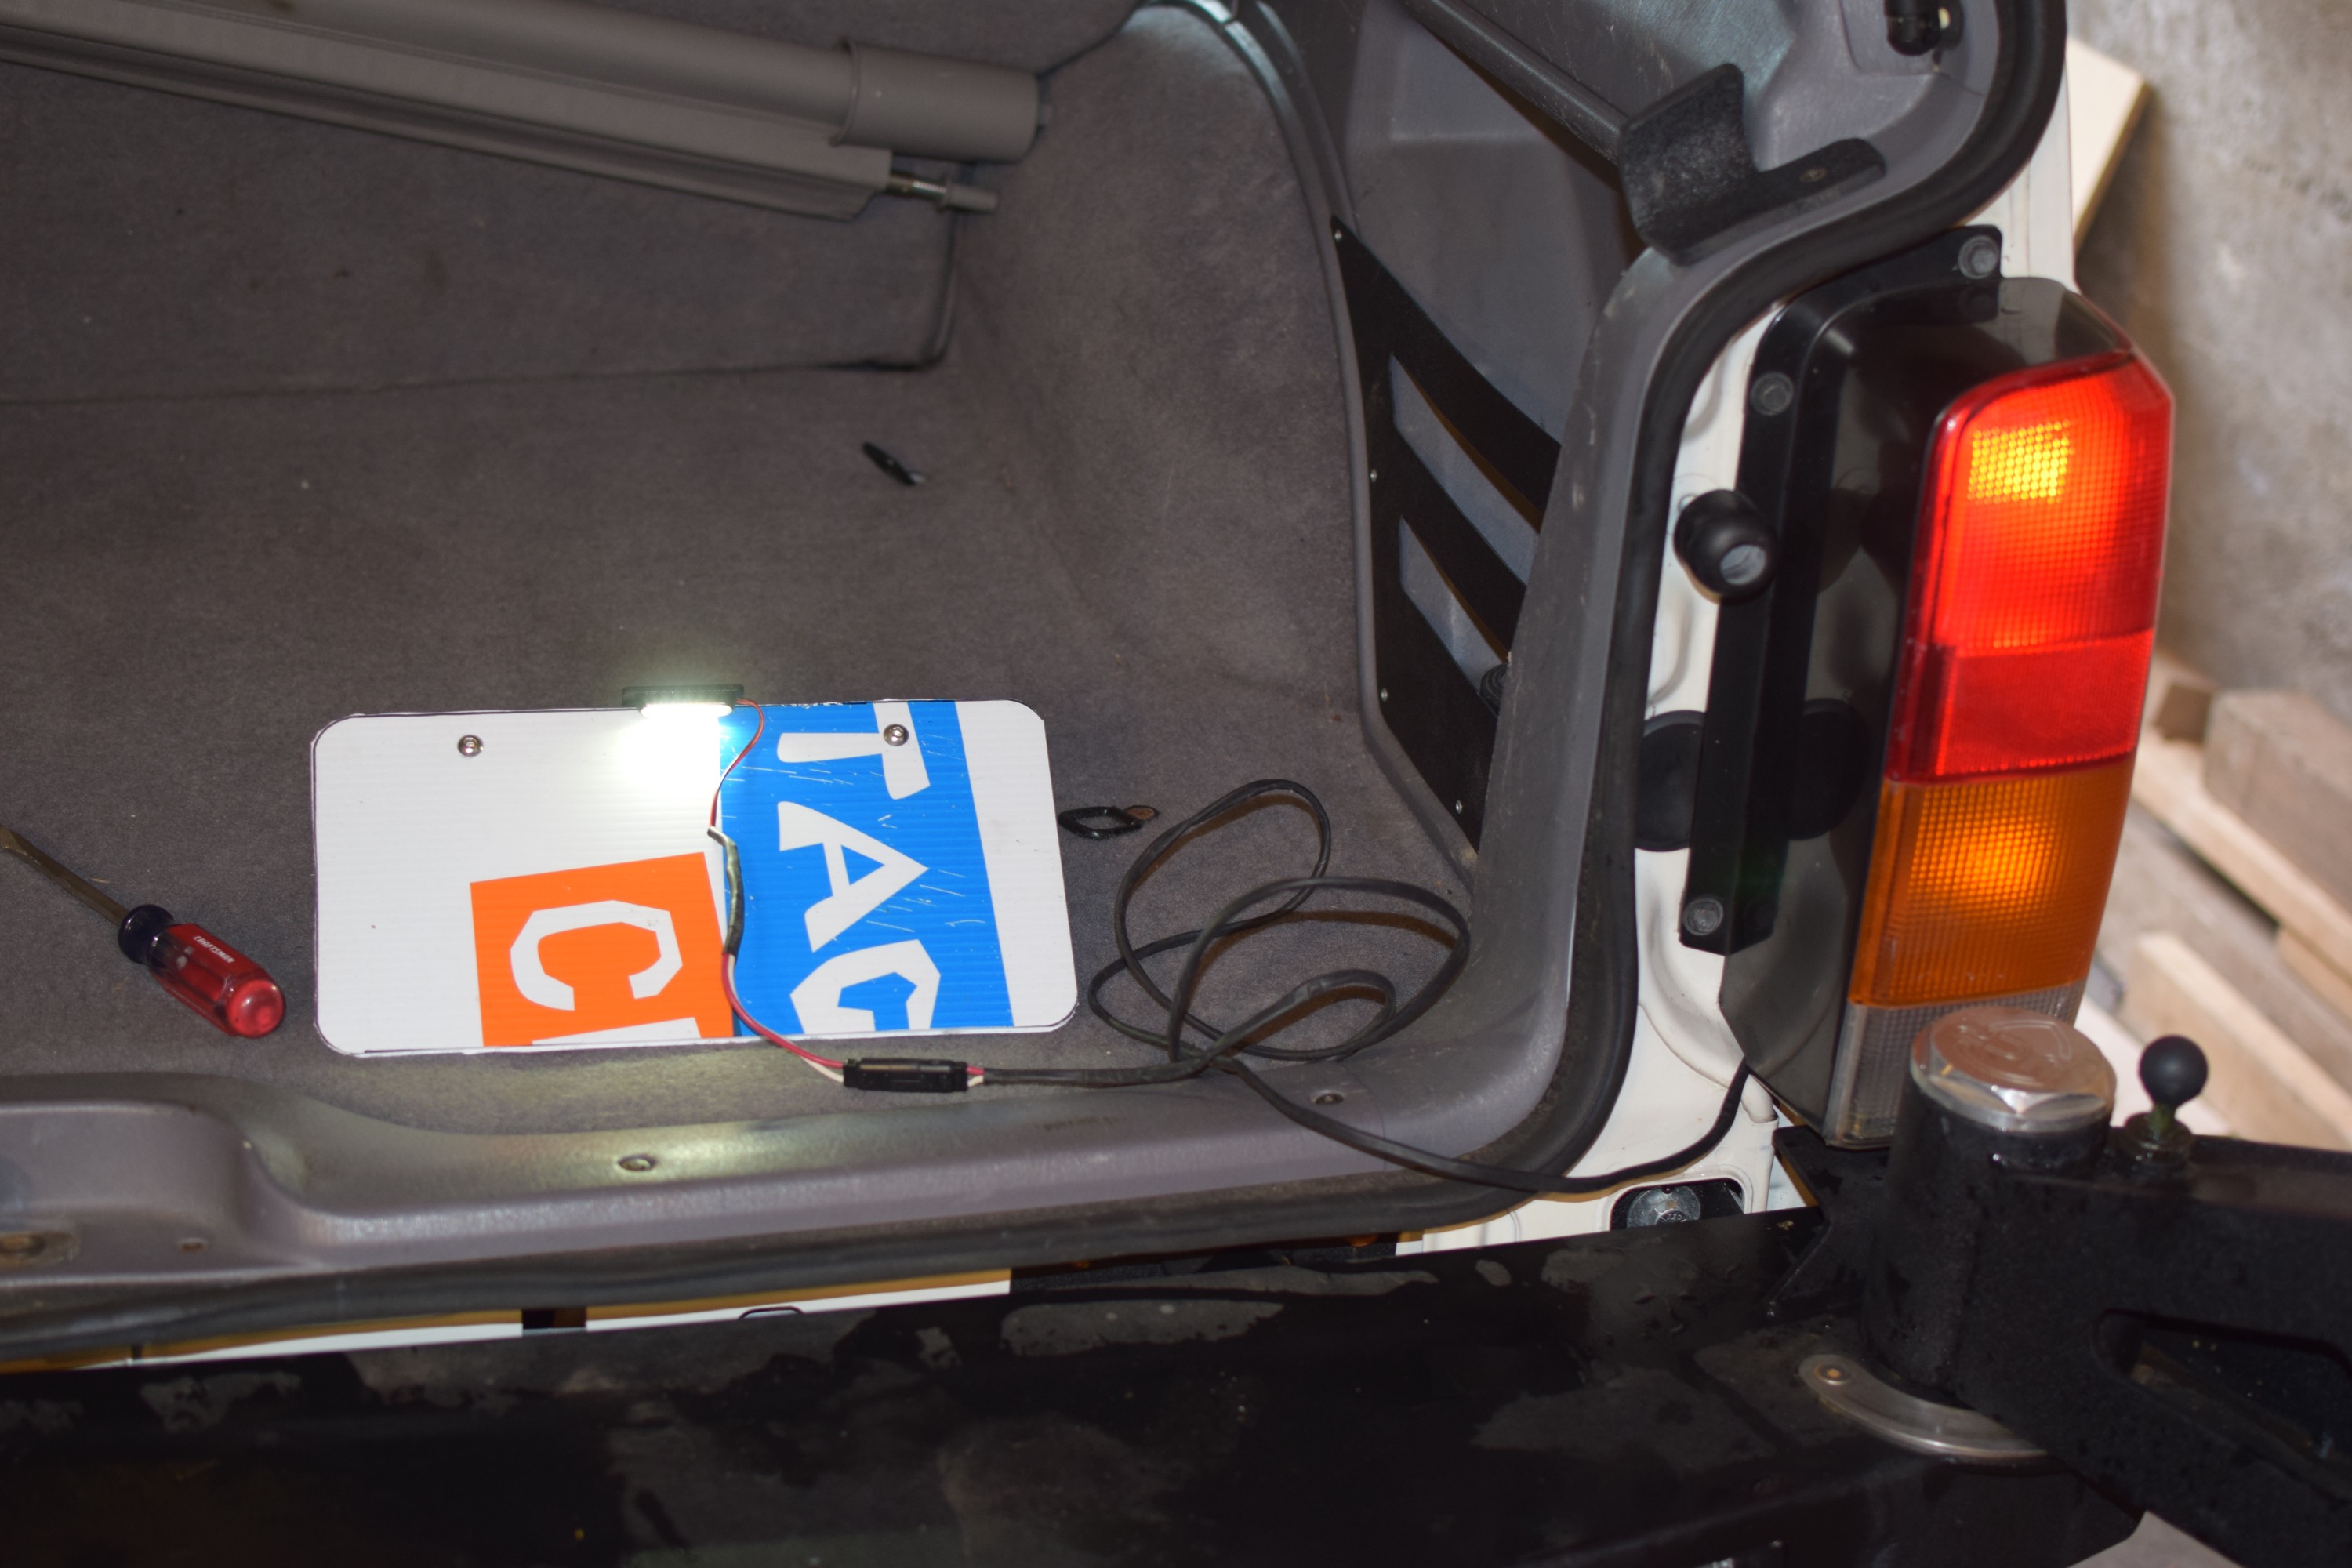
Here it is ready to install on the tire carrier with a fake license plate for the photos.
A diagram of the setup
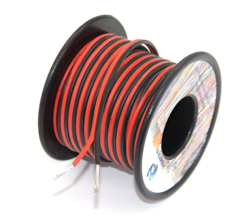
The supplies
- JCR license plate bracket
- 16 awg wiring
- Heat shrink tubing
- Two trailer wiring connectors
- Soldering supplies, or alternately you can use wire taps and crimped connectors.
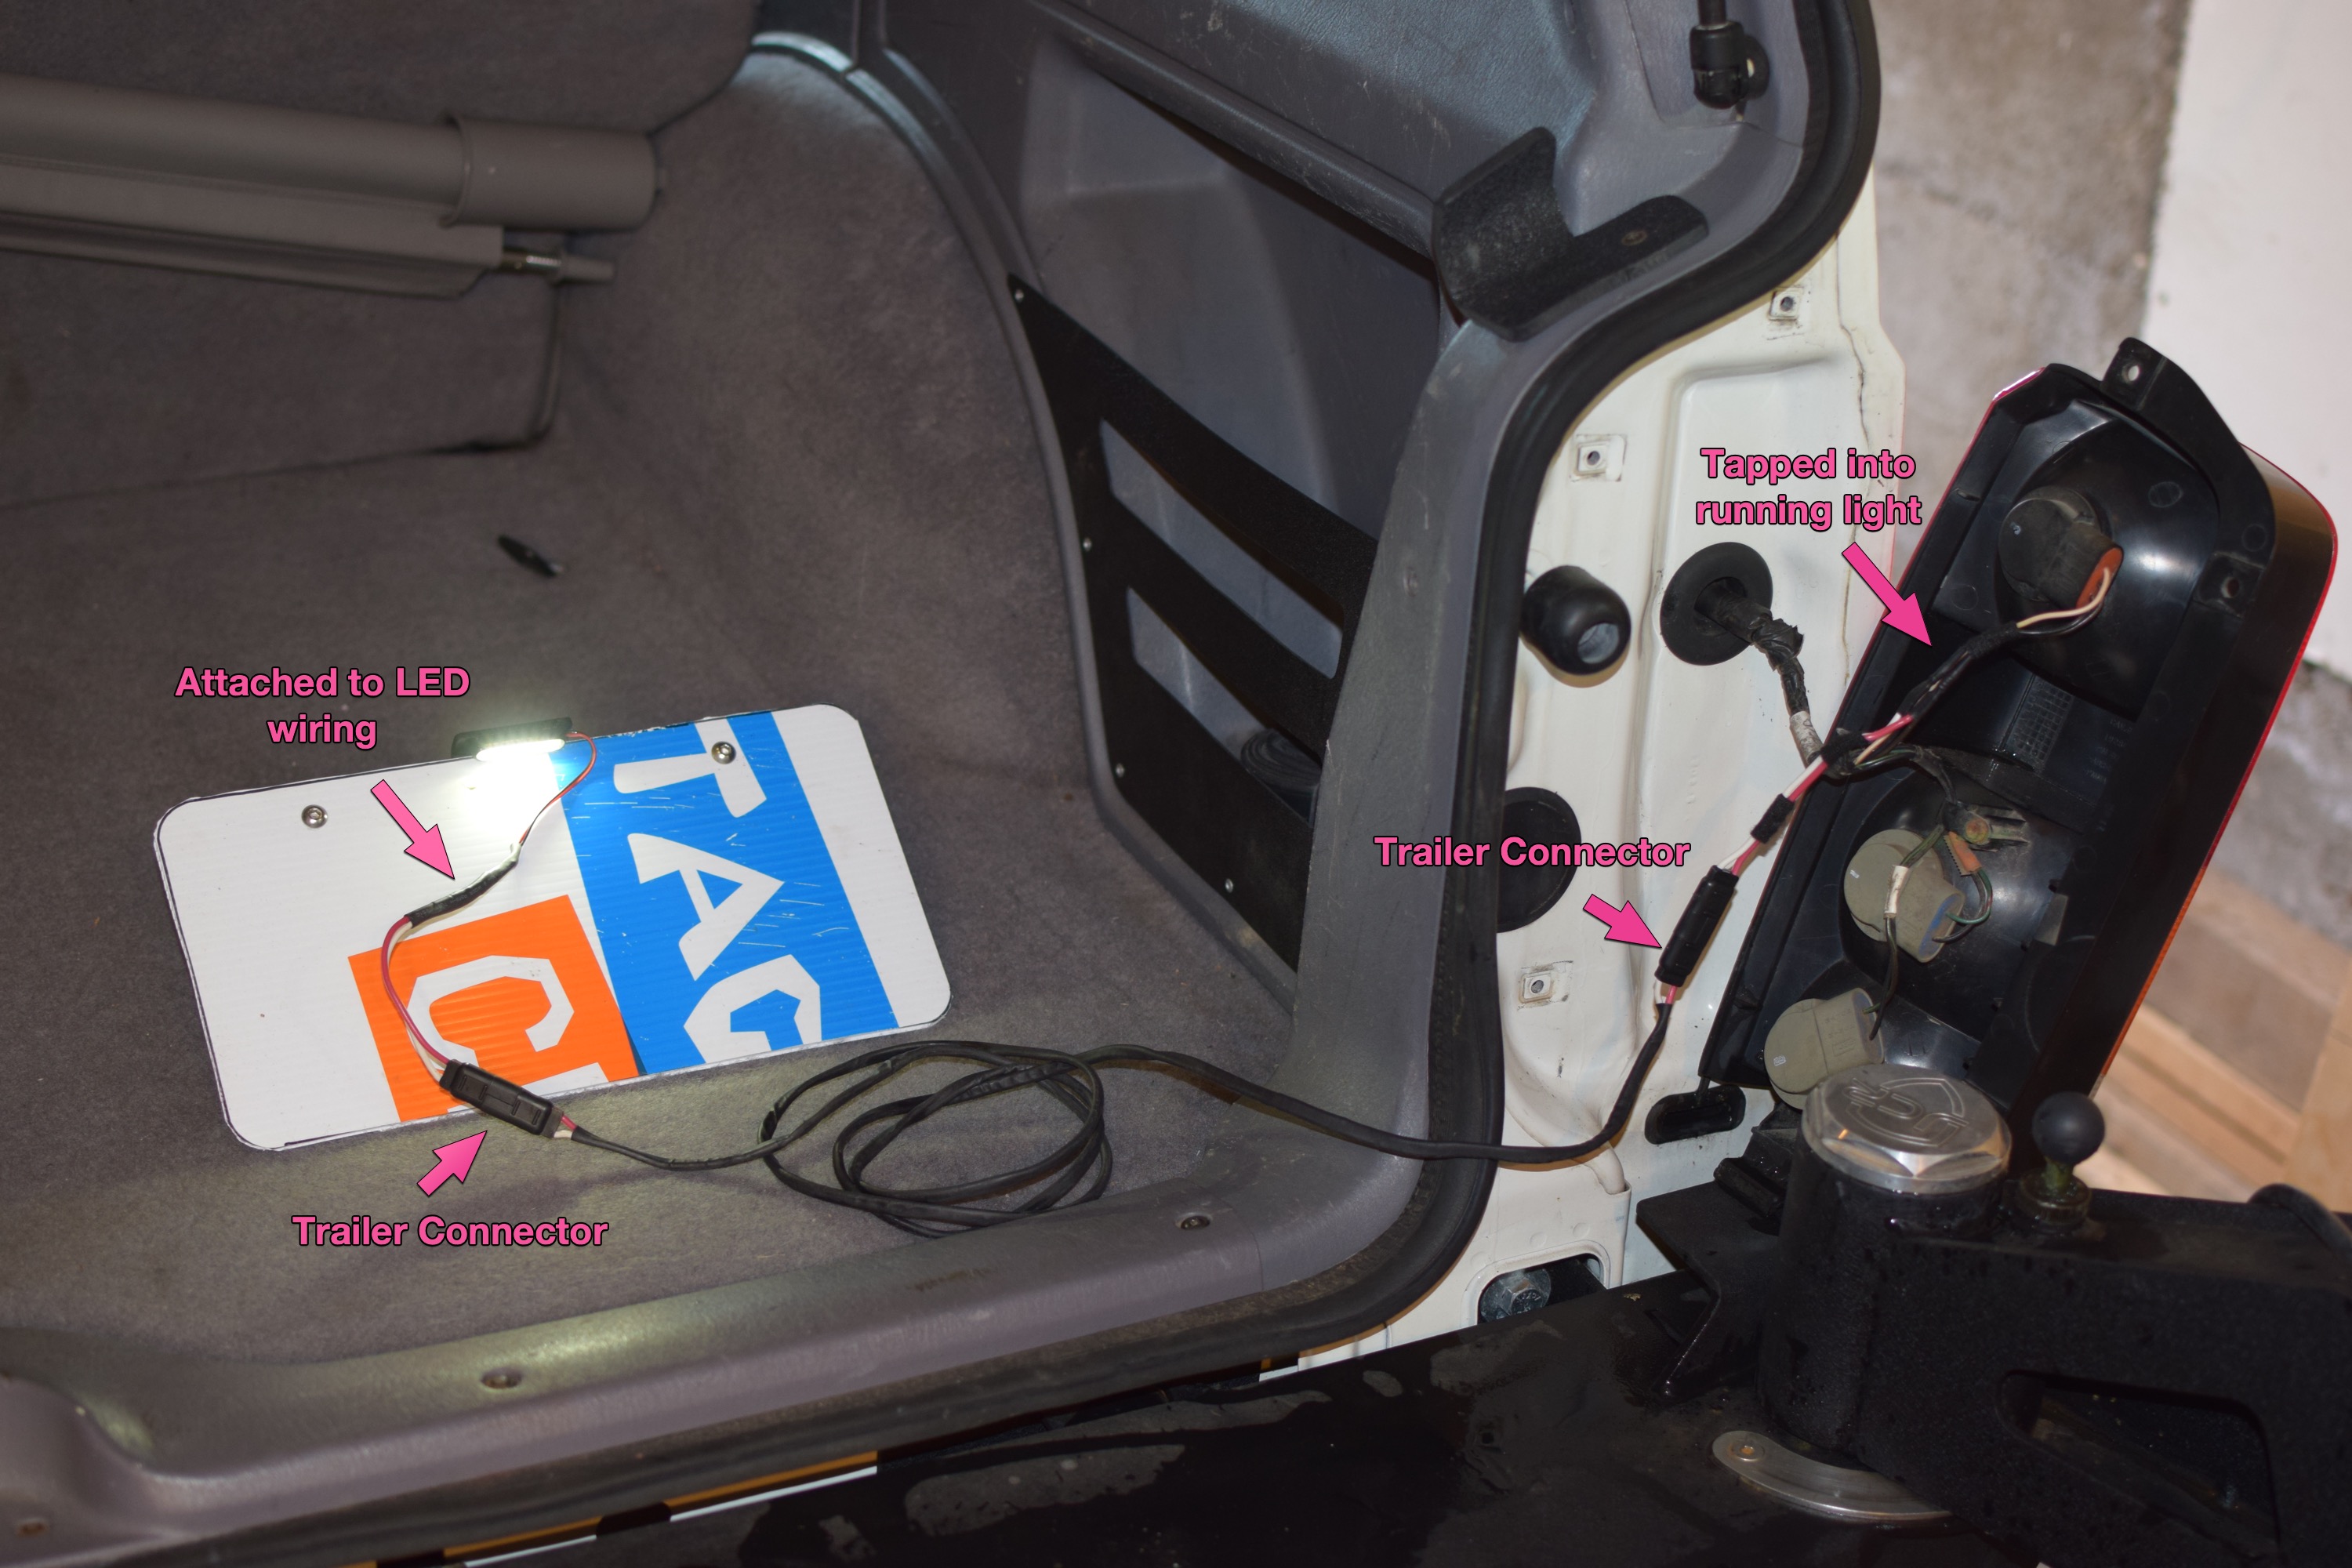
Use trailer wiring connectors

In this photo, you can see a new trailer light extension wired into the running light. This seems like a tidy solution to running this new LED light in parallel with that factory tail light.
We’ll tap into the right rear running light for power and ground. When we’re done, we’ll have a trailer light plug grafted into the factory harness and we’ll run a wire from that new plug out to the new license plate light.
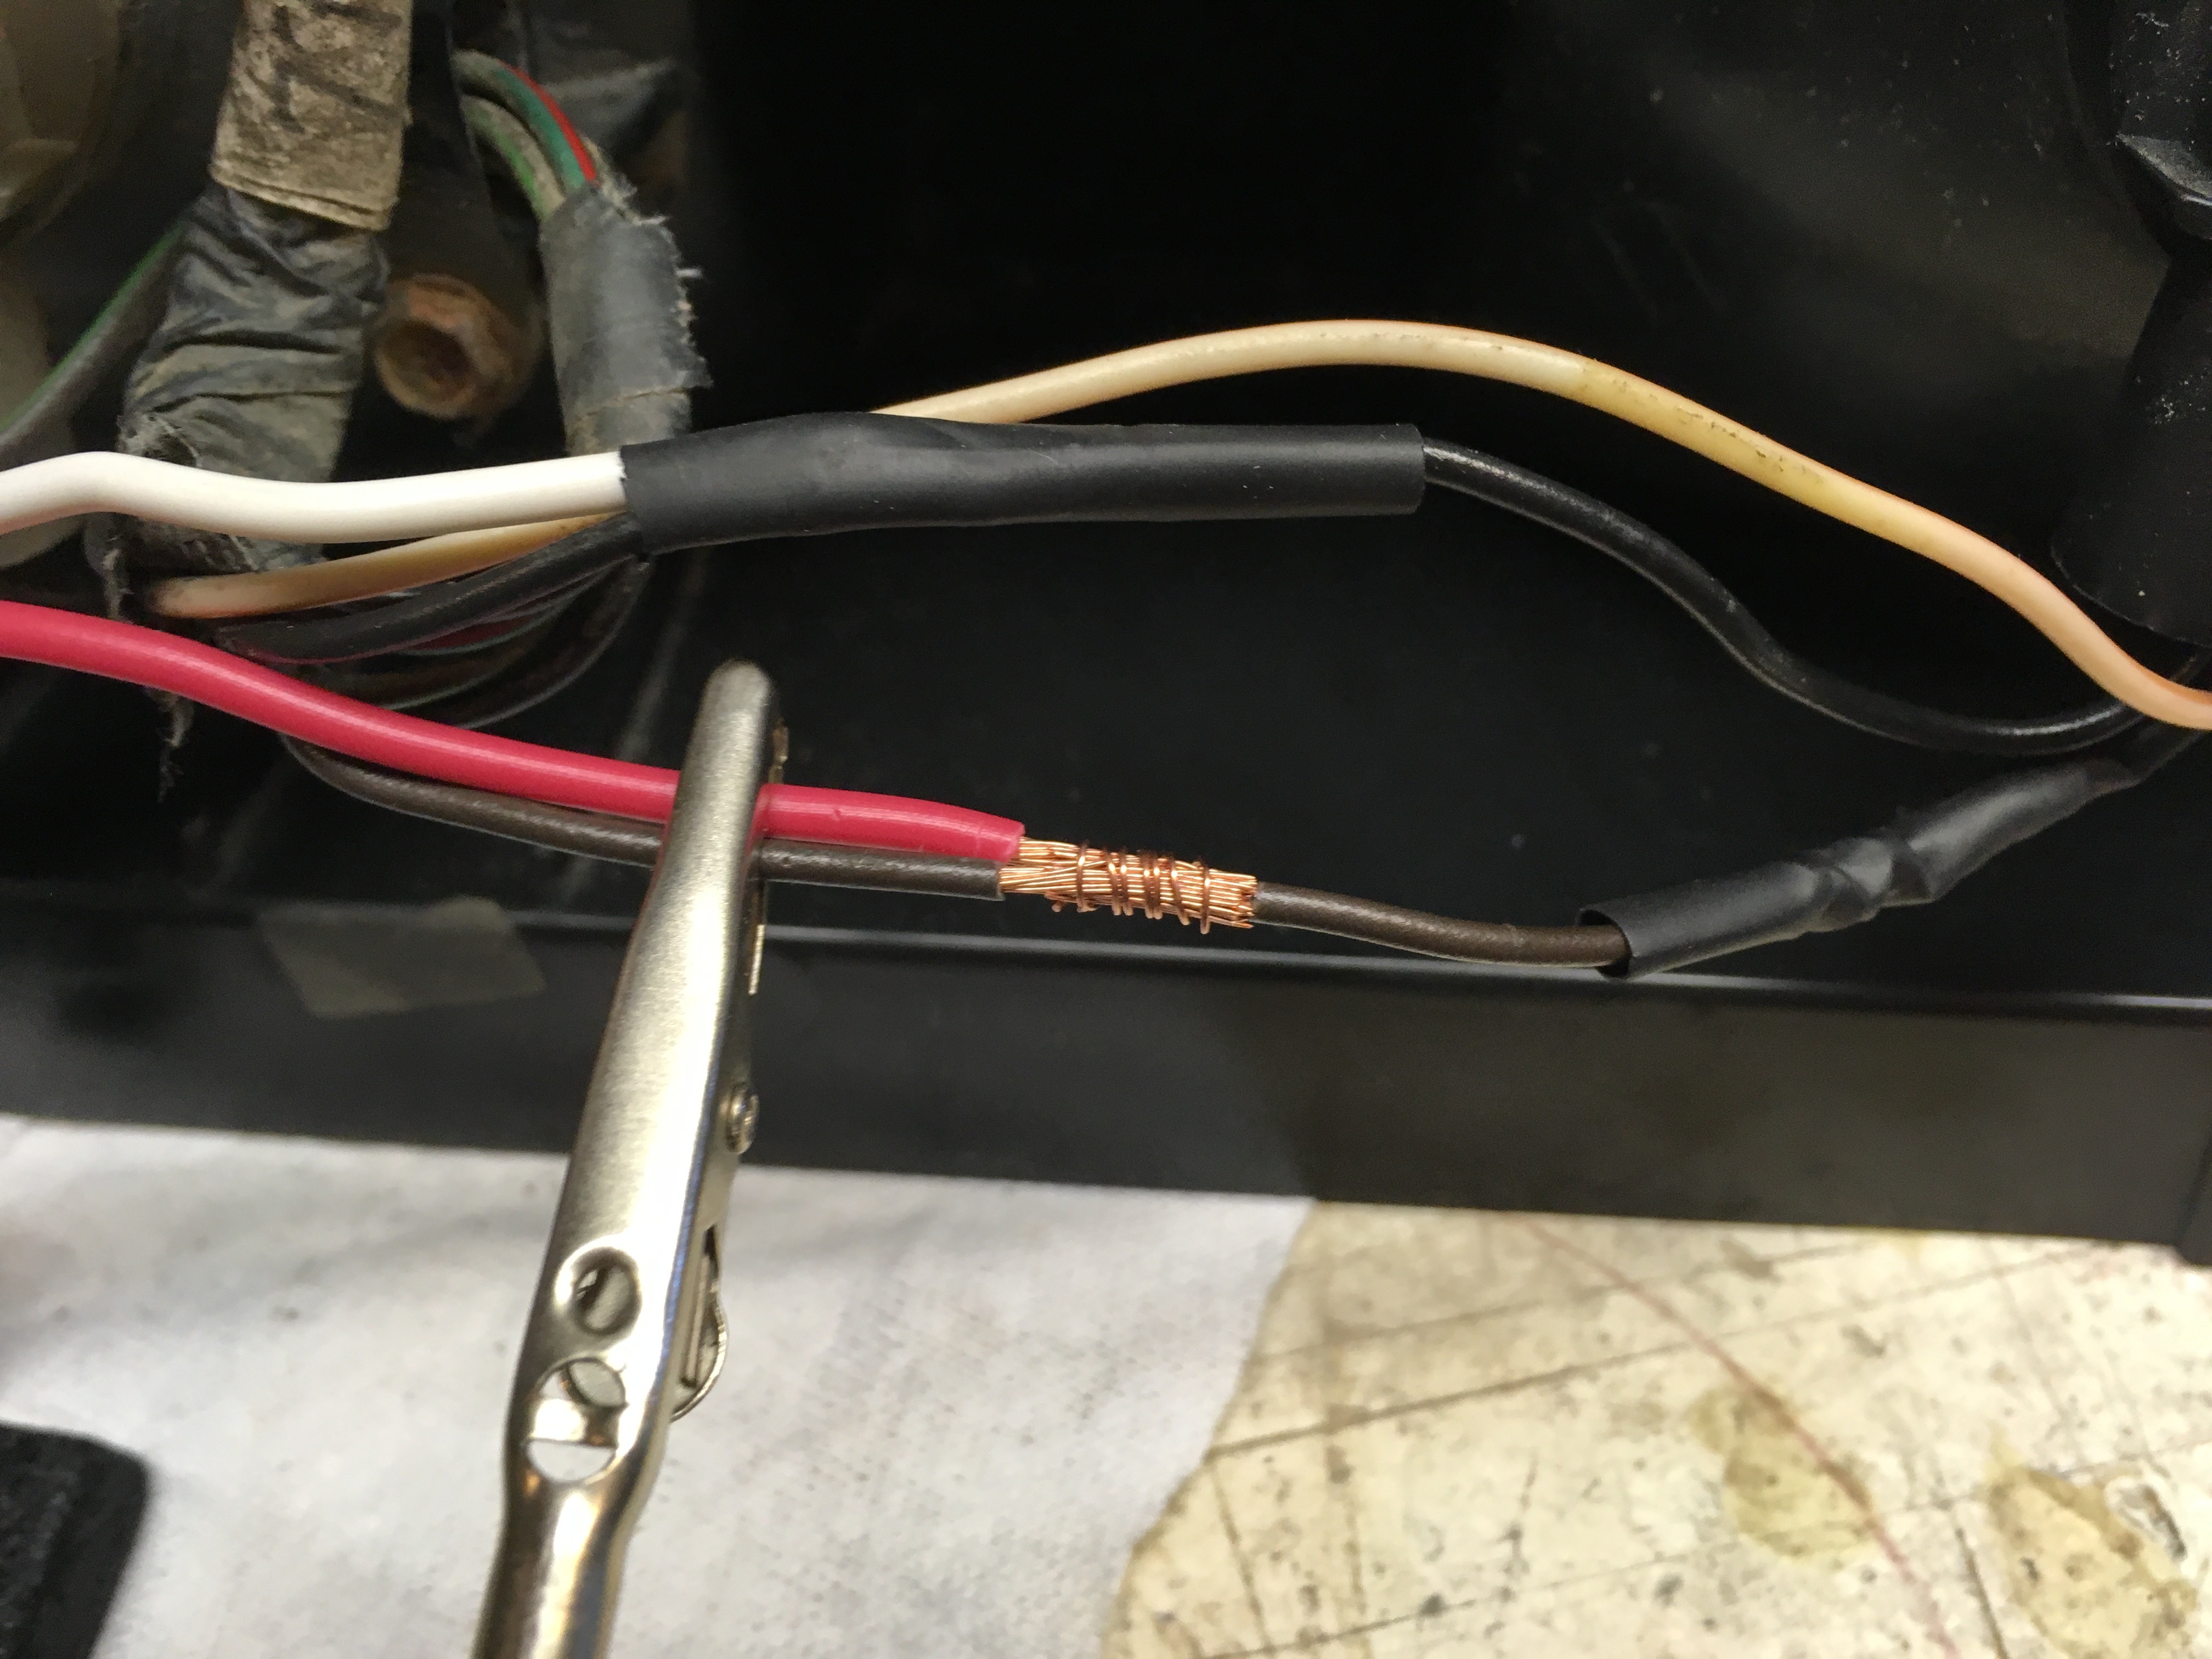
We can tap into our factory wires in two ways, we can either solder or we can use wire taps. For soldering, you simply need to clip the wires and strip both sides back a bit, slide on heat shrink tubing, solder all three wires together and then slide the heat shrink tubing over it and shrink it down. I prefer to shrink tubing with a heat gun, and I like this heat gun from Wagner. Using wire taps is a little simpler, but the factory service manual says to solder and this Jeep is a hobby. With wire taps, you’ll need to find the right size for the factory wires and follow the instructions provided with them.
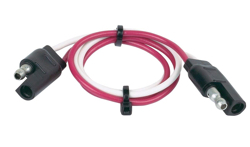
We’ll be adding one half of a trailer wiring plug to our factory harness. In the photo above, you’ll see the red and white wire from the trailer harness being added to the factory harness. The trailer connector will probably come with a plug on each end, you’ll just clip the wires in the middle so that the ends are free from one another. One end will go to the factory harness, and the other end will be added to the wire we’re making to run to the license plate light. Find the wires that run the running light. In my XJ it was the brown hot wire and the black ground wire that I needed to tap into.
Add a trailer light plug to our LED light
The LED light has tiny wires, and it will seem a little silly attaching our 16 gauge wiring to them. But the larger wires should be a little more durable, and the trailer plugs are cheap and easy to use. We’ll attach a trailer harness plug to our trailer light. This will make it easy to remove from the long wire we’re running when we need to remove it so that we can take the tire off the carrier. For this, I soldered the small wires into the larger wires and covered them with heat shrink tubing.
If you’re worried about water and corrosion, you can use some liquid electrical tape underneath the heat shrink tubing. To do this, you’ll slide your heat shrink tubing down your wires, do your soldered joint, paint the joint with the liquid tape and then heat shrink the tubing over it while it’s still wet. You could use dielectric grease as well to help keep the soldered joint extra waterproof.
Make a wire to connect everything
I used two strand 16 gauge wiring to match the factory wiring and I covered this in heat shrink tubing. We need to add the trailer plugs to each end of this and make it the right length.
When we’re done, this wire will have a plug on both ends and will connect from the new connector we added to the plug we added on the LED light. Be careful to use the correct plug ends on these because the plugs have to be paired up the right way!
Run your wire through your tire carrier
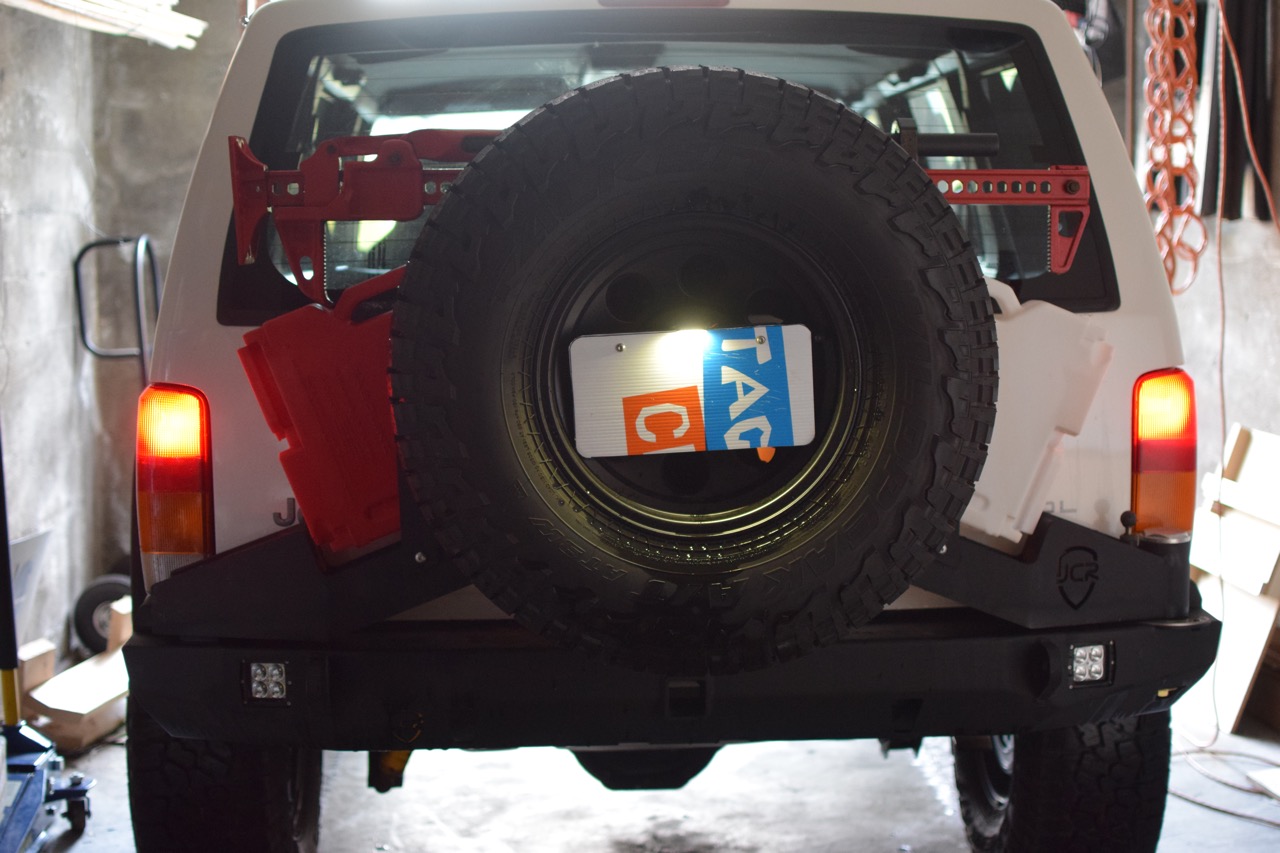
Here’s the complete setup with the license plate bracket in place. The plug next to the LED light makes it easy to remove the license plate when we need to use our spare tire. The bracket and light can simply be detached and unplugged.
If you’ve got questions, please feel free to reach out and send me an email.